March 2025
Not exactly a Ferociously Busy Month
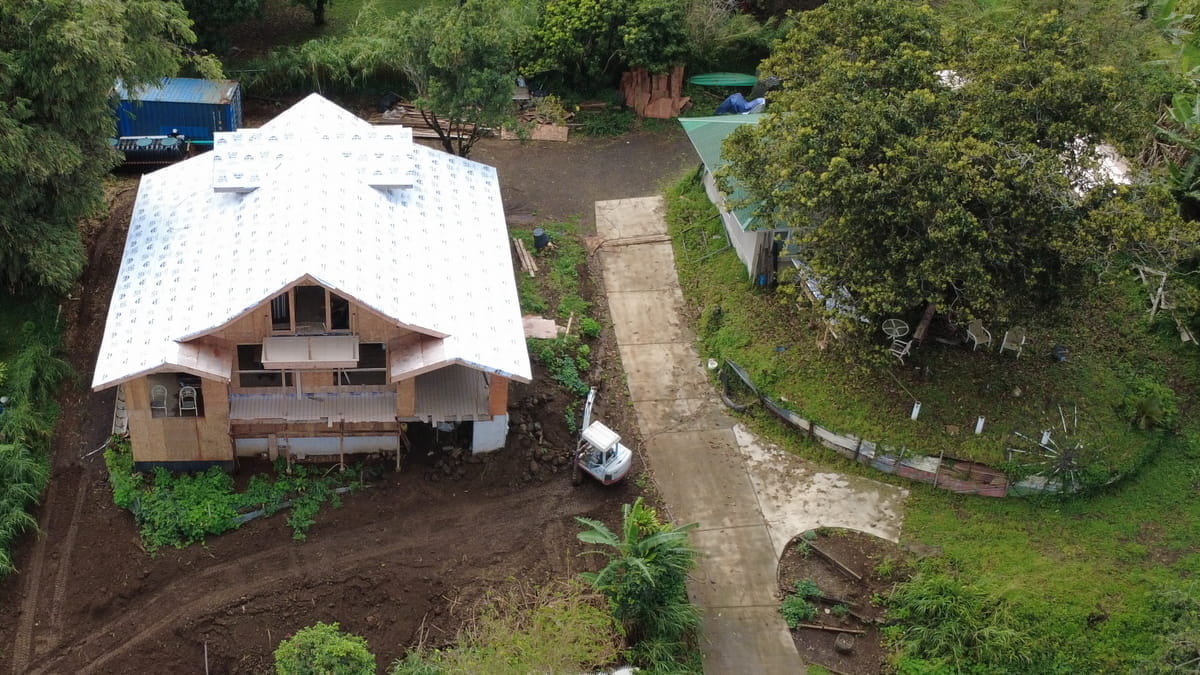
The jobsite
(it's good to have Buzzy flying again)
Drone pictures are much better for showing overall views, although the buzzy little critters can be annoying. This picture is actually from early February since the septic tank is still back by the blue container and the front edge of the lanai and walkway haven't been trimmed. But, things haven't changed much these past few weeks. At least, as far as the house is concerned.
Construction slowed way down in March, everyone has pretty much been off doing other things. Nick & his cousin Ethan (who occasionally helps him) have gone off to the next project. It's only a few blocks away and for some really nice people so I suppose we shouldn't complain but it really slows down the final framing here.
Most of what's left of the framing is those wretched Simpson fittings. There's also doors and windows, but we're still building windows so they aren't ready to be installed quite yet.
Ross has gone off to ski in Colorado for the past few weeks and I've been a touch grumpy about being left behind so I haven't felt like doing much construction. Not that I wanted to go to Colorado, though. It's cold there! So, not a lot happened construction wise this past month, but it's been over a year of construction so taking a break isn't necessarily a bad thing.
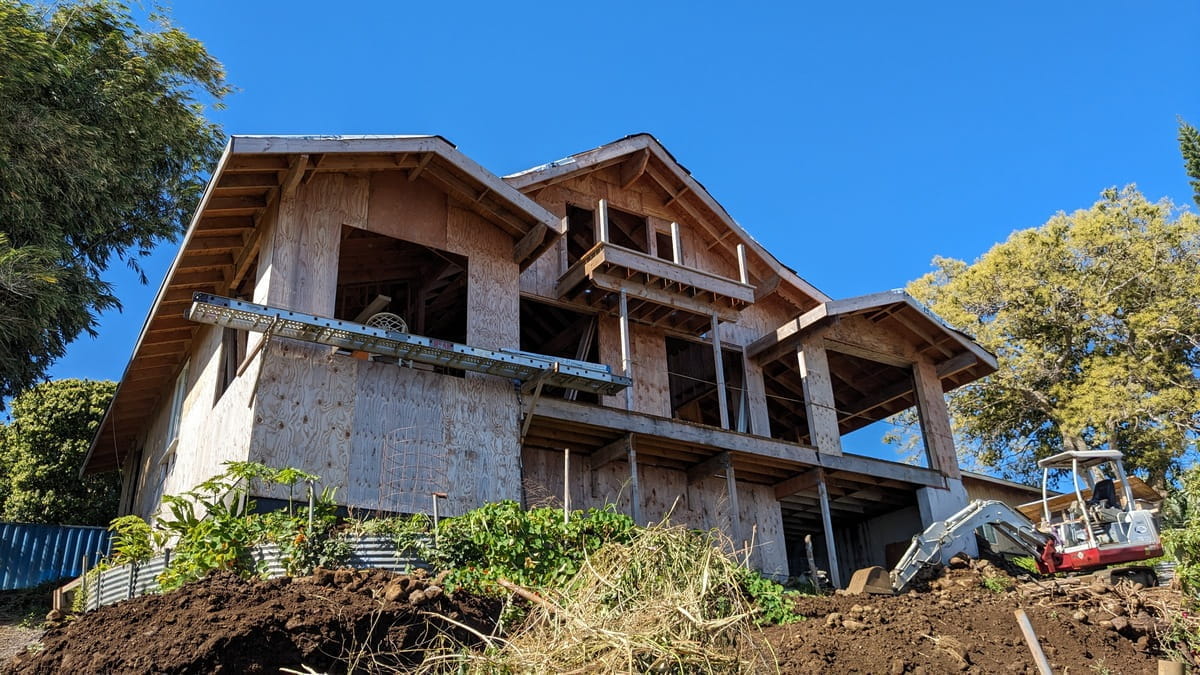
Another View of the Jobsite
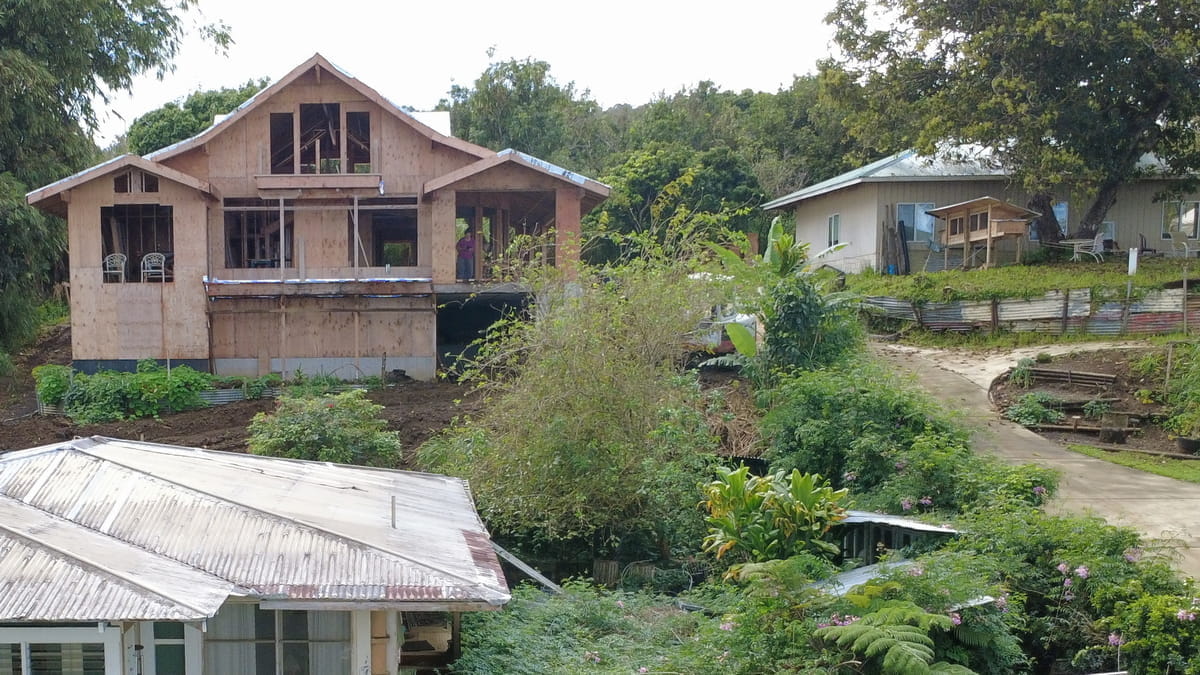
it's definitely on a hillside
The new house is actually pretty close to the existing house, but because of the elevation change, they don't seem as close as they actually are. The whole property is on a slope, although it's not all the same slope. The first house is almost on sort of a plateau, then it gets a steep rise to the next, which is the "new house plateau". Next to the new house is the "avocado plateau" which has the (duh!) avocado tree.
I'd originally planned on building a tea pavillion on the avocado plateau, but now it seems to be getting populated by bunnies instead. Which, considering avocado leaves are toxic to bunnies, may not be the best for the bunnies - should they get out of their hutch and eat the avocado leaves, but it will be great for the avo tree. Bunny "berries" (bunny manure) is an excellent fertilizer and the tree should thrive with bunny hutches nearby. Once the construction stuff is removed from the area, then there will be space to move the hutches somewhere else. But, until then, hopefully the avo tree will be happy.
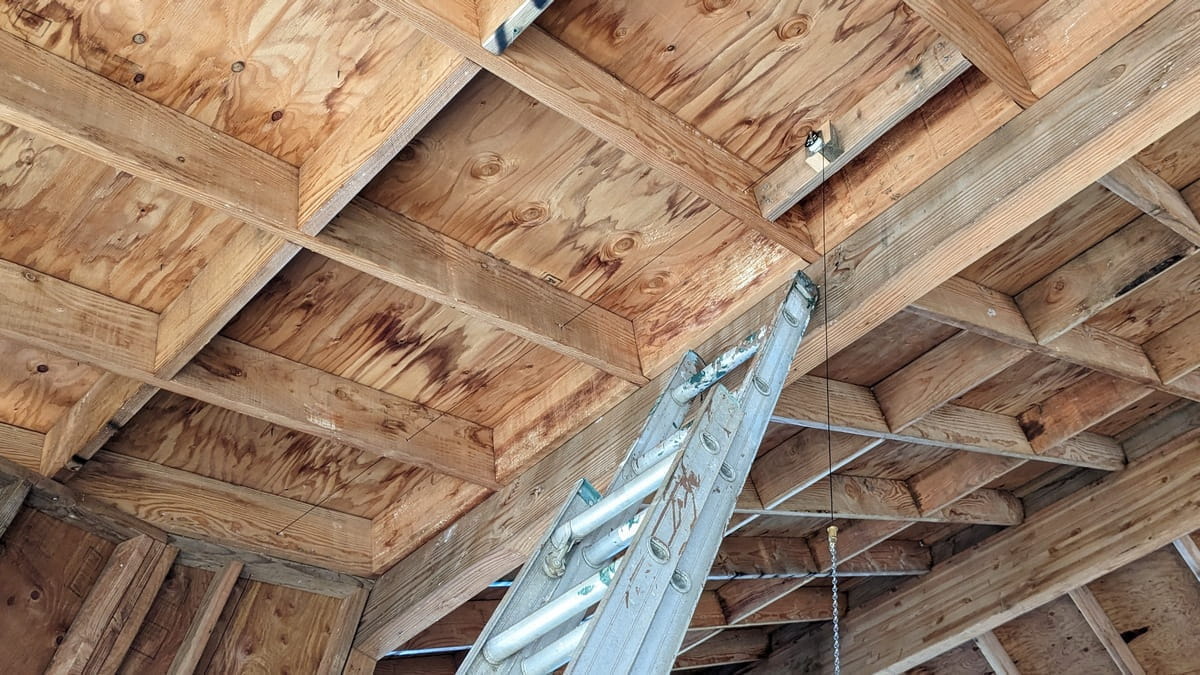
Chandelier Hanging System
(hopefully it will work)
Since chandeliers need the occasional dusting or light bulb change, it's best if they can be moved up and down, don'tcha think? Not sure if you can see much in the picture, but there's a turning block (the pulley in the rafters above the ladder) and a thin black steel cable. The steel cable goes through the rafters on the left side of the ladder and there's another turning block on the other side of the last rafter, but you can't see the turning block in this picture. If you look really closely, you can see the black steel cable going down next to the wall stud, but it's hard to see.
Eventually, there will be a counter weight more or less equal to the weight of the chandelier (roughly forty five pounds) set into the wall. It's quite similar to how a sash weight window works.
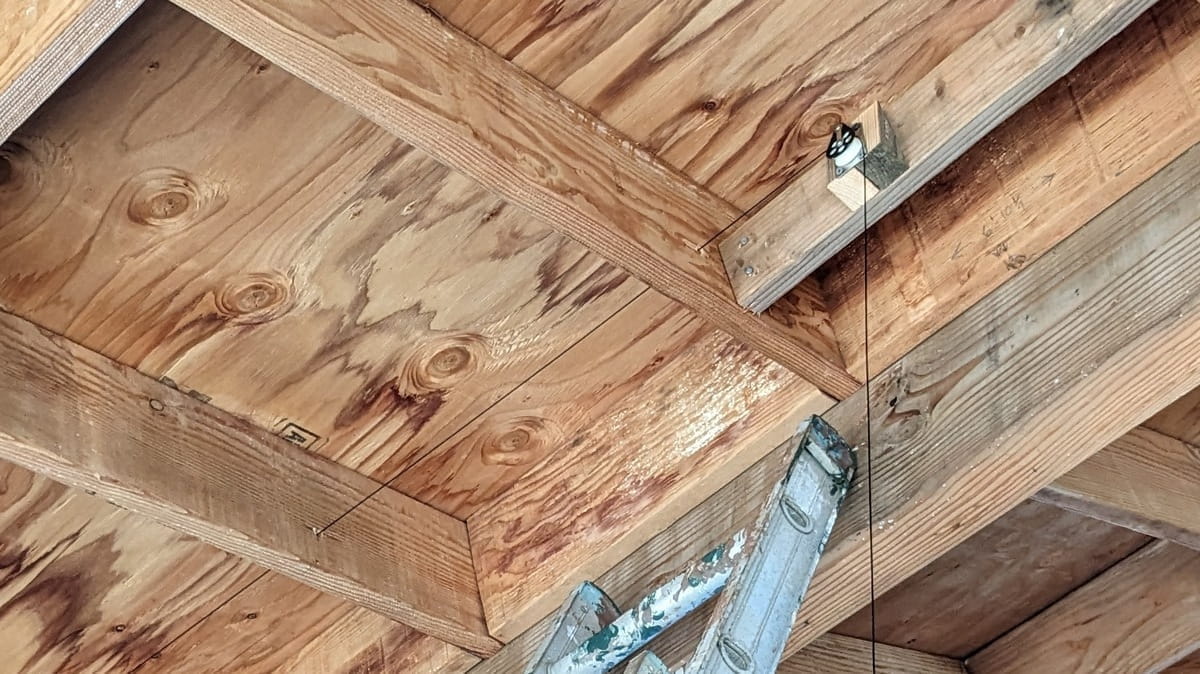
Turning Block
(hard to get it vertical)
Not that it shows up in the picture, but this is about twelve feet up in the air, just inside the 4x12 header that goes across the dining room area. I think the 4x12 will be sanded, stained and finished with a clear finish. But, that wasn't today's project.
This is what's called a "turning block" and it's actually a boat part. It's basically a pulley that's mounted to a solid surface. There's a matching one on the other side where there will be some sort of counter weight. Not that you can tell from this picture, but the black steel cable hanging dow from the turning block is absolute dead center of the fourteen foot diameter half circle that makes up the dining area.
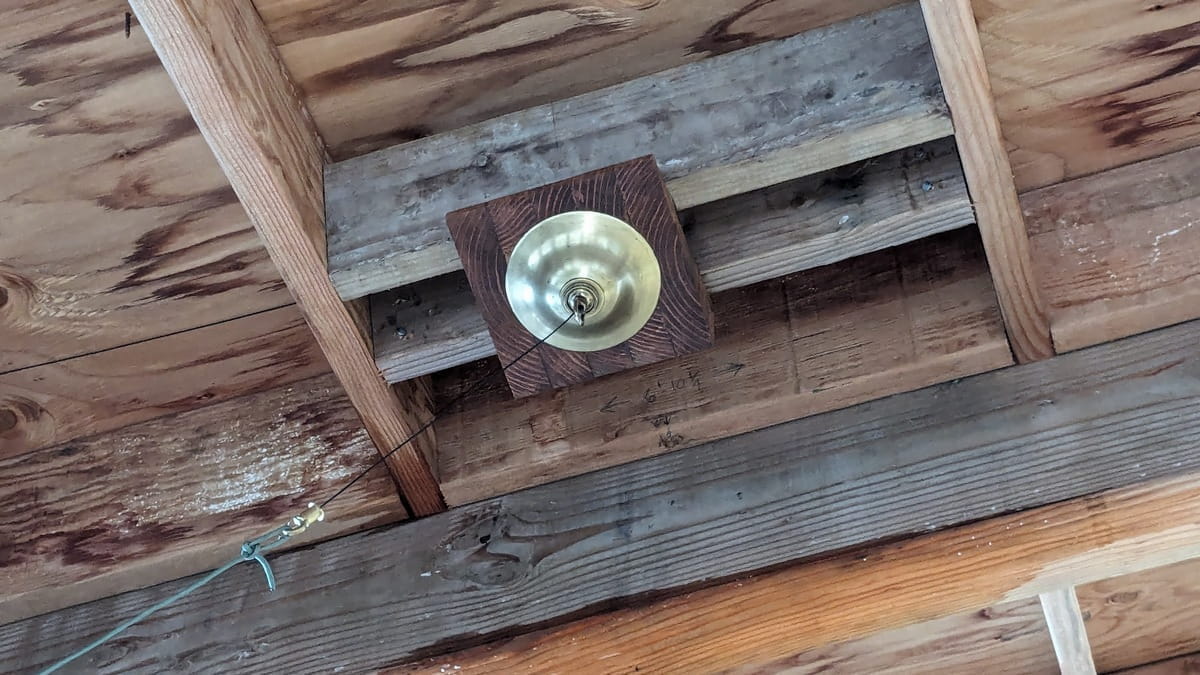
Chandelier "Canopy"
(chandelier parts have odd names)
This is the part that will be visible when the chandelier is installed. The five wood triangles are to get the 'canopy' to be installed level. Those were cut to the slope of the ceiling, glued together into a block, sanded and stained. Still probably should have put some sort of final finish on it, I suppose? Finish work takes a lot longer than rough framing.
There will be some sort of ceiling installed on the lower edges of the rafters which will also go up to the edges of the wooden block. Either drywall or perhaps cedar or pine boards? There also needs to be an electrical outlet installed up in this area. The electrical cord from the chandelier is too thick to fit through the tiny hole which now has the steel cable running through it.
Eventually, that brass clip will be threaded through the hanging chain for the chandelier and clipped to the chandelier. The chandelier will actually hang from the cable, but the chain will be there in case something happens to the cable. When suspending forty five pounds above the dining room table, it's good to have more than one thing holding it up.
There should be four to five feet of up and down mobility for the chandelier, possibly more if the wall framing is changed a little bit. There may be a moveable wall panel in front of the counter weight, too. In case it gets jammed, it'd be nice to be able to reach it.
I'd install the chandelier now to test things out, but at the moment the roof isn't entirely waterproof. It only has the sticky paper on it so there's areas of wet yet and one of them is right above where the chandelier will be.
Windows
(they are very heavy!)
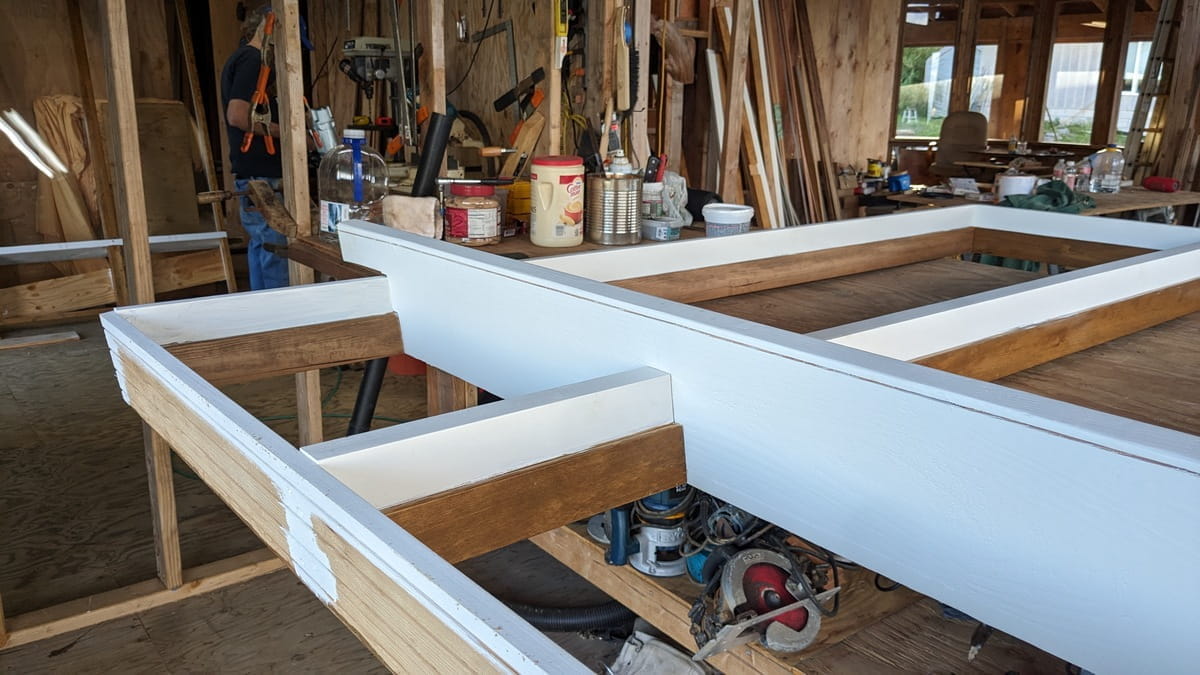
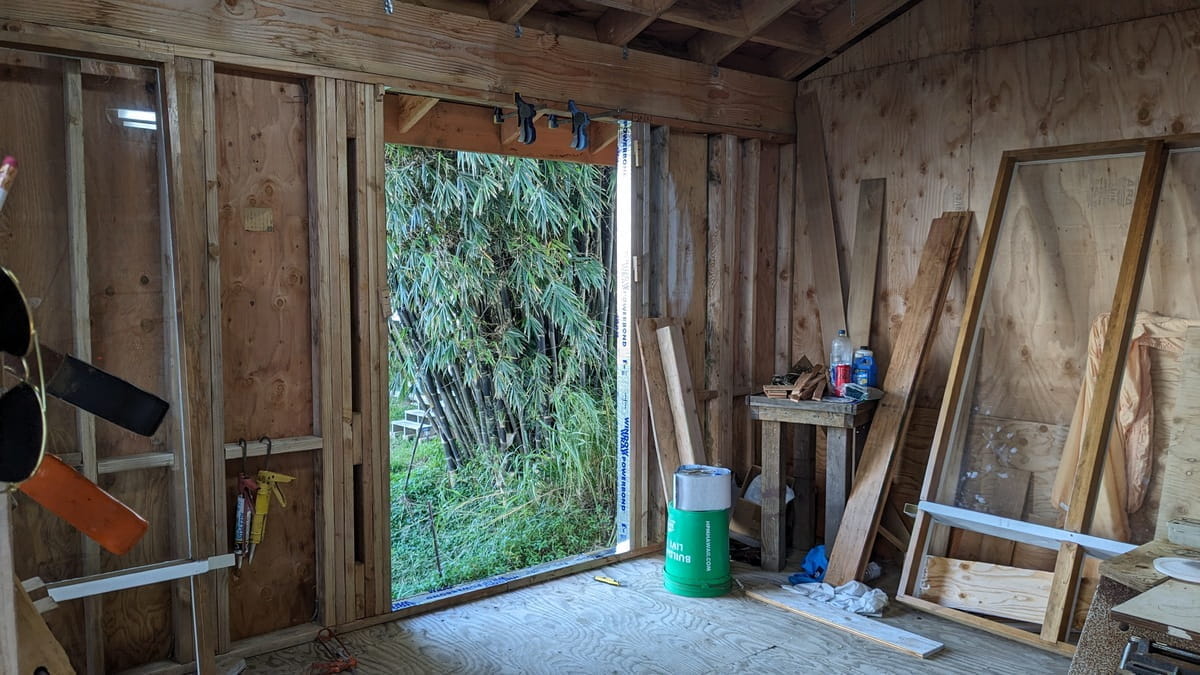
Windows take a lot of time. These need to be primed, then painted the exterior trim color of creamy off-white on the outside and finished with a clear finish on the inside. There's a big windowsill on the outside and there will be one on the inside, too, although I don't know what that will look like quite yet for the non-dining room windows. The line near the edge of the big windowsill is a 'kerf' (sawcut) on the underside of the sill so any rain that drips around to the bottom of the sill will fall off before going across the cut. There will be four glass louvers below each bit sheet of tempered glass, but they're not installed yet.
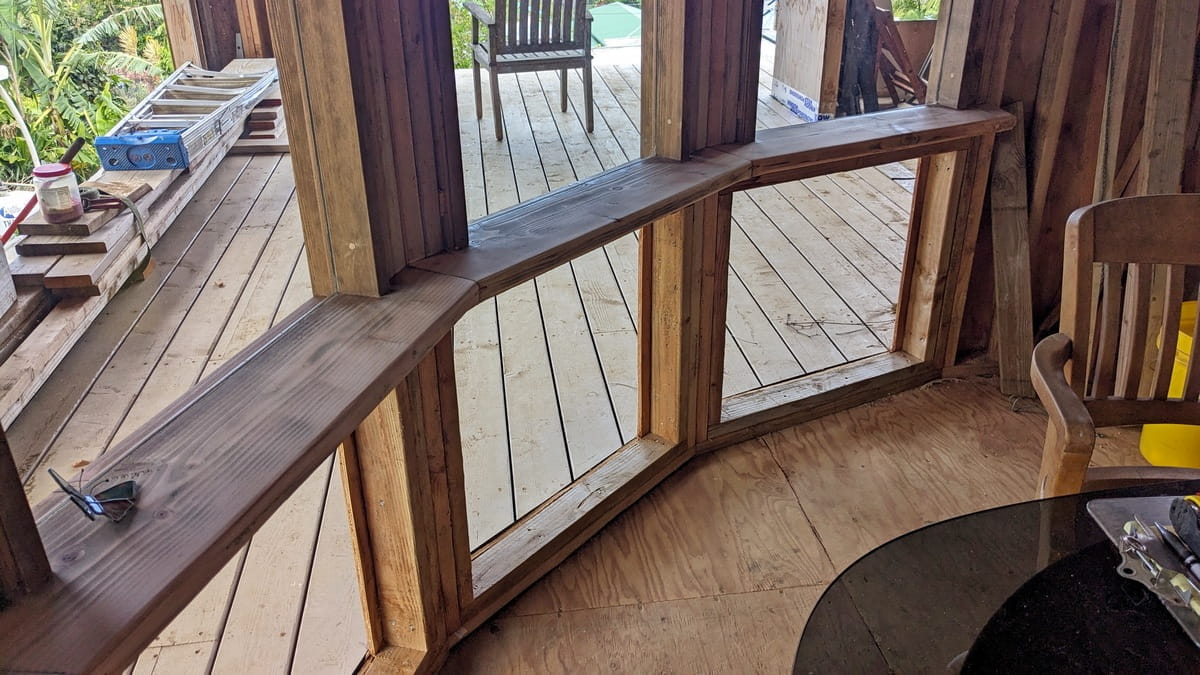
Dining Area Windowsills
(almost done but they still need work)
The dining area window sills started out as 2x10s and were fitted to each other in a half circle. They still need some wood putty in the cracks, stained and then a clear finish on them. They could use a bit more sanding before all that, too. It would have been nice to make them from some sort of nice hardwood, but that would have been really expensive.
There is tempered glass above the windowsills, it's a bit hard to tell it's there. Below the windowsills there will be glass louvers, but those still need to be installed. Screens as well, to keep bugs and any other small unwanted critters out.
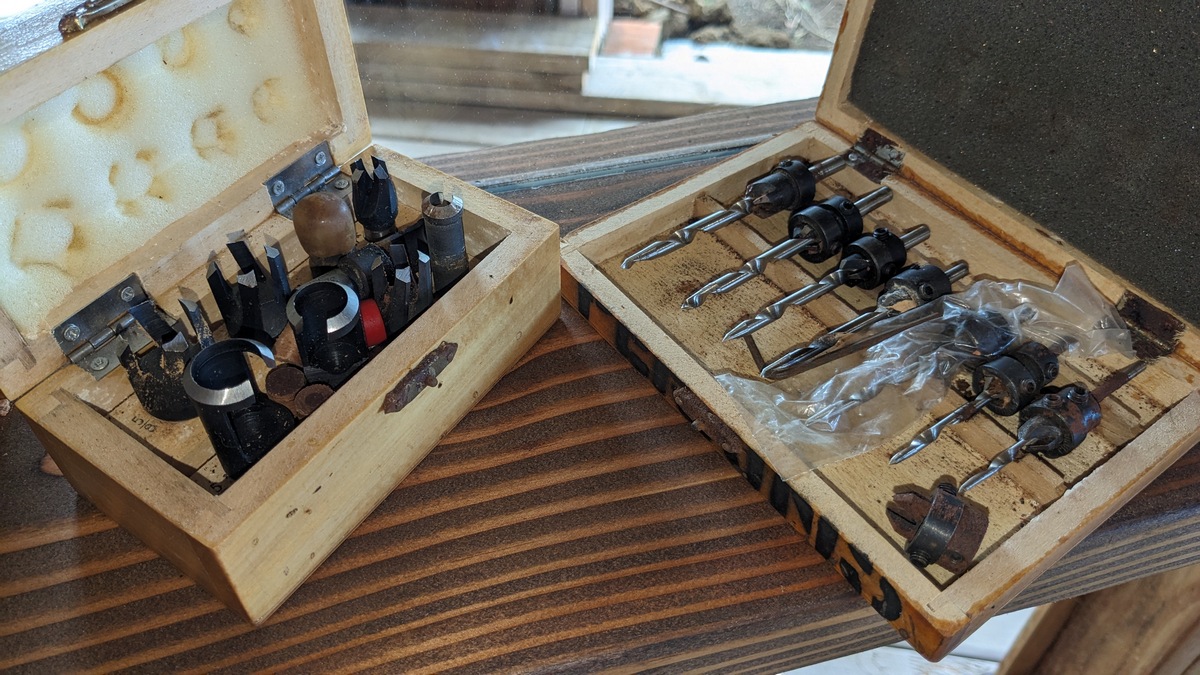
Plug cutters & matching drills
(somewhat obscure but useful tools)
The box on the left has "plug cutters" which are drill bits that cut the wooden plugs to fit into the screw holes. One of these plug cutters, the drill press and a scrap of the window frame wood is all we need to make plugs that match the frame perfectly. The box on the right has the drills which make the holes for the screws as well as the larger hole above them where the plug is glued.
Rough Opening
(with a long drop on the other side!)
There is a 4x12 "top plate" (IMHO, it's more of a header than a top plate) at the top of the walls. The bottom of that 4x12 is pretty much the limit of how high we can make the windows. To prepare the area for the windows, there's a lot of stick on flashing and the windows are held in by really thin wedges and screws. The screws are put in the wooden frame around the windows so they then need to have a wooden plug installed over them to hide them.
Library Window Done!
(well, installed, not actually "done" yet)
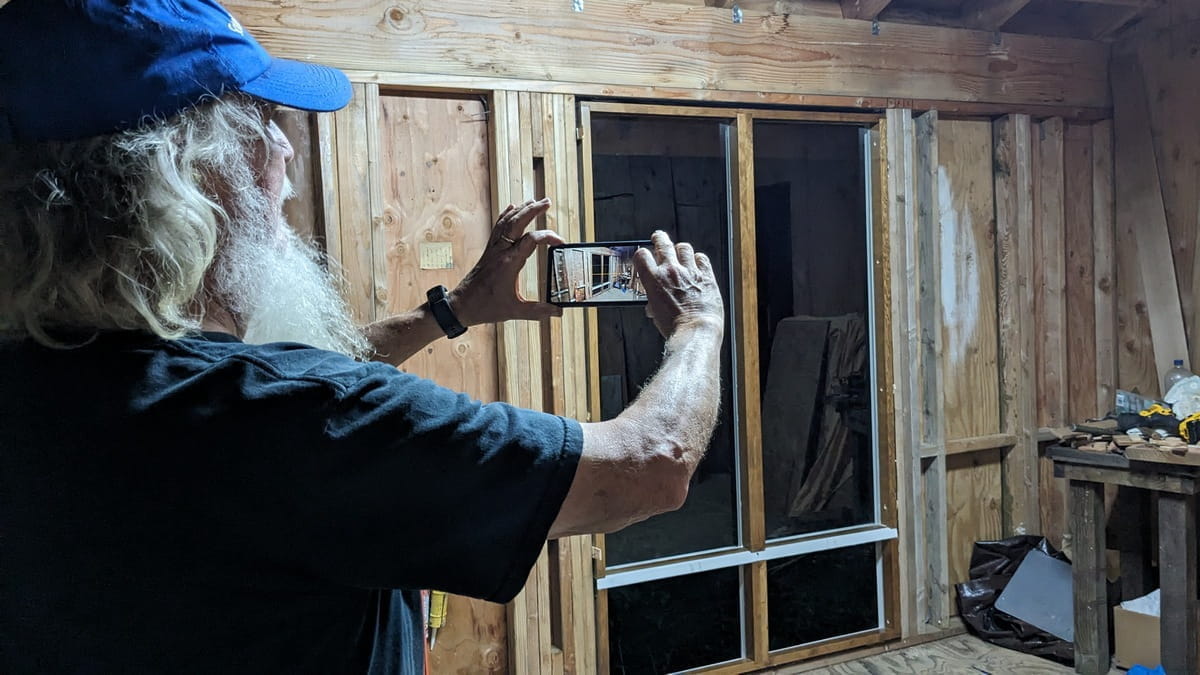
As with everything these days, it's not actually done until it's had a picture taken of it? This is with the window set into place and secured but it's not done yet. It still needs the screw holes plugged, chiseled level, sanded, stained and a clear finish on them. As well as the louvers and screens installed. And trim. On both sides of the wall. (sigh! There's still quite a bit to do!) But, at least some progress has been made and it's a great step forward towards getting the structure weatherproof.
Bedroom Window Done!
(well, hanging out in place, not actually "done" yet)
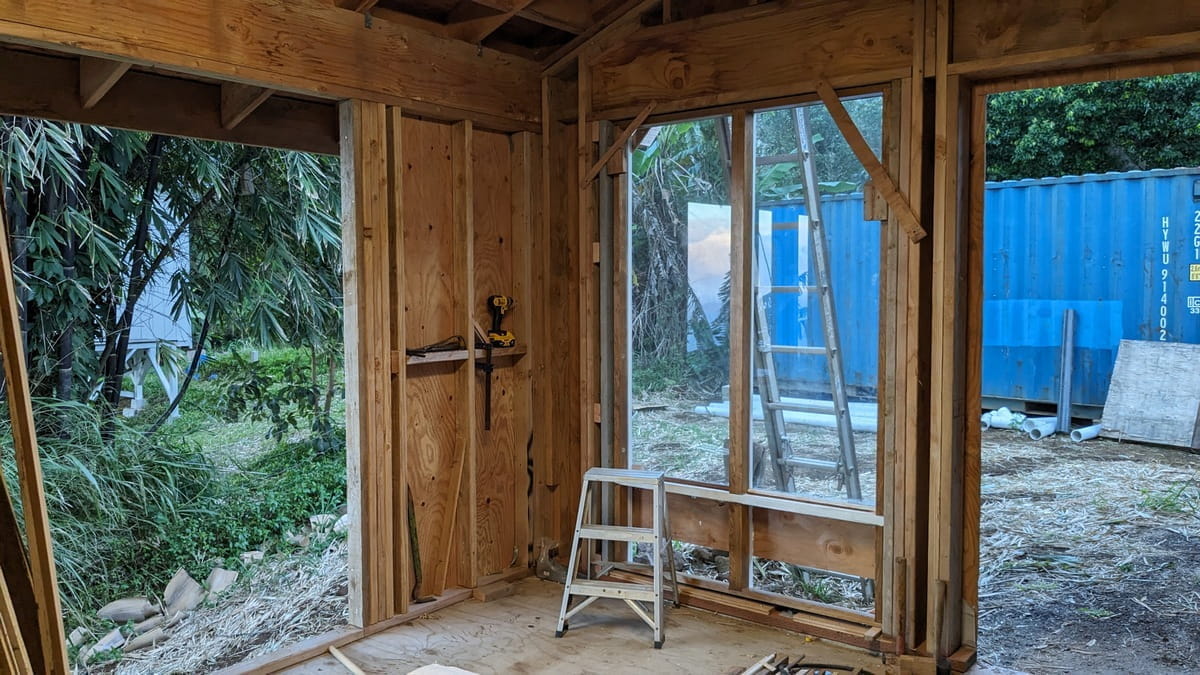
This one isn't officially installed yet at all. It's just kinda hanging there in more or less place and not fastened in at all. Still, it's progress!
From the Outside
(still a big hole in the other wall)
This was a fairly easy installation since (1) it's not actually installed yet, and (2) it's easy to reach both sides of the window. When the inside and the outside of the window is easy to reach, it's much easier to get the window into the rough opening. This one still needs to be screwed into place since it's just being held by the scraps of wood screwd across the corners of the rough opening. Even though it's not done, at least progress has happened.
Dining Area From the Outside
(not done yet, of course)
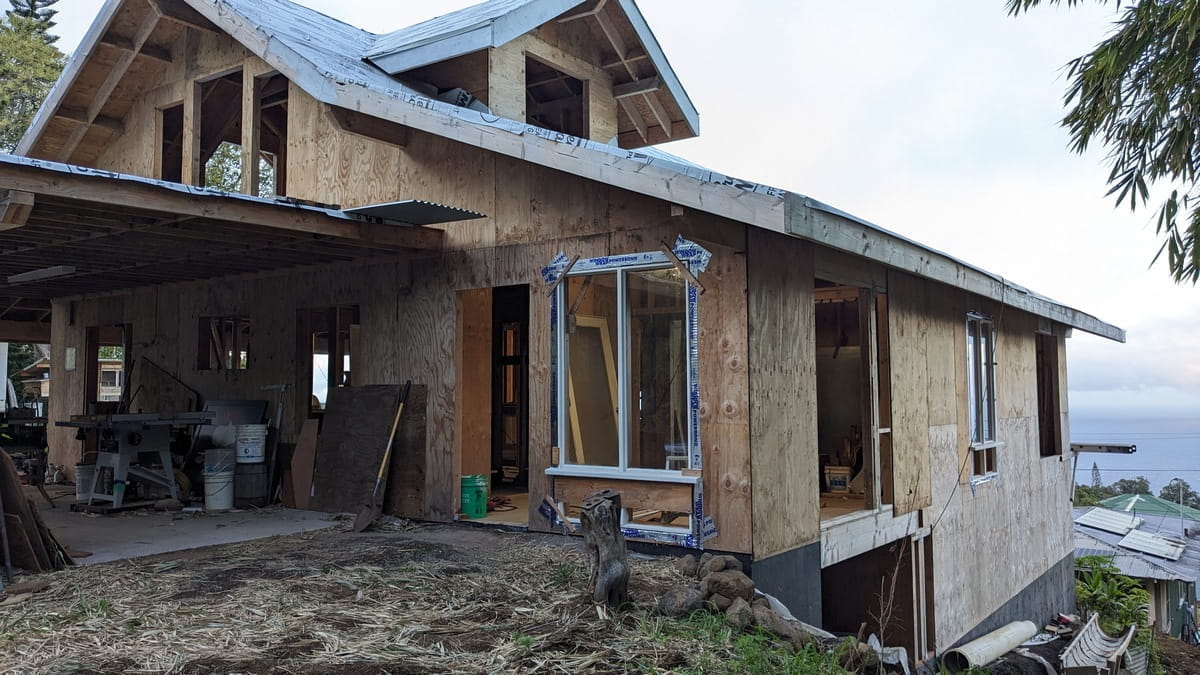
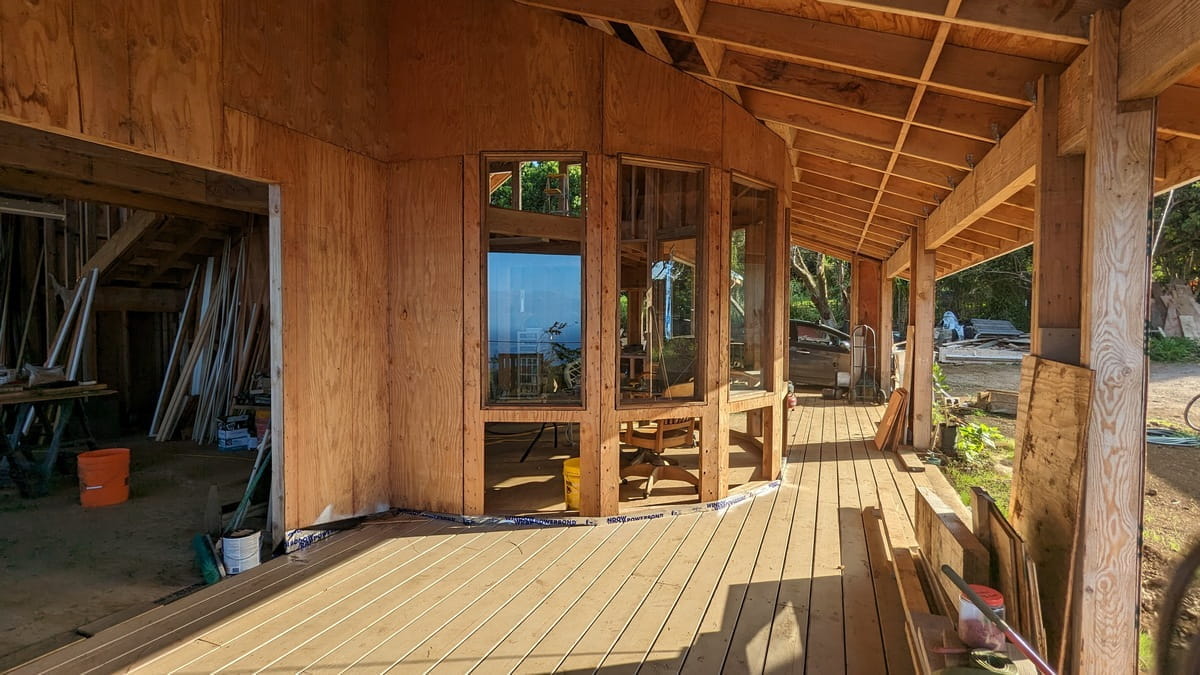
The dining room fixed glass windows are all installed, although they all still need the louvers below. This area also needs the lanai ceiling installed as well as the siding on the house. And some paint. And a front door, too. But, at least it's getting more done, even if it's just not finished yet.
I find it interesting that the back door to the sun deck can be seen through the upper part of the first dining room window. Eventually, there will probably be a solid railing between the loft area and the dining area so then - more than likely - that doorway won't be visible anymore. This house has a lot of 'see through' in it.
Dining Area From the Inside
(not done yet, either, of course)
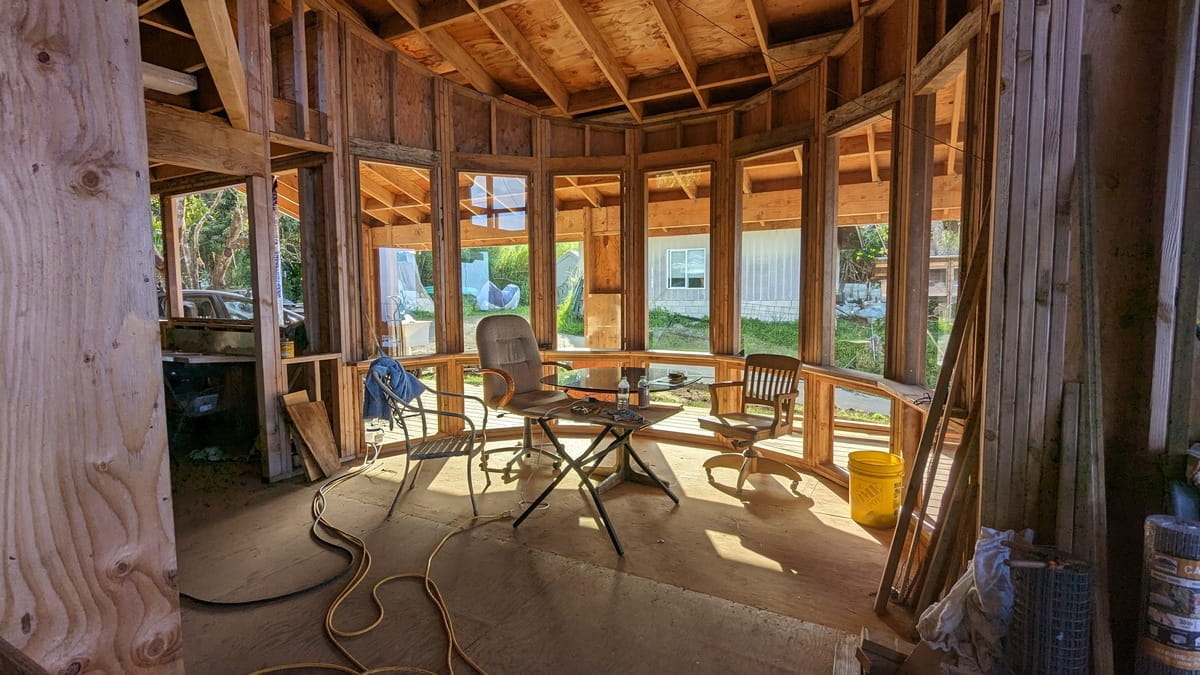
The dining area windows have the glass installed but not the louvers. The windowsill still needs some work, but it's about eighty percent done. Eventually, there should be a lot of fairly wide wood trim around the windows. Possibly all wood between the windows with a big top trim all the way across the top? Maybe a solid wide band of trim across the top and maybe some thin bits of "wall" down between each window? The pass through to the kitchen will be trimmed out to match the windows, most likely.
There will be some wall above the windows up to the ceiling. The ceiling in the dining area may be different than the ceiling in the rest of the house. Maybe some sort of tongue and groove wood planks? With a whitewash on most of it, but a dark stain in a quilt pattern centered around the chandelier? That chandelier will be hanging here eventually.
The afternoon sun seems to hit the dining room windows fairly well. Hope it doesn't get too warm in the late afternoons?
Amazing Dining Area window framing
(very accurate!)
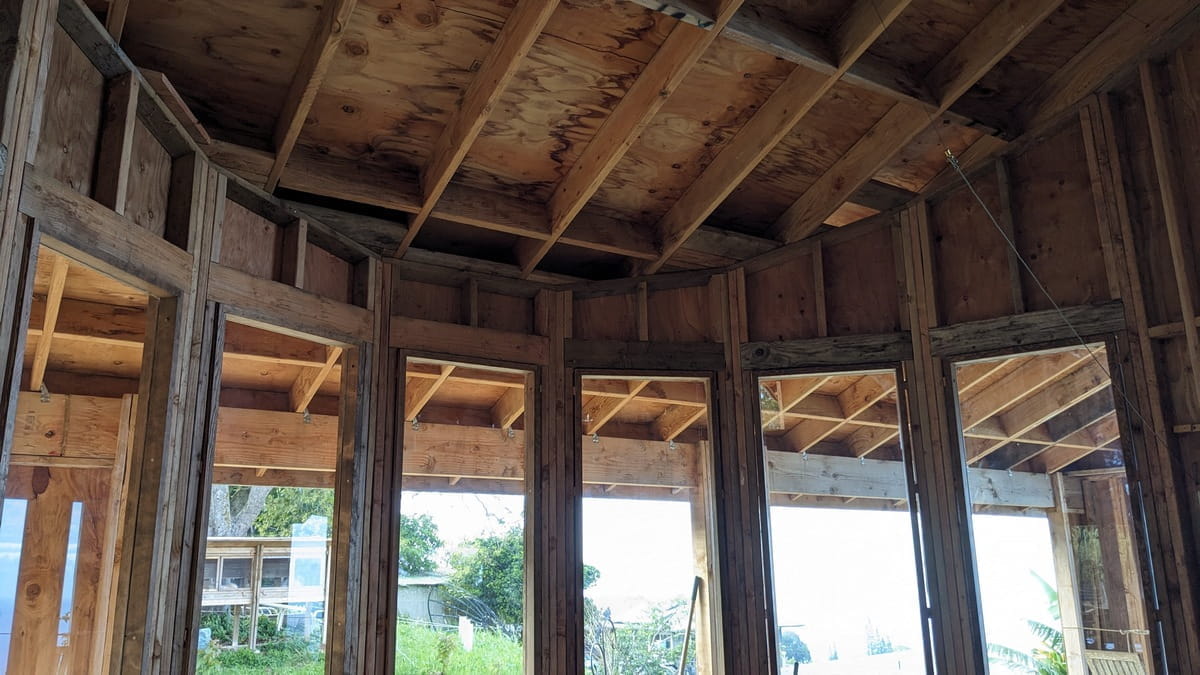
Our builder guy, Nick, did an amazing job with the dining area framing. This is a fourteen foot diameter half circle of windows going up to meet a slanted ceiling. The largest difference between the smallest of the window openings to the largest of the window openings is a quarter of an inch. Seven big windows in a half circle and only a quarter inch difference? Then, of course, have them go up to meet a slanted roof! Obviously, Nick has built a few houses before this one.
The level of amazing on this bit of framing is right up there with however he and his cousin Ethan managed to get the massive glulam ridge beams up without any heavy equipment. Those massive beams were installed to the top of just a few sticks of lumber above the open floor joists of the loft. Then the rest of the front and back walls were built after the big beams were up. I wouldn't be surprised if Nick had a secret antigravity machine hiding somewhere? Amazing work. He also likes to do these amazing things when nobody is watching (well, other than his cousin, Ethan.). Maybe he does it that way to make it more surprising? Or, perhaps, he doesn't like comments from the peanut gallery when doing tricky work. It's probably difficult enough without having to answer questions from homeowners?
Interior View across the Living Room
(more of a workshop than a living room at the moment)
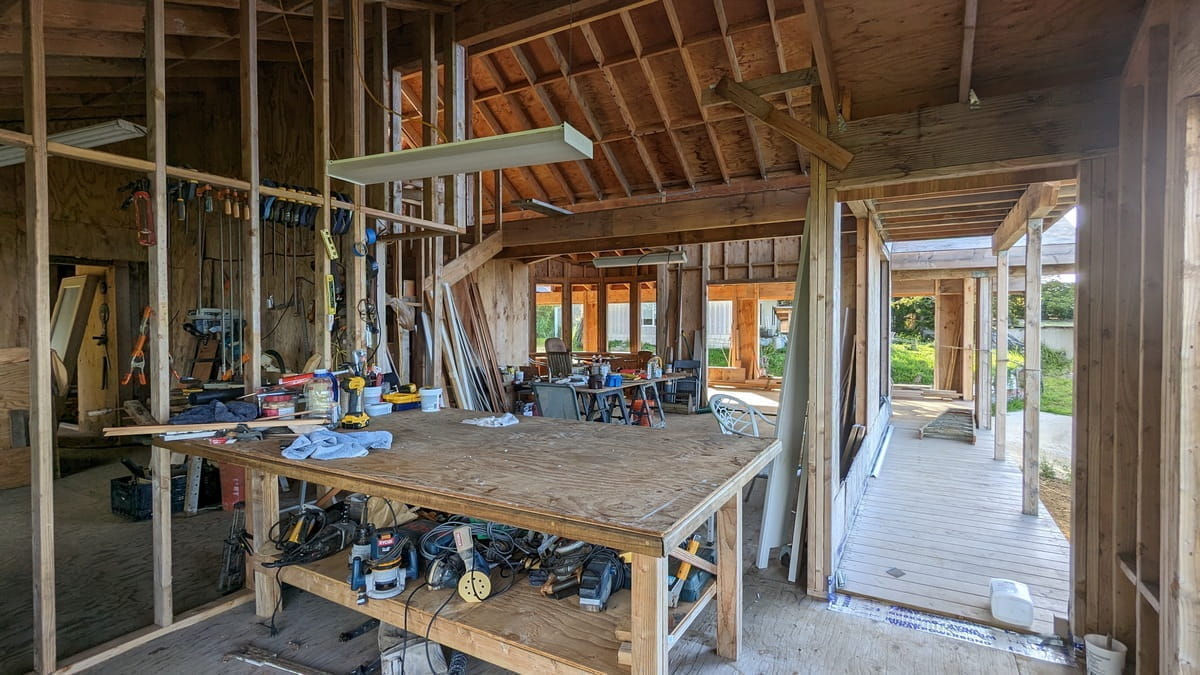
This is the view from the front corner of the Sun Room looking across the Living Room to the Dining Area. Out of the doorway on the right is the front walkway to the side lanai. There will be 3/4" T&G oak flooring installed on the interior. Once that is installed, the floors will be level. The house is still very much a workshop, but hopefully you will be able to imagine this as a Sun Room, Living Room and Dining Area?
The odd wall framing below the light fixture over the work table (one of those boards is just a leg for some scaffolding) is for the "secret" doorway to the library. There will be hinged bookcases at that corner which will swing in. When they are swung out into the living room area, they will make a corner and the doorway won't be visible at all. At least, that's the plan, we will see how it goes when we get around to building the bookshelves.
The big hole in the wall to the right of the dining area is the rough opening for the front doors. Those will be a pair of wood framed French doors and maybe they will be installed somewhat soonish? Sometimes it's hard to know what to do next, there's still so much on the 'to do' list.
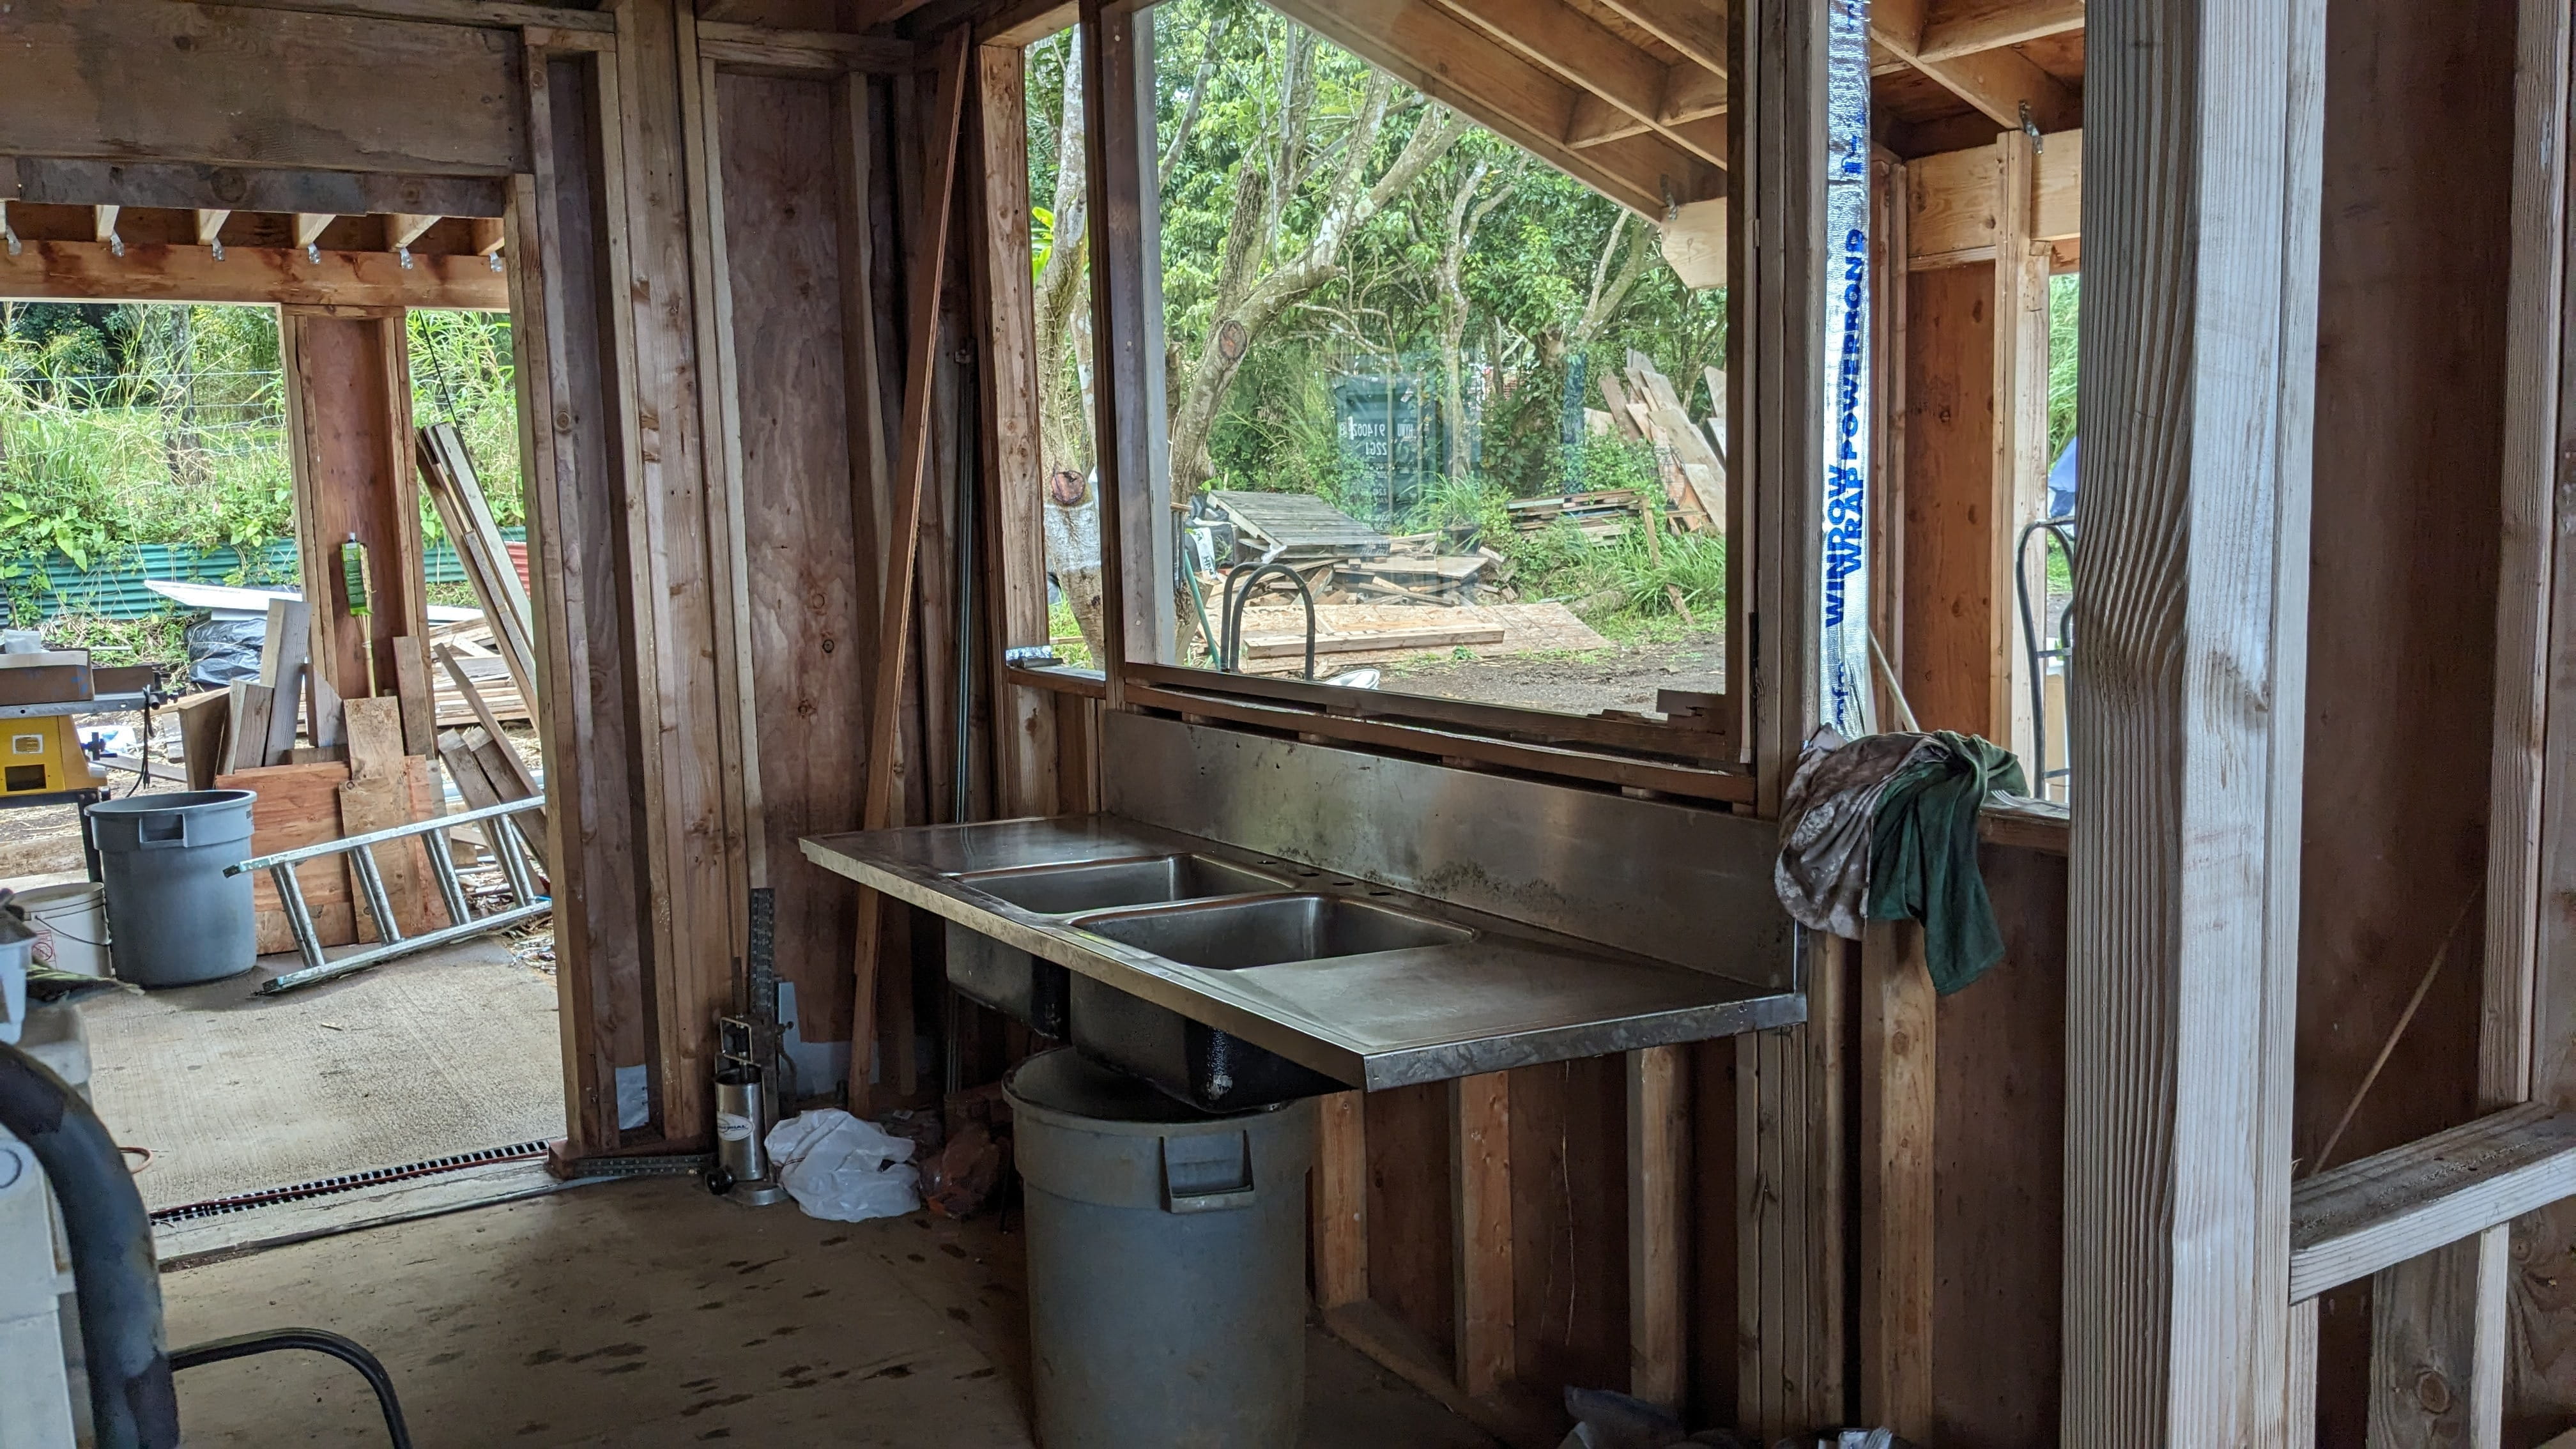
Kitchen Sink
(obviously, no cabinets yet)
We've been meaning to build this house for awhile. Back in 2016, in anticipation of building a house some day, we got this kitchen sink from a Craig's List advertisement. It's been sitting in the sideyard covered by Guinea grass and bindweed for almost NINE YEARS. Amazingly enough, it doesn't even show it. Which means it's some sort of really good grade of stainless steel. If you get good things, they're very, very durable. (Possibly somewhat reminiscent of that crazy chandelier?)
In the picture, it's only been dragged out of the weeds, it's not had any other cleaning other than taking the weeds off of it. It should polish up to like new. Other than being a survivor, it's also six feet long.
At the moment, it's just sitting on top of a trash can to hold it sorta in place. It will actually be a couple inches higher but there will still be enough room for a bit of windowsill between the top of the kitchen sink and the window.
Some rough ideas have begun percolating for the cabinets, but first, the parameters.
- This kitchen is actually rather small; but I didn't want a kitchen where the cook gets to serve and entertain the other folks sitting around in the kitchen. That works great for most everyone except the cook, IMHO.
- This kitchen is a straight "galley" kitchen. No corners to figure out how to access the awkward under the counter corner areas.
- Kitchen sink with a honking big window and only lower cabinets on one wall, 'fridge, stove and upper /lower cabinets on the other wall
- On the sink side of the kitchen, just lower cabinets, no upper cabinets. Upper cabinets on both sides would make the kitchen seem even smaller and more like a hallway.
- The front of the 'fridge is even with the front of the cabinets
- Instead of lower cabinets, big drawers to pull out so things are easier to reach
- pantry and long term kitchen item storage outside of the working kitchen zone (which in this case, is the kitchen itself)
Most of the cooking around here is done with items from the 'fridge so having the pantry actually in the kitchen isn't really necessary. Same with a freezer, that can also be elsewhere. This is a small kitchen so it needs to have all the areas actually functional, not areas that just take up space.
There will probably be these things on the counters:
- Coffee maker
- Coffee, tea & condiments
- Microwave
- Toaster
- Kitchenaid Mixer
- bottle of soap
- sponge container
Those are the things which get used often enough to not want to have to get them out to use them. Probably it will look too cluttered for anyone enthusiastic about the minimalist style, but I'm more pragmatic than stylish anyway so function before form. (Although it's much better when form and function can get along at the same time.
The kitchen is roughly twelve feet long. There will be about four to five feet of width between the two faces of the lower cabinets. Enough space for someone to walk past whoever is working at a counter, not enough space to dance. (You wanna dance, use the lanai.) So, on the kitchen sink and ginormous window side of the kitchen, there's three feet of space on either side of the big drainboards of the kitchen sink. I need to measure the width of the sink bowls, there will be some cabinet beneath the drainboards. So, perhaps four and a half feet of drawer style cabinets on either side of the sink? Maybe five feet? Guess I can't plan much accurately without some more measurements.
Whatever size they end up being, the cabinets on the left side of the sink will be possibly be for dry and shelf stable food storage? Either that or food prep bowls, utensils and tools. Under the sink is cleaning supplies. The right side of the sink may eventually have a dishwasher, although we don't have one now and never have had one so probably not. The cabinets there are much more likely going to have all the serving plates and dishes. Whatever goes on the table since that's the closest area to the table. Dishes and silverware for the table, possibly coffee mugs and glasses, too? Mugs and glasses location may be determined by the placement of the coffeemaker, not quite sure where that's going yet.
The other side of the kitchen, the Hilo side, has lower and upper cabinets. (In the kitchen, the ceiling is only eight feet high. Which is part of what makes it seem like such a small kitchen. The height of the dining area is twelve and half feet, it goes up to around eighteen feet in the living room.) The Hilo side of the kitchen will have the refrigerator nearest the door to the carport. Then some counter space, then the stove and then some more counterspace. There will be a line of cabinets all along the ceiling, too.
Not quite exactly sure where things will go along this Hilo side of the kitchen. Between the stove and the hallway, those cabinets will have cooking pans. Not quite sure what will be in the cabinets between the stove and the 'fridge. Nor the upper cabinets quite yet. But, need to figure it out before building the cabinets.
Well, back to more pictures for March.
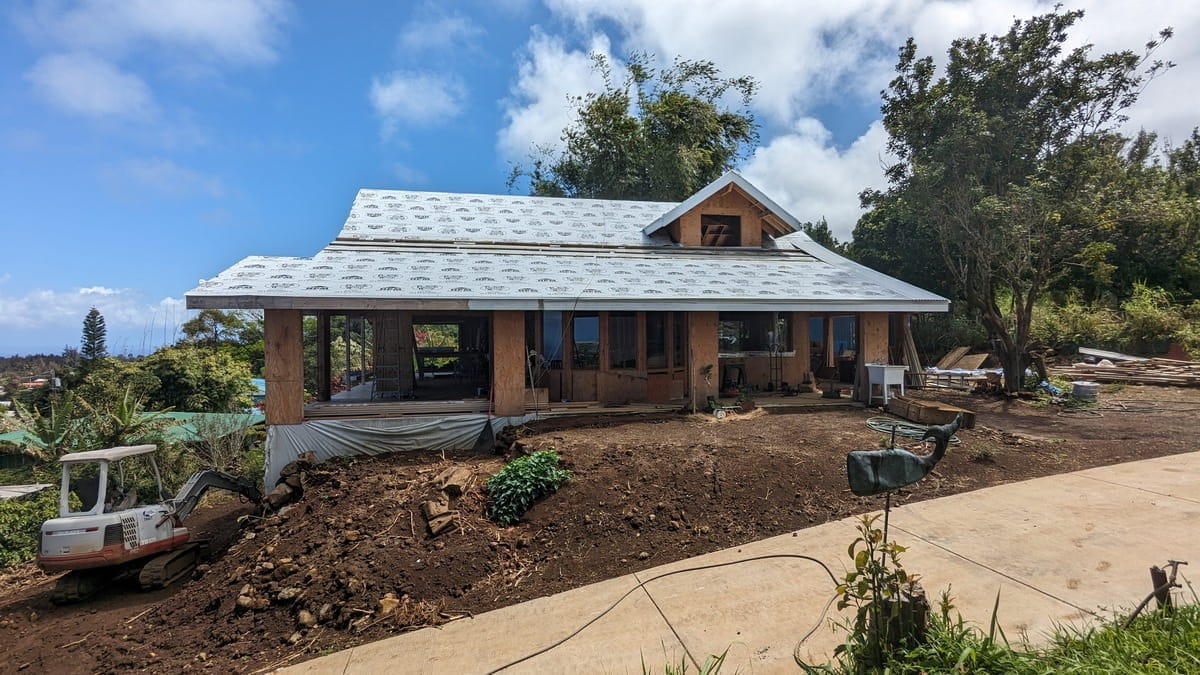
Mid-March Makai Side
(might put some railings on soon)
Not a lot of changes, most of them would be changes done by Nick and he's been off for most of the month getting the foundation for Ty's house ready to pour. After that's poured, he may be back to put in more Simpson fittings (wretched, wretched things!) or maybe he will be at another jobsite. Hmm, it's Nick, he could be off pig hunting or helping brand cattle, too.
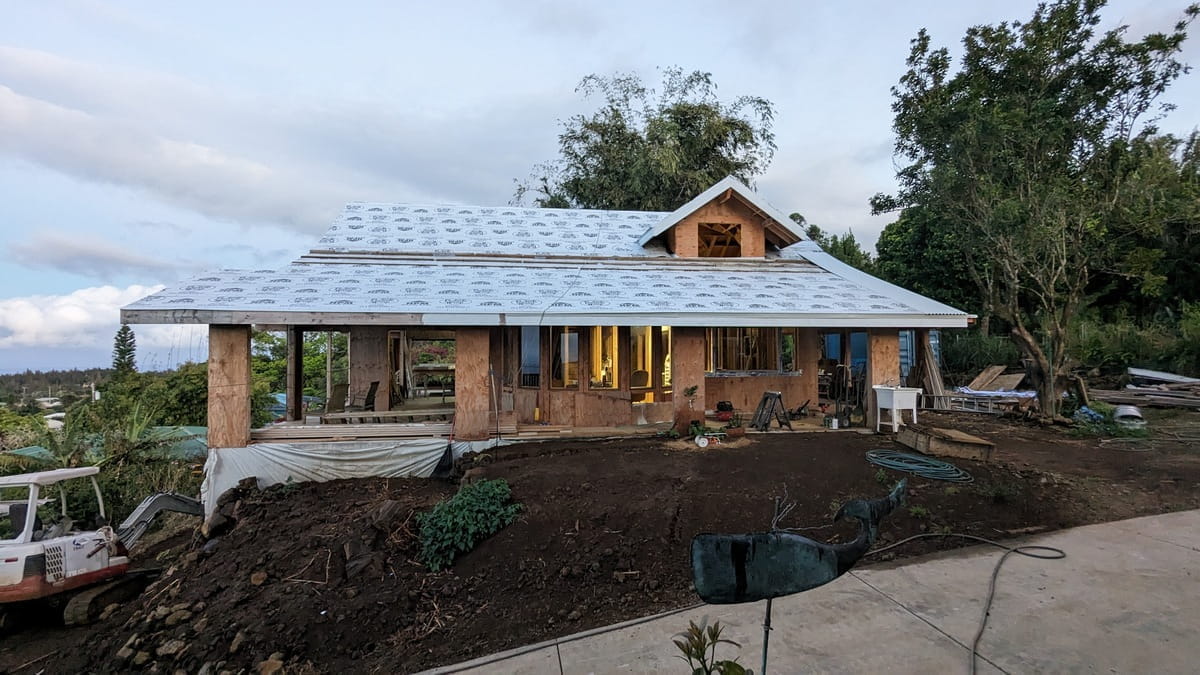
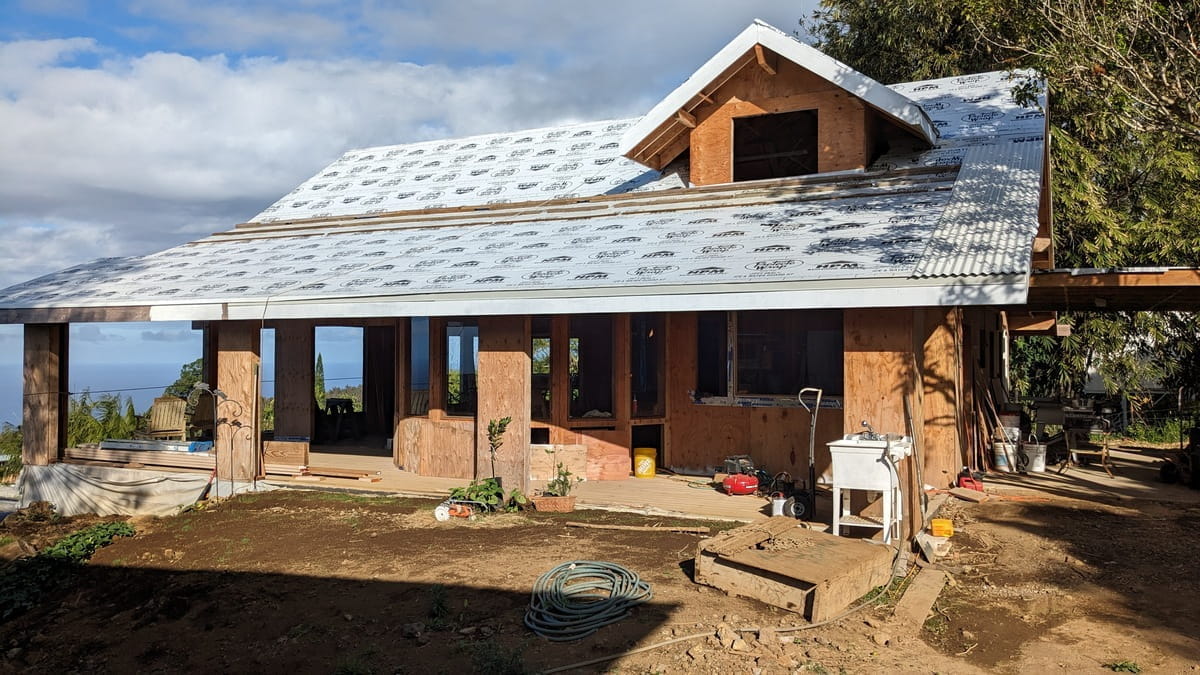
March 12th, Lanai Side
March 16th, Lanai Side
(not a lot of changes for days!)
This picture is from March 16th. Obviously, now days go by without significant changes. (sigh!) However, there was a window installed on the other side of the house, it just doesn't show up in this picture. It is kinda a nicer picture with the dining room lights on, though.
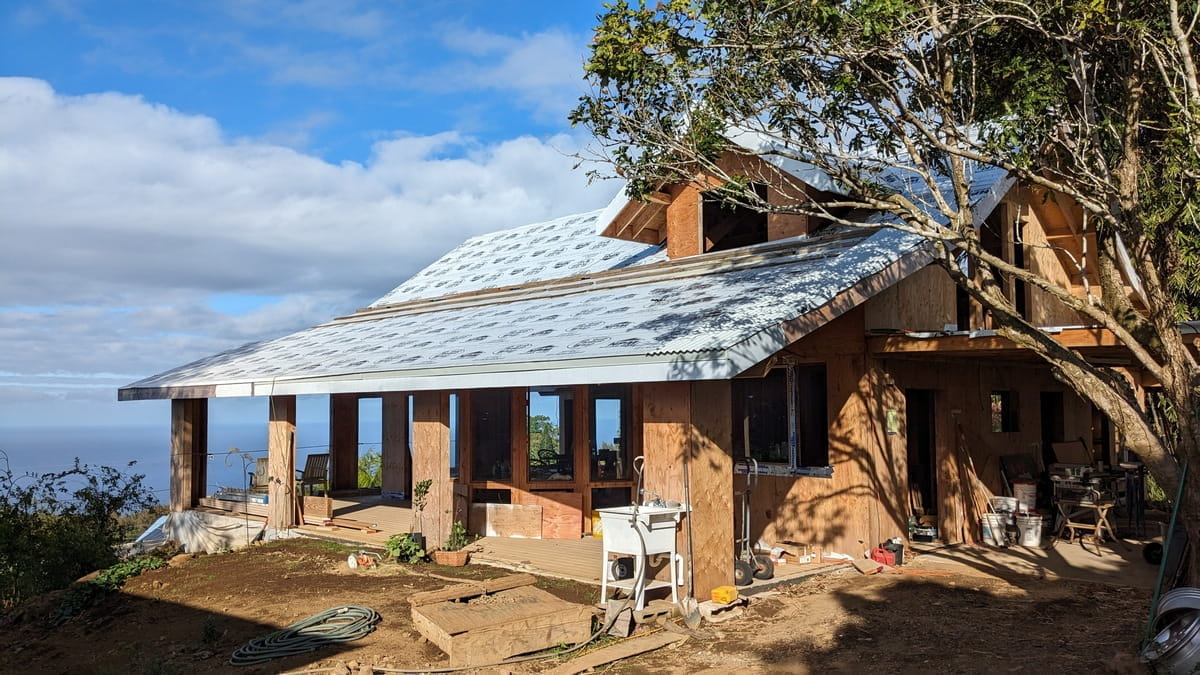
March 22nd Lanai Side
(trying to grow grass, but not doing well)
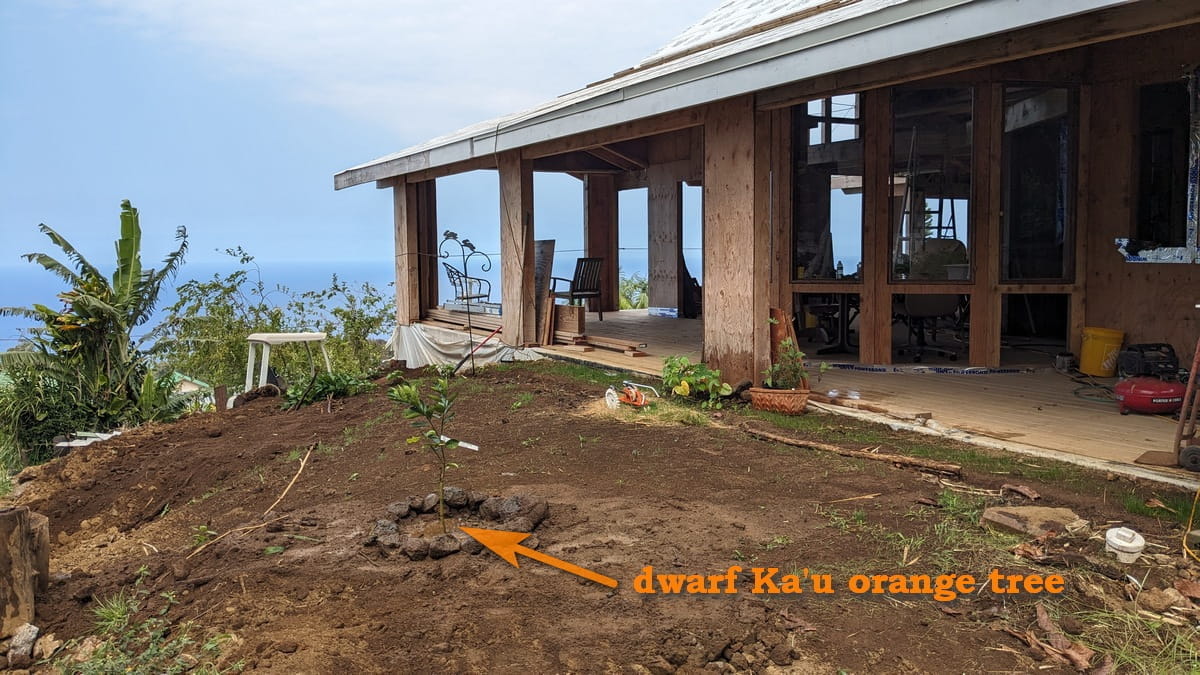
The rain off the roof (no gutters yet) splashes mud up onto the lanai, so I'm trying to grow some lawn grass there so it won't do that. The plan is that once it's lawn, it shouldn't splash mud. There's also a few beans, a Ka'u dwarf orange tree, a small mamaki and a nice rosemary that was gifted to us by our neighbor, Mimi. It's the beginnings of the landscaping.
That white utility sink is just there temporary, it will find a new home somewhere else. Maybe somewhat soonish before it gets stuck there for years and years. One has to be careful with "temporary" things.
March 22nd Lanai Side (again)
(similar yet slightly different picture)
Slightly different view, shows a bit more of the mac nut tree and the slope of the front lawn. I'm not sure if that's actually the "front" lawn since it's on the same side of the house as the "front" door, or if it's the "side" lawn since it's actually on the side of the house? In any case, it will hopefully be a lawn at some point.
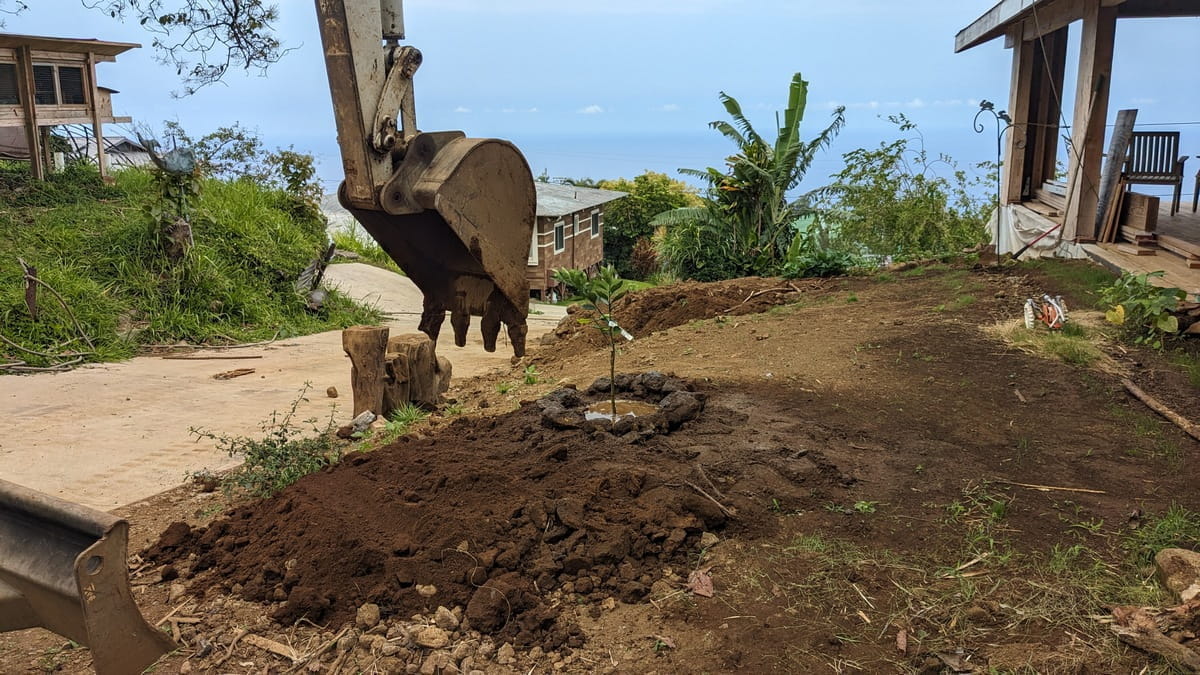
Landscaping!
(finally, something new)
Finally, something new and something hopefully "done". This is a dwarf Ka'u orange tree from Sean Spellicy of Royal Palm Enterprises over in Hawaiian Acres. Ka'u oranges are a really sweet and tangy orange, they're particularly nice and Sean has nice healthy plants. It's a grafted tree and well started so hopefully we will get oranges in a few years. Citrus grows really well around here and this little orange will hopefully soon grow big enough to shade the lanai from the late afternoon sun. It will also have orange flowers which smell divine.
Planting trees with Scoops (the excavator) is much easier than using a shovel. The bunnies donated a bucket of "bunny berries" and those were put down at root level so hopefully the little tree will find plant food right away. Had I been more thorough, I'd have remembered to put some bio-char and oyster shell in with the bunny berries. I can put some on top, but it's better to put it by the roots.
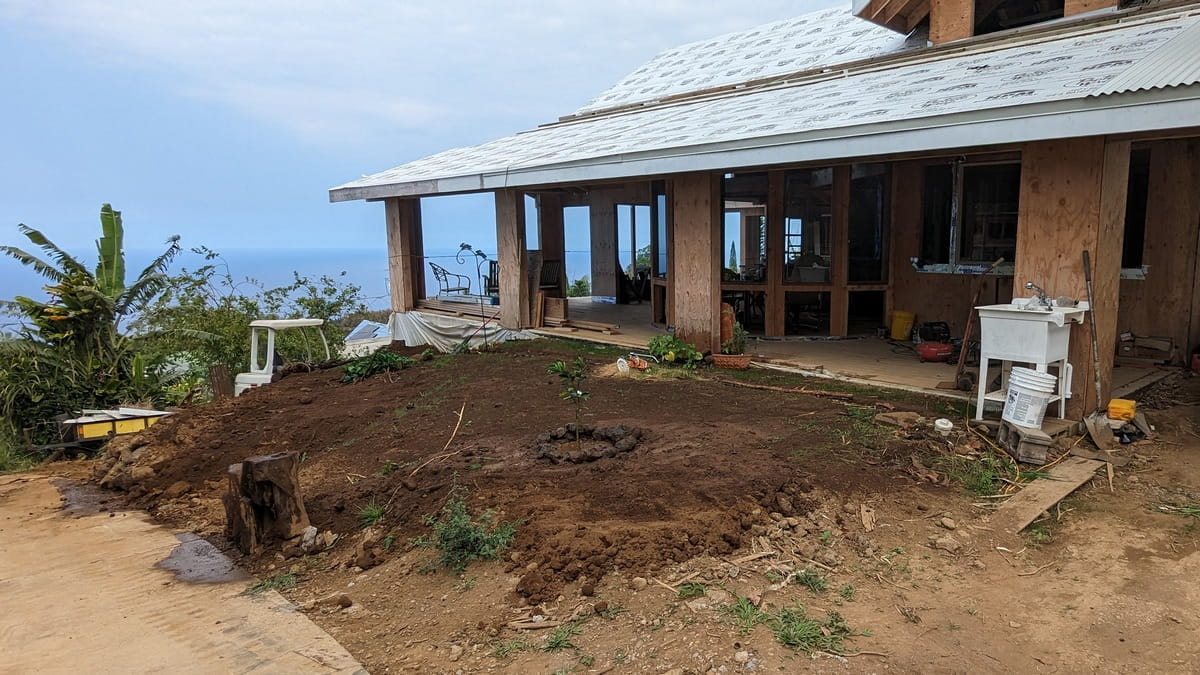
March 29th Lanai Side "lawn"
(now with an orange tree)
What doesn't show up well in the picture is the added soil along the driveway side of the side lawn area. The level area has increased, but it's hard to show in the pictures. At some point, there may be a set of steps going from the level of the lawn down to the driveway.
Hmm, the new little orange tree doesn't show up well in the picture, either. I did put a ring of rocks around it to try to keep weedwhackers at bay, but it will need something more substantial by the stem to protect it once tall grasses, weeds or other things start growing near there. I'll save a tall tin can, those are not particularly decorative, but they are weedwhacker proof. Might be nice to plant a few beans, there, too. Those add nitrogen to the soil as well as shade it while the little tree is getting established.
Landscaping (again)
(with names and arrows and everything)
There, an arrow! With a label, too. Ha! Now, if I can just get that arrow to show up somehow in real life so the little tree will be noticed before an evil weedwhacker gets it. You may laugh, but you'd be surprised at how many little trees are done in by evil weedwhackers! (Which, in Australia, my Aussie friends tell me are called "whipper snippers" - your bit of trivia for today).
Not Really Construction Related
(but at least made with construction scraps?)
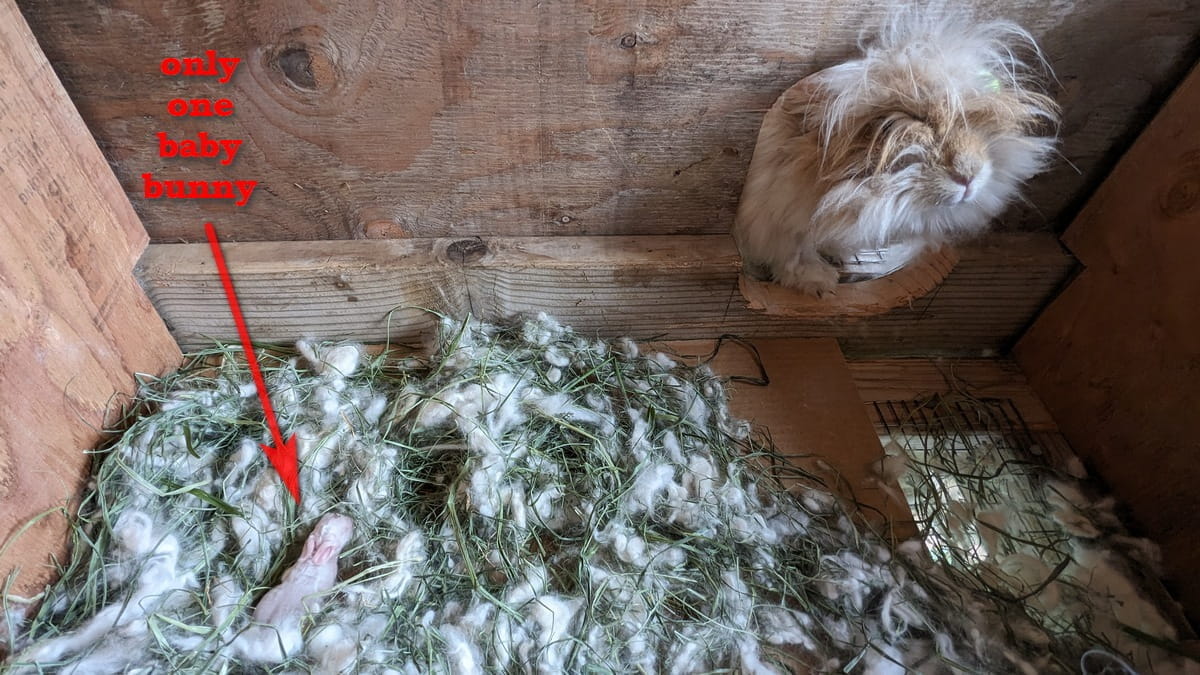
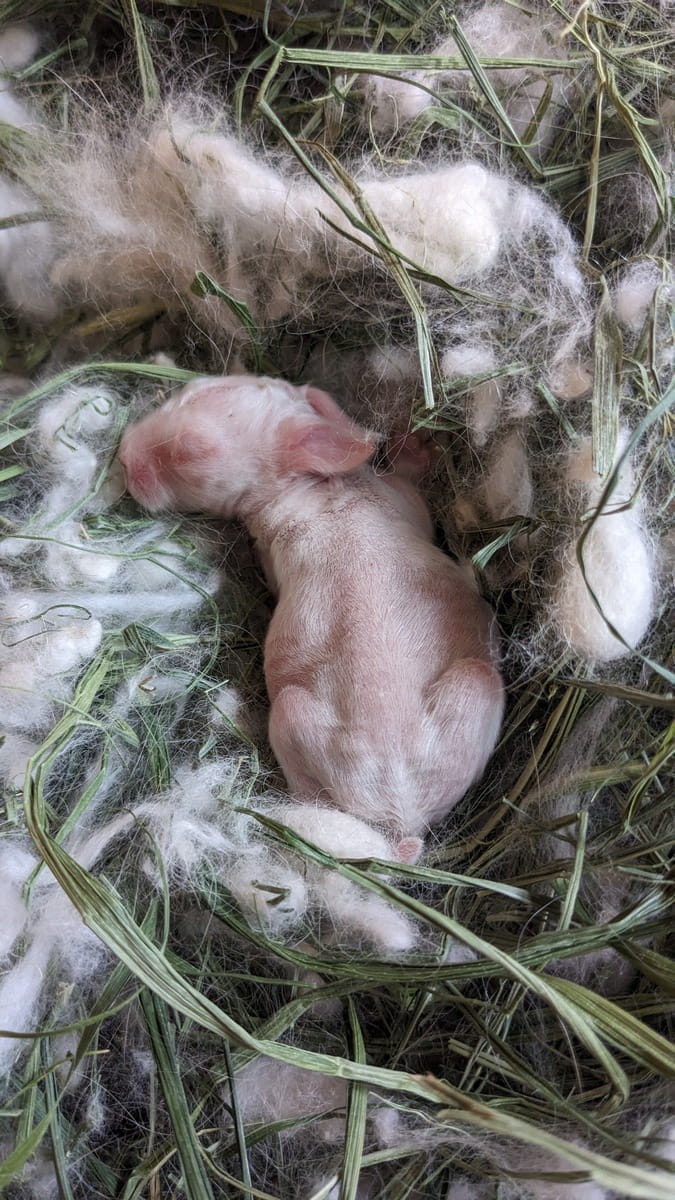
This isn't really about house construction, but the bunny hutch was made with construction scraps, so does that count? This is the first baby bunny we've had for awhile and so far Clover has been taking care of it and it has been surviving. It's four days old now. Haven't a clue if it is male or female, but it is an albino and will have ruby eyes once it gets around to opening them in around a week from now.
Baby Bunny! Woot!
(but just the one)
Very fat and well fed baby buh-neh! Yay!
In the world of bunnies, a doe who has successfully raised babies is called a "proven" doe. Clover, if she continues to keep this one alive , will reach that status of "proven" and she will be the second one in the herd at this time. There used to be a minimum of two dozen bunnies and more likely three dozen English angora bunnies here at any particular time with multiple 'proven' does, but we've taken a break from baby bunnies for a few years so now the herd is down to merely a dozen, although now with this little one, it's a dozen plus one.
I hope this little one survives, it's got some good genetics for fiber quality as well as the albino white color (or rather, the lack of color). So, if it survives, it will be used in the breeding program and hopefully have a lot of offspring. Hopefully, it will be male, a buck can have a lot more immediate impact on the quality of a herd than a doe. But, that's all bunny stuff, this part of the webpage is supposed to be about house stuff.
