January 2025
🔨 📐 Still in Framing 📐 🔨
Getting towards the end of framing
(we really hope, anyway)
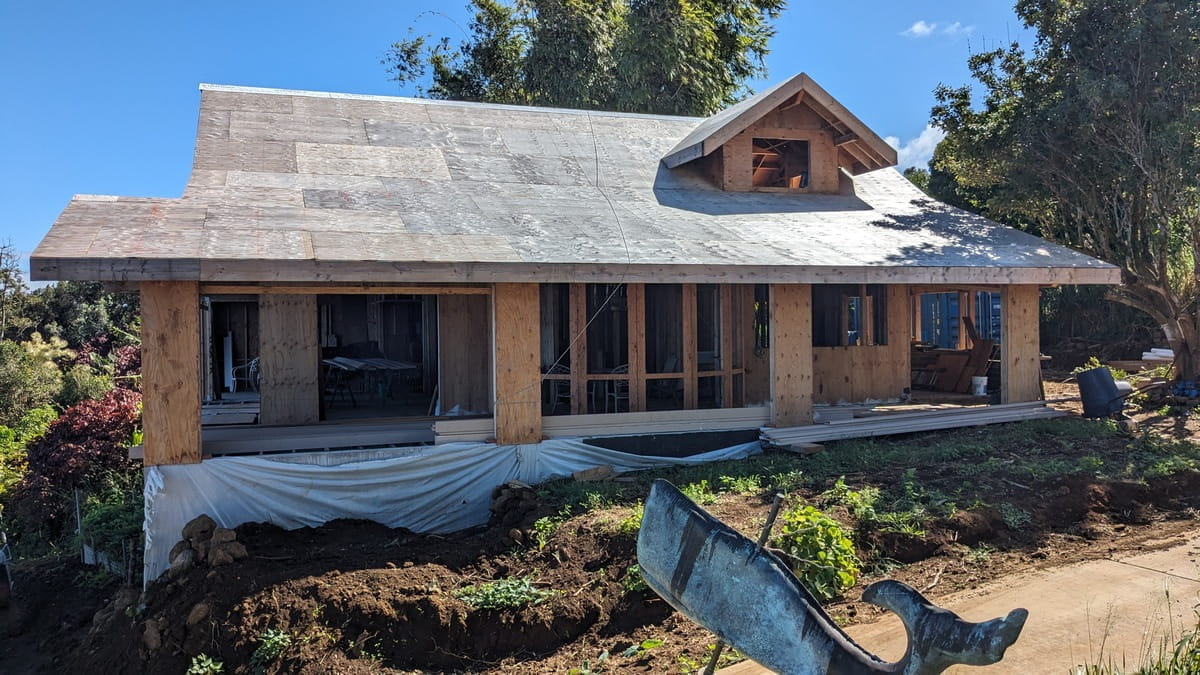
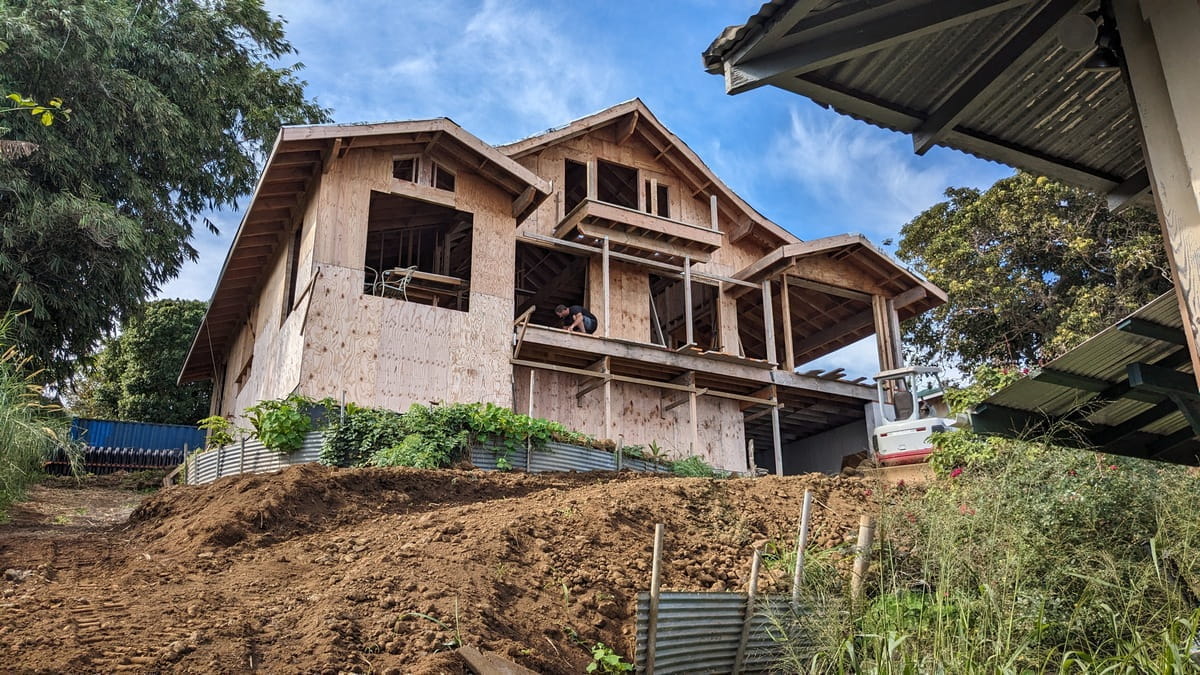
Beginning of 2025
the view from the Avocado Plateau
We still haven't achieved waterproof, but the house shape is becoming very defined now. I don't know how much more framing there is, but the majority of it has been done now. There's still some corners to be trimmed, Simpson hold downs to be put on, etc. Maybe a few doors and windows could be useful?
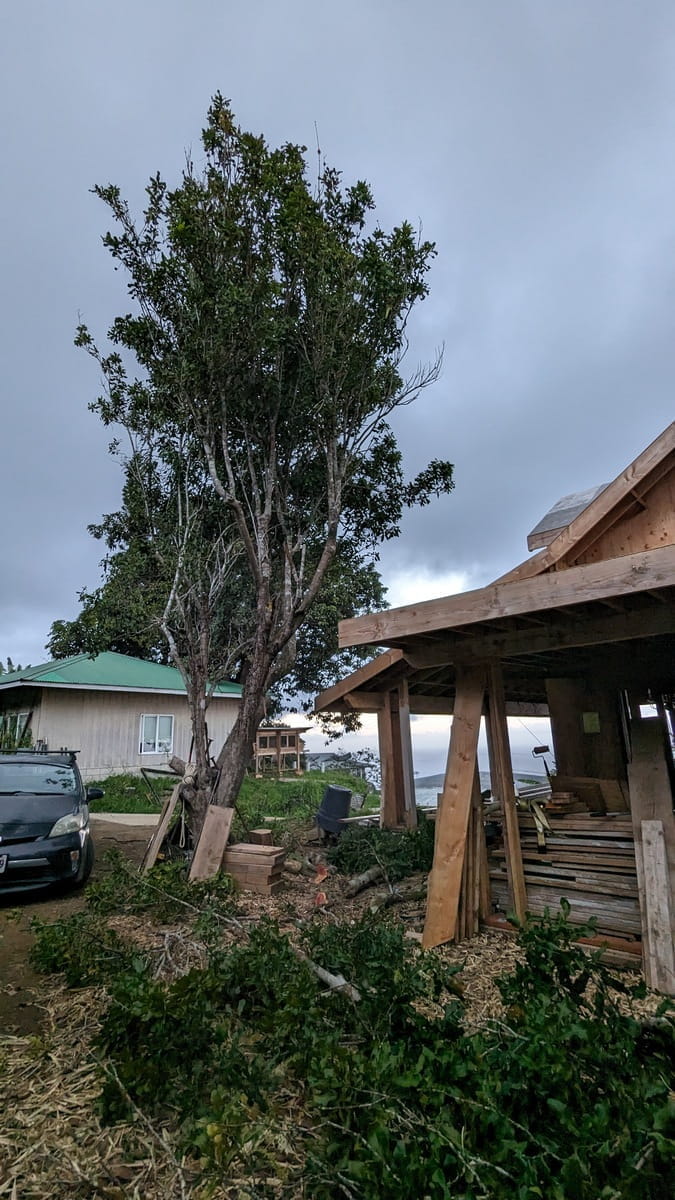
Mac nut tree still there
(it's getting skinnier, tho)
The poor mac nut tree is still hanging in there. It's not the tree I would have picked nor the spot I would have planted it, BUT, it takes twenty years to grow a tree so it's best to keep it - if possible. It did get trimmed back again, though, for the carport roof. I think it's finally about as trimmed as it needs to be so now hopefully it can continue growing now without any more trimming. At least, for awhile.

Almost Waterproof!
it's still just "sticky paper", tho
It's some sort of construction "paper" even though it's not really paper at all. It's some sort of seriously sticky tar like stuff with a vinyl backing. Once it's stuck down, it doesn't want to come up at all. It's "mostly" waterproof and it can last for a few months before the tin roof is installed.
Carport Roof
almost waterproof, too!
This pretty much now covers all the roofing with sticky paper. There's still the tin roofing to be put on, but the house is now at least mostly waterproof.
Painted Decking
Woot!
The deck boards have been painted - at least with tinted primer - before being installed. Once they're installed, it's really difficult to get paint between the boards so we wanted at least a coat of primer there. I suppose we should have painted them with at least two layers of paint before they were installed, but it was taking forever to get them painted with just the one layer of primer. Have a *mostly* waterproof workspace inside the house helped, but it was still taking a long time.
Nick & Ethan spent several days getting them installed. They're very careful and precise. Nick has several scraps of 2x lumber which have a bit that is the right width for between the boards. At the end of the day, those little scraps would be sticking up between the last boards that had been installed. Just another interesting Nick Construction Method. I should take a picture of those little blocks, if I see them again.
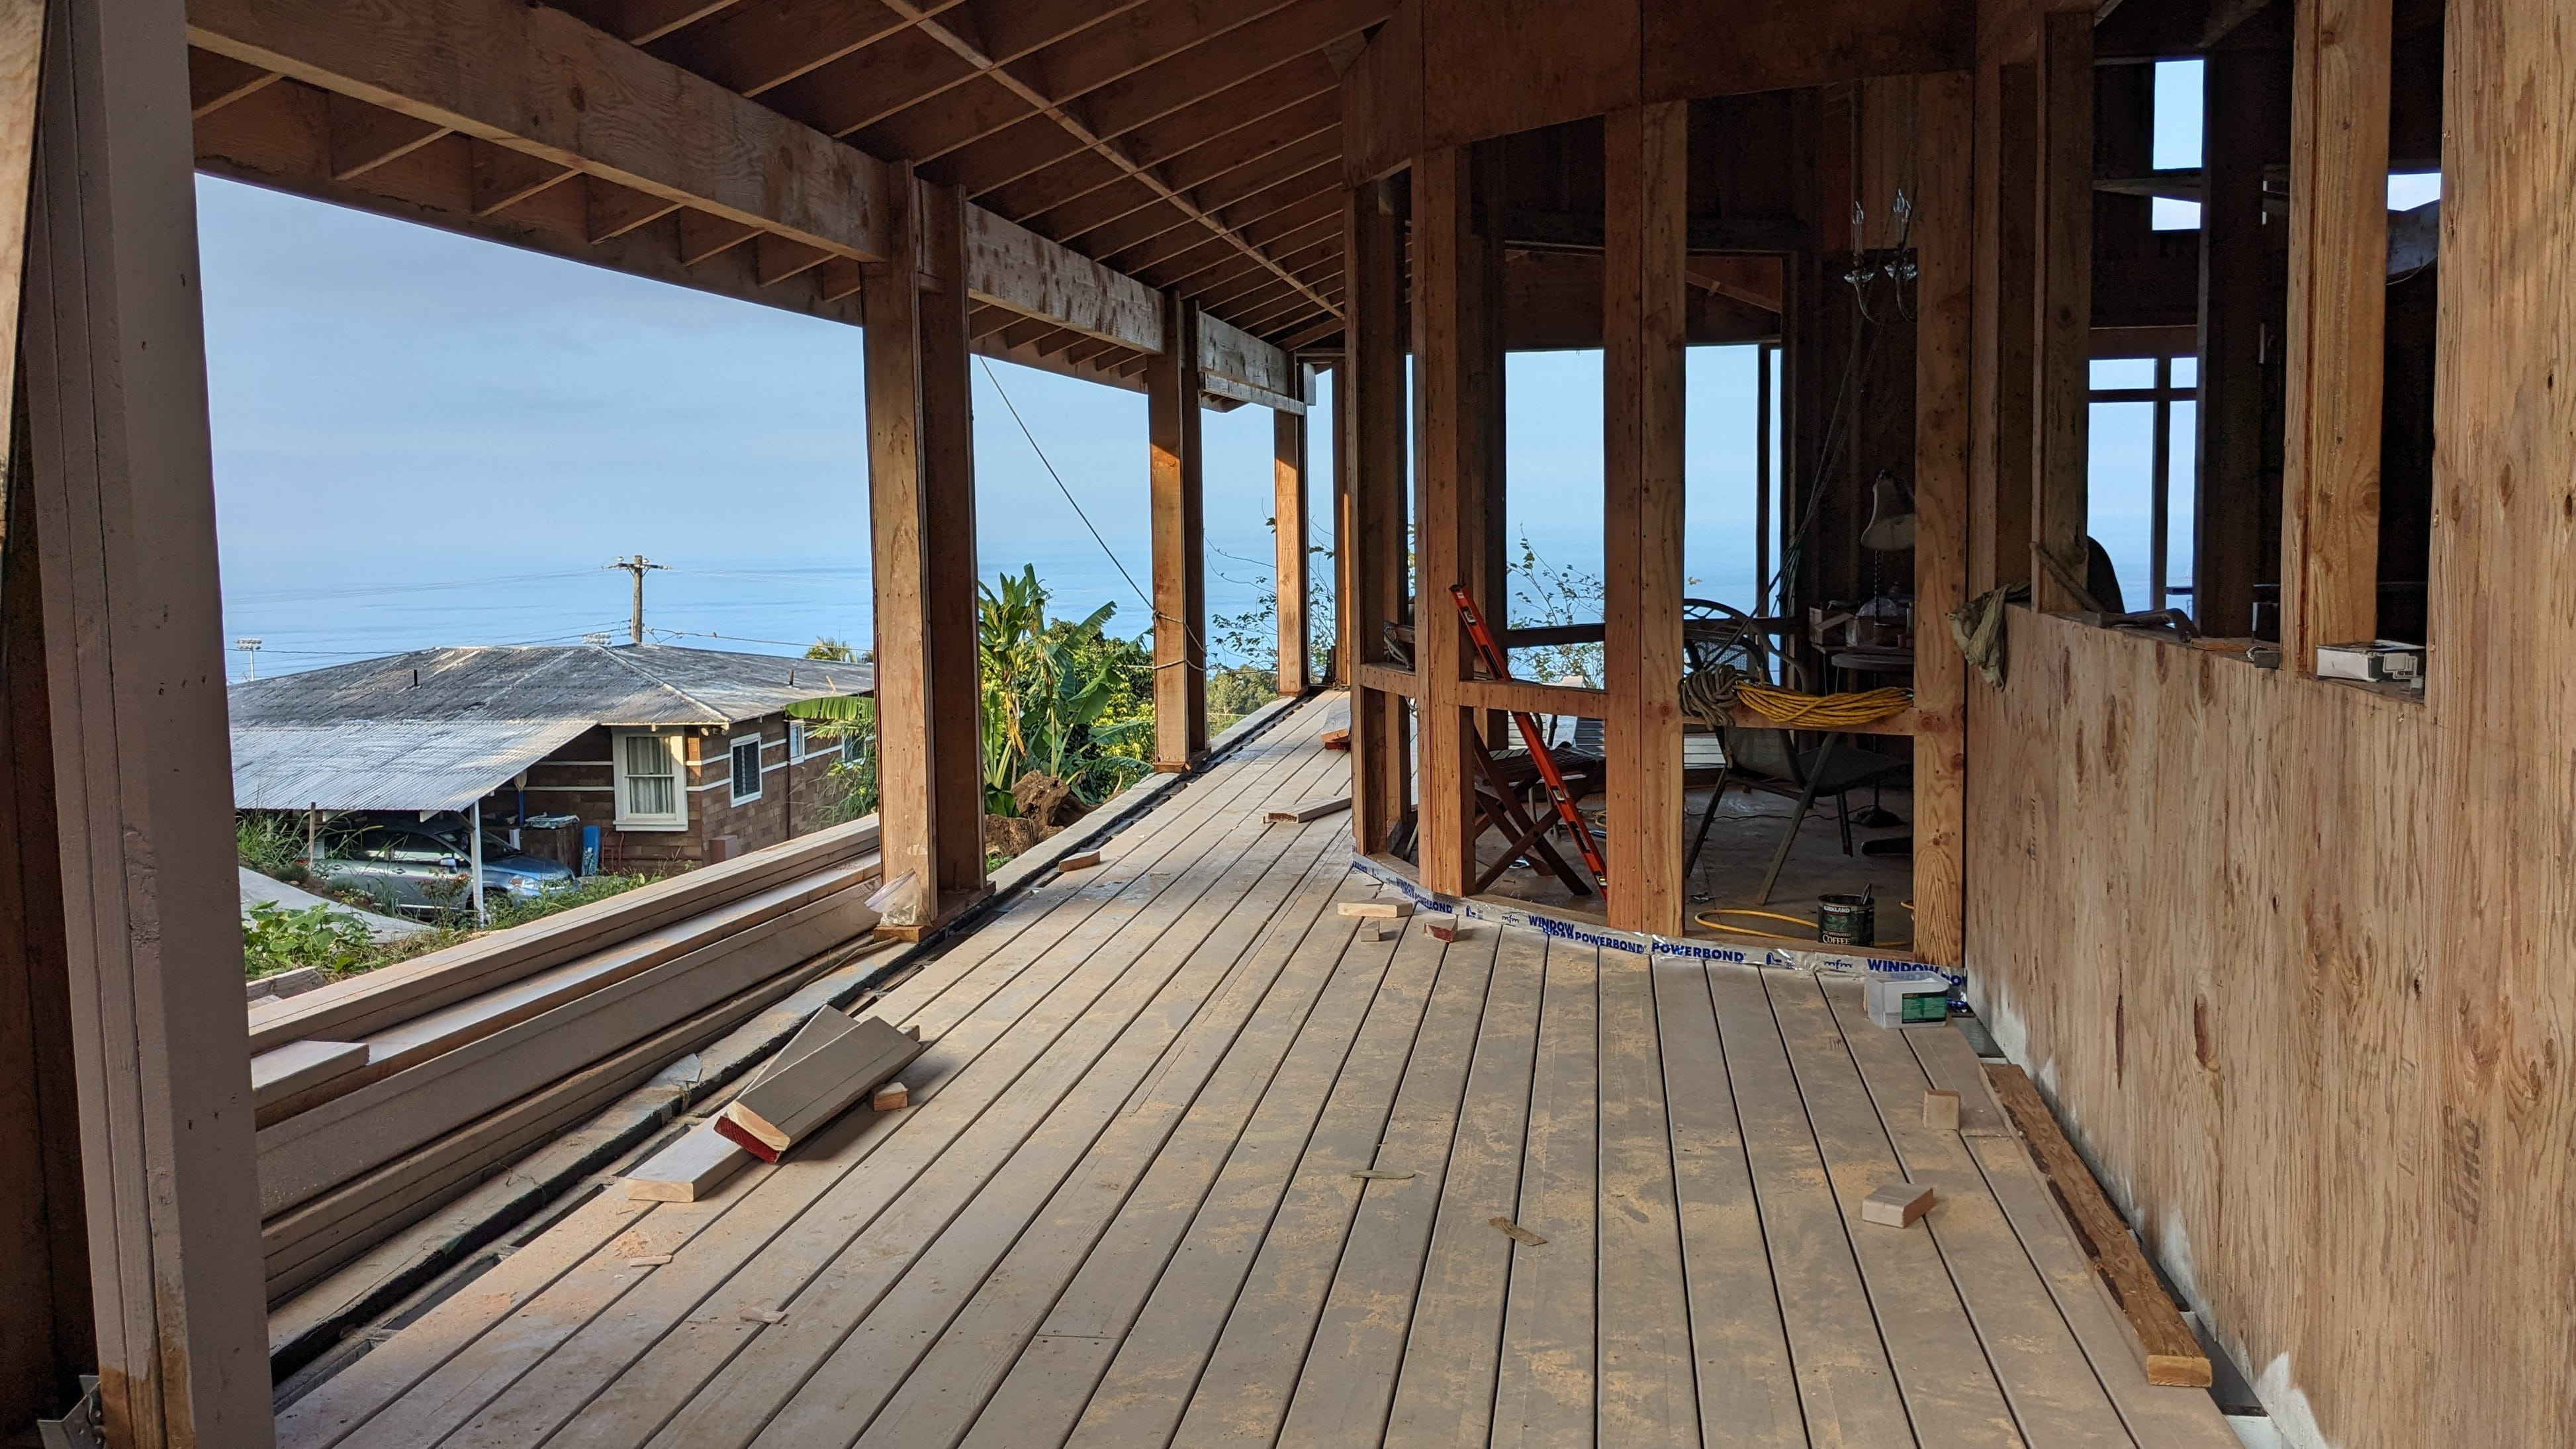
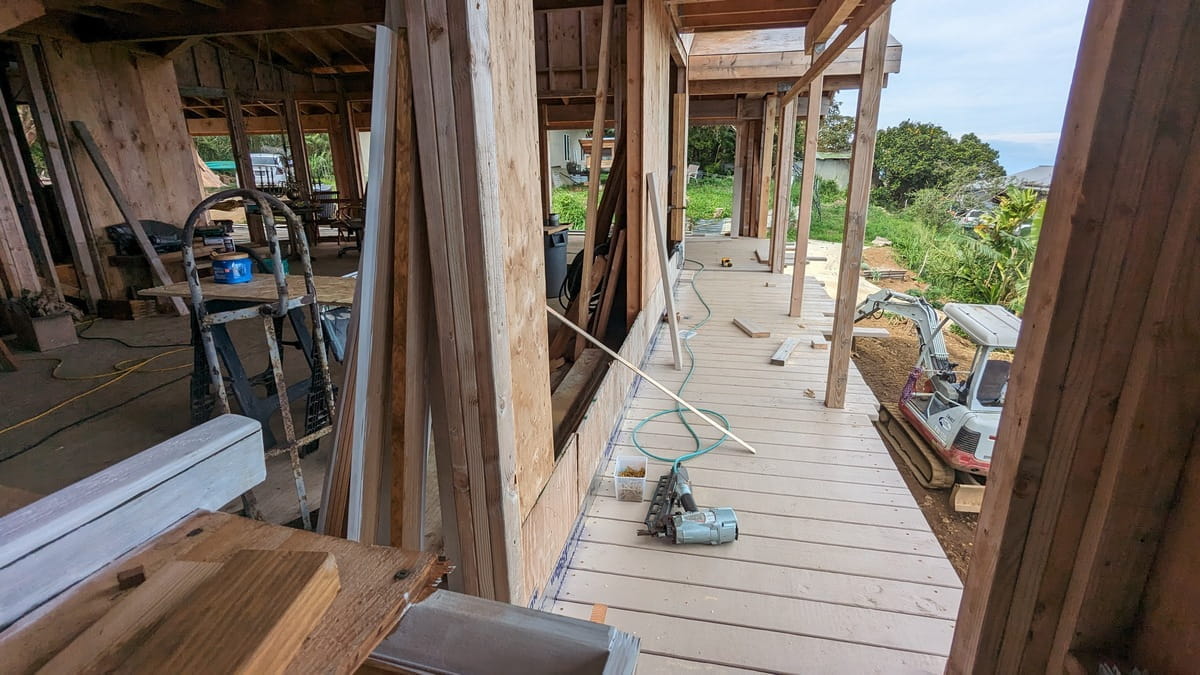
The Mauka Lanai entry
(from the carport end)
This is the "entry" end of the lanai, the carport end, as it were. The lawn on the left side will eventually be level with the lanai for the first two openings. Between the last two posts (wall sections?), there will be a wire railing since the lawn will be three to five feet below the level of the floor decking.
This is the first time I've been able to physically experience the walk up to the front door, it's all been virtual imagination up until now. The lanai floor starts out level with the carport drive, so - as expected - it's a really easy transition onto the lanai. There's the big kitchen window on the right, with the lawn area on the left which will eventually be level with the lanai floor. Walking along, the lanai decreases down near the dining area half circle. Then, when walking past the dining area, the whole lanai opens up with the ground falling away on one side and the whole Pacific ocean view at the end of the lanai with the front door (once it gets installed, of course) on the right side. The whole feel of "opening up" is much more than I'd expected and it has turned out better than I'd thought.
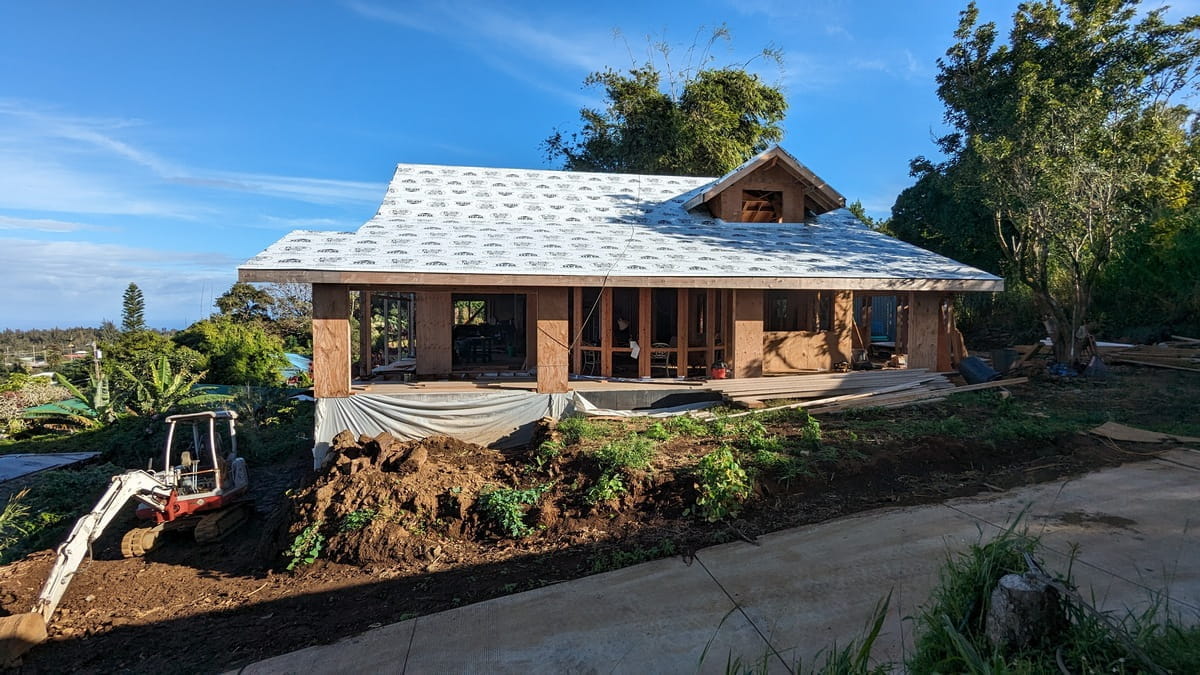
Mid-month Picture
(well, almost mid-month anyway)
This is a picture from January 12th, so it's almost mid month. Visually, most of the changes from the first of the month picture is the sticky paper on the roof. There's now floor decking on the lanai although the front walkway and Crow's Nest lanai still need flooring.
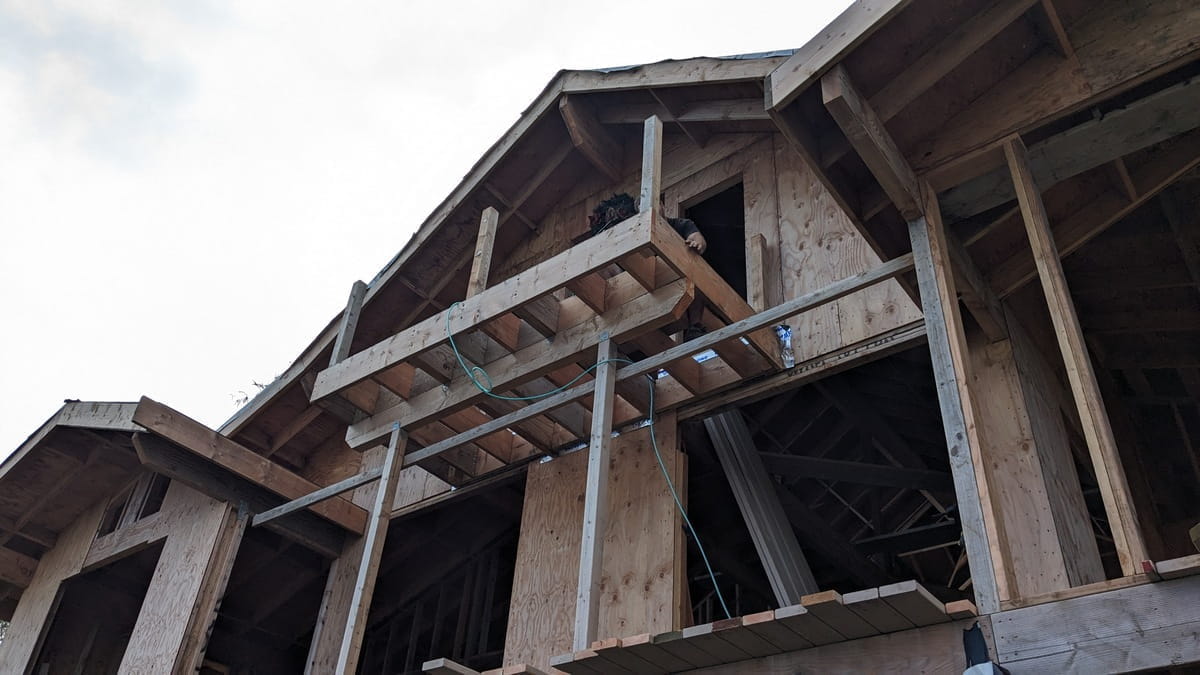
Crow's Nest Lanai
Railing posts, no floor decking yet
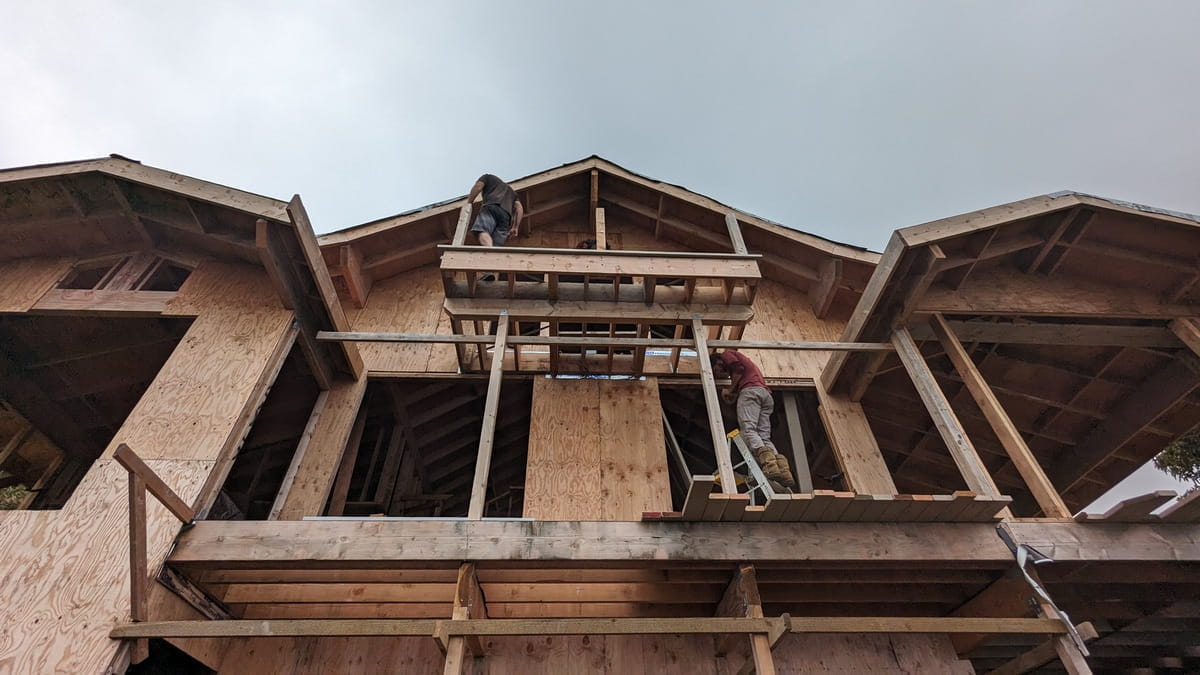
The lanai now has some posts for the railing, more blocking between the joists and some fascia, but no floor decking yet. Nick is up there, but mostly you can only see his hand and the air hose to the nail gun. Nick & Ethan have zero fear of heights! They'll be up there building and nailing without looking anxious at all.

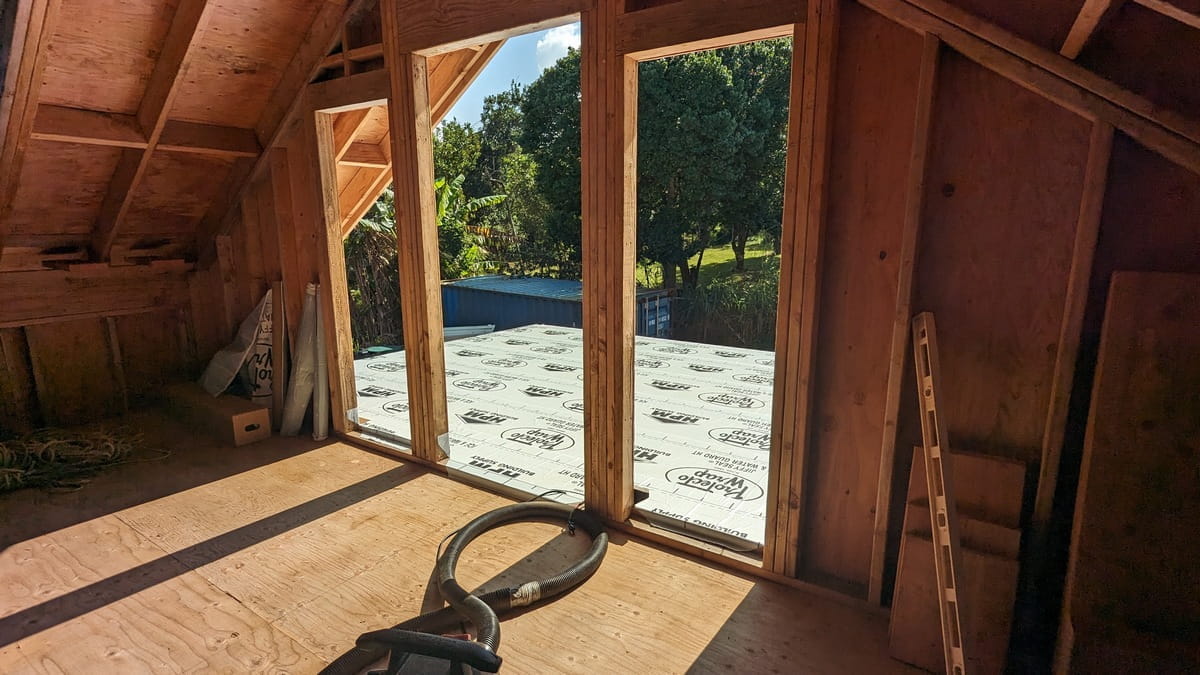
Looking Out from the Catwalk
(but still no lanai decking yet)
This is the view from the inside. Still no railings on the catwalk, although that is four feet wide at least. It'd be way spookier if it were only three. Then, at least the crow's nest lanai has a few railing posts, but some floor decking would be handy, don'tcha think?
It does have full blocking at four feet on center as well as cross strapping. Nick builds things very solid.
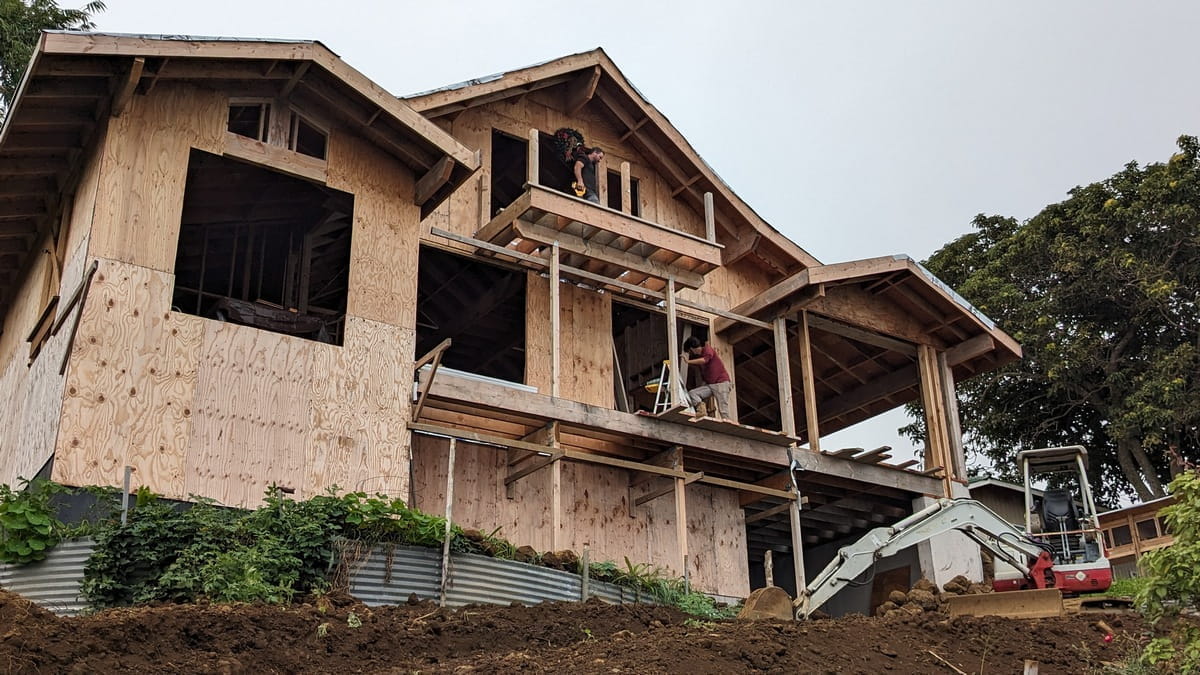
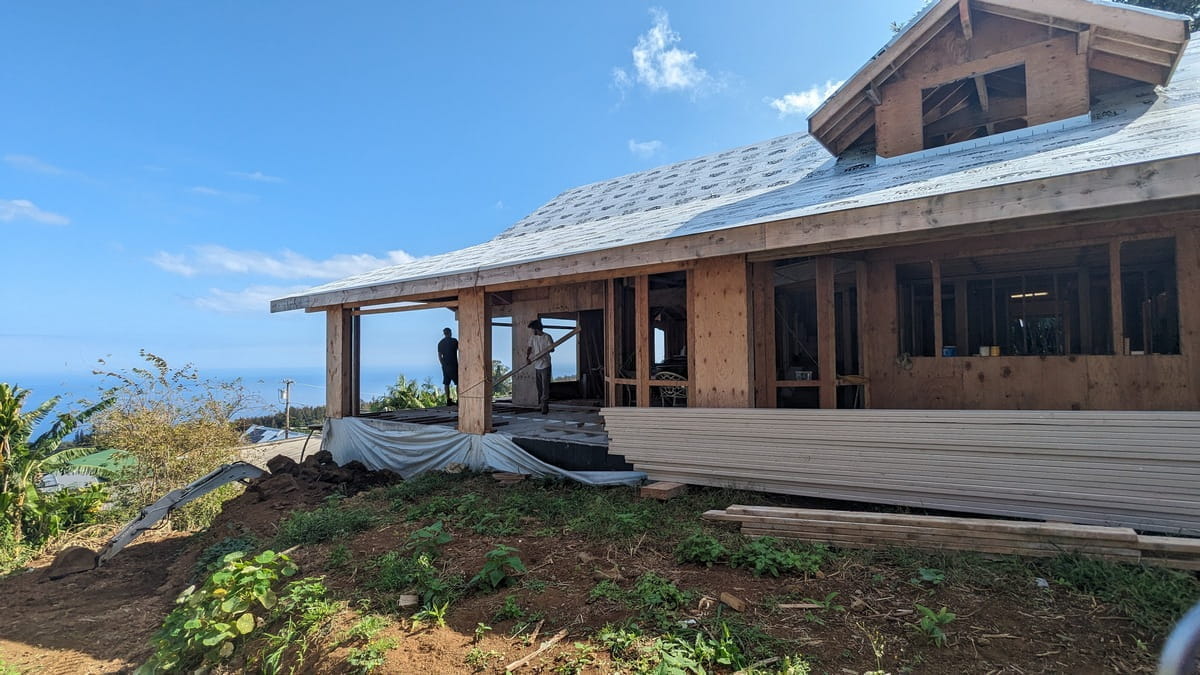
Nick & Ethan at Work
The front walkway is still not fully decked so Ethan in the red shirt is pretty much at the end of the decked area. Nick is up on the crow's nest lanai getting it ready for the flooring. The floor decking for the crow's nest is staged on the inside of the house waiting to be pulled up onto the catwalk.
Nick & Ethan Working
(soon after the picture above)
Just another shot of Nick & Ethan working. This whole house has basically been built by them with Nick doing a lot of it by himself. Which is why the framing is taking a lot longer than a similar job on the mainland, but we don't worry about cold weather around here.
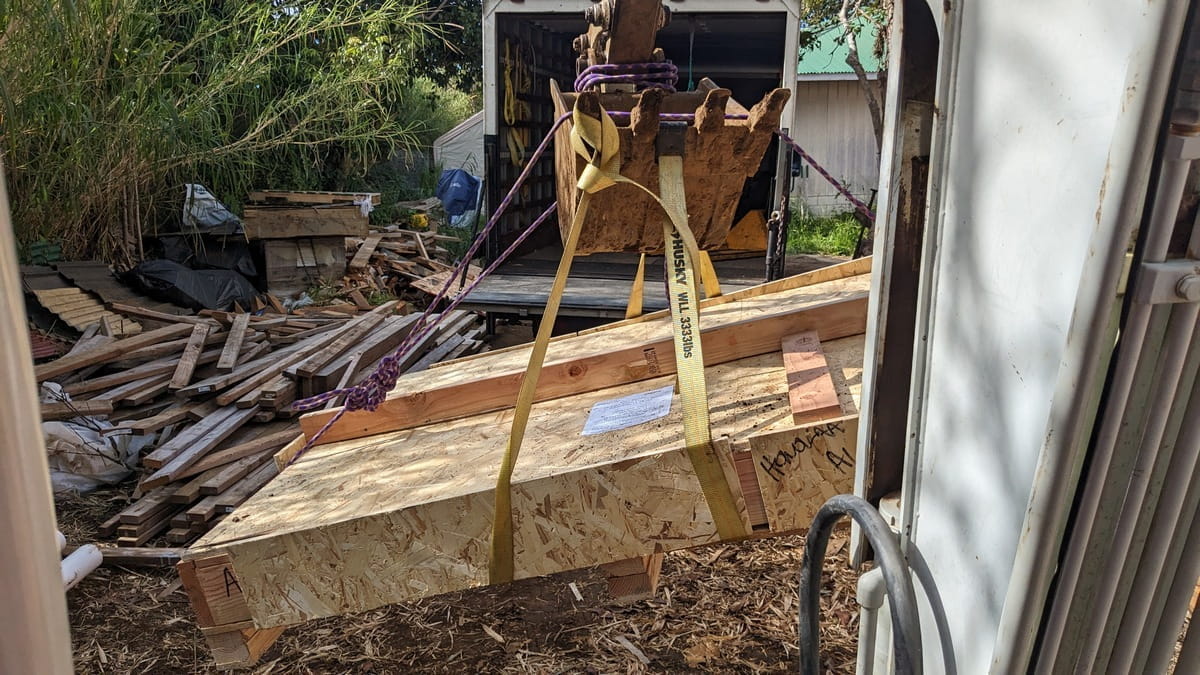
Box of Windows
(well, window glass, anyway)
This is a box of glass. It's got pretty much all the window glass for the house so it's 900 pounds of tempered glass. It was shipped in from the mainland since that was several thousand dollars less expensive than sourcing it on island. I tried to get a quote on island, but they were all at least a thousand dollars more expensive and that didn't include delivery, either!
Scoops (we finally named the excavator) was able to lift the box out of the delivery truck without much trouble at all. That got the box out of the truck and onto the back "lawn" (so far it's just dirt and sometimes mud). Of course, now we get to open the box and see if it arrived intact. It is a box of glass packed flat, I was surprised to see it flat. Usually, glass shows up stacked vertically, although that's also on the sides of trucks with specially built racks.

All The Windows
(some assembly still required)
Astonishingly enough, it arrived intact. Not only intact, but not a single chip or scratch! Amazing!
Due to the high cost of pre-manufactured windows, we are making the windows for the house. Takes longer but will save thousands of dollars at the end of construction. At least, as long as we're doing the window assembly and not paying someone else to do it.

Windows
some assembly required
There are three types of windows in the house. The main ones are these big multi-pane windows with the louvers below the fixed glass panes. That will provide views that don't look through screens. There is also the kitchen window, which is one big pane of fixed glass with a louvered window on either side of it. Most of one kitchen wall will be windows. The third type of window is just louvers, mostly in the bathrooms to provide lots of ventilation and no need for good views.
The basic frame is made from door casings. Then glazing compound, put in the glass, glazing points, and more glazing compound. Then put in wood molding to help hold in the glass. The glazing points and glazing compound would probably be enough, but the molding adds to the security.

Mid-Month Buzzy View
(the drone is named Buzzy)
Here's a more official "mid-month" picture since it's actually from the 15th instead of the 12th of the month. This is a picture taken with Buzzy the drone, who can be annoyingly buzzy, but does take lovely pictures. At some point, I should put in some of the videos, although those have to be loaded on YouTube and then linked to there. Hmm, unless there's some way to do it via HTML and the website that hosts this page? I'll have to check, it would increase my web page building skills.
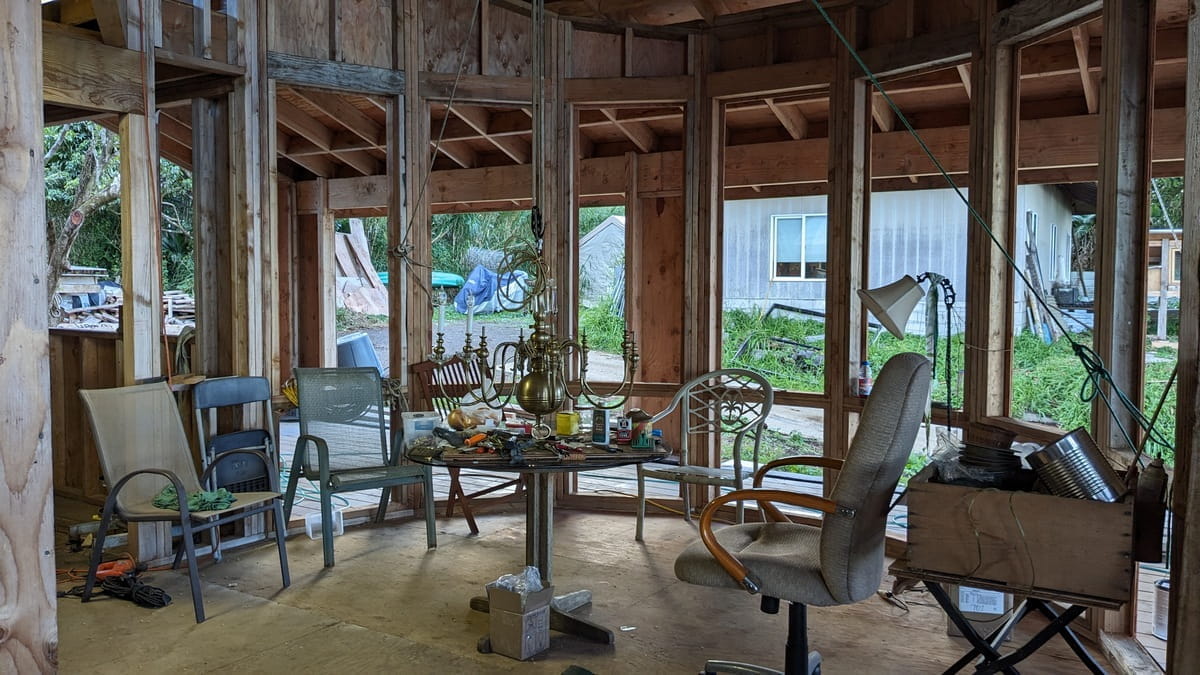
January 10, 2025 Dining Area
A lot of my time this month has been taken up with the Chandelier Project. There will be a whole Chandelier Page, but its still under construction as of February 2nd, 2025.

Chandelier
(still needs wiring and bling)
The chandelier still needs to be wired together and still needs "bling", but that will all be covered on the Chandelier Page. (Which I still haven't made yet)
January 22nd, 2025
The front walkway now goes all the way across the house! Yay! Of course, some railings will be nice, but at least the floor decking is there.

A Front Walkway
(mostly so we can wash the windows)
We didn't really need another entrance to the house, but we did need a way to easily wash the windows so a walkway across the front makes sense. It will be nice to be able to walk from the sun room to the lanai, I suppose, but mostly this was to provide for window washing. There were also two posts there to support the crow's nest lanai, so they may as well hold up a walkway, too.
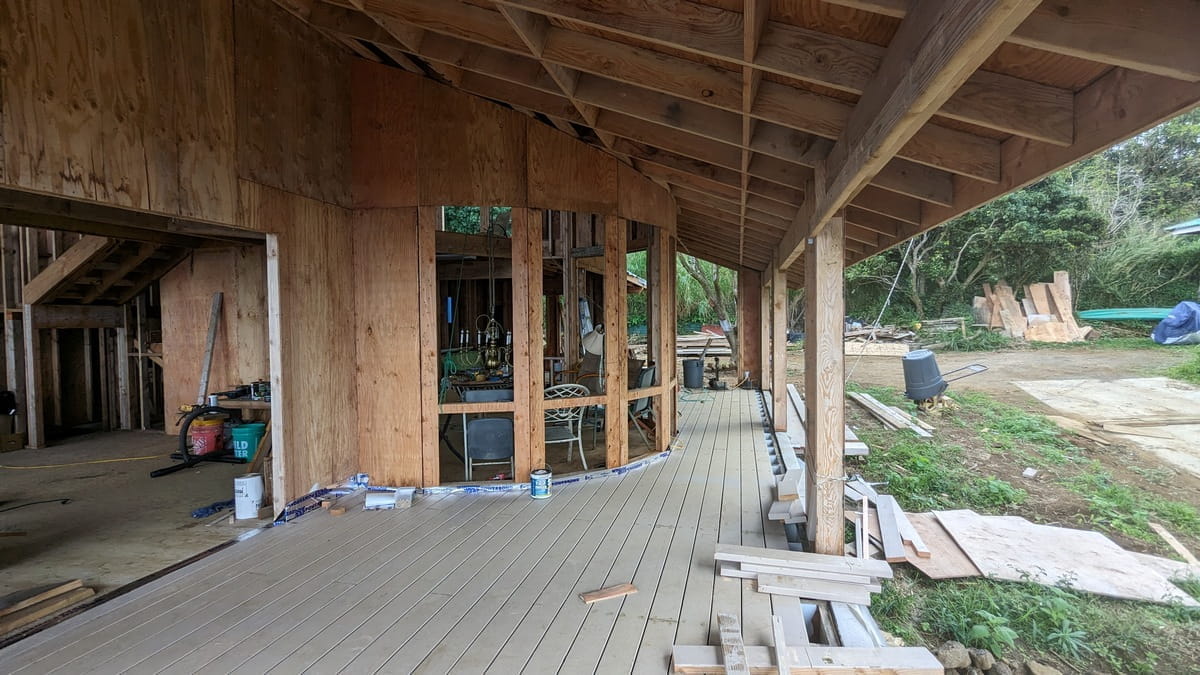
Wider Walkway View
(same picture as above, but further back)
Sometimes the camera doesn't get wide enough so this picture from further back may give you more of an idea of how the front walkway integrates into the house.
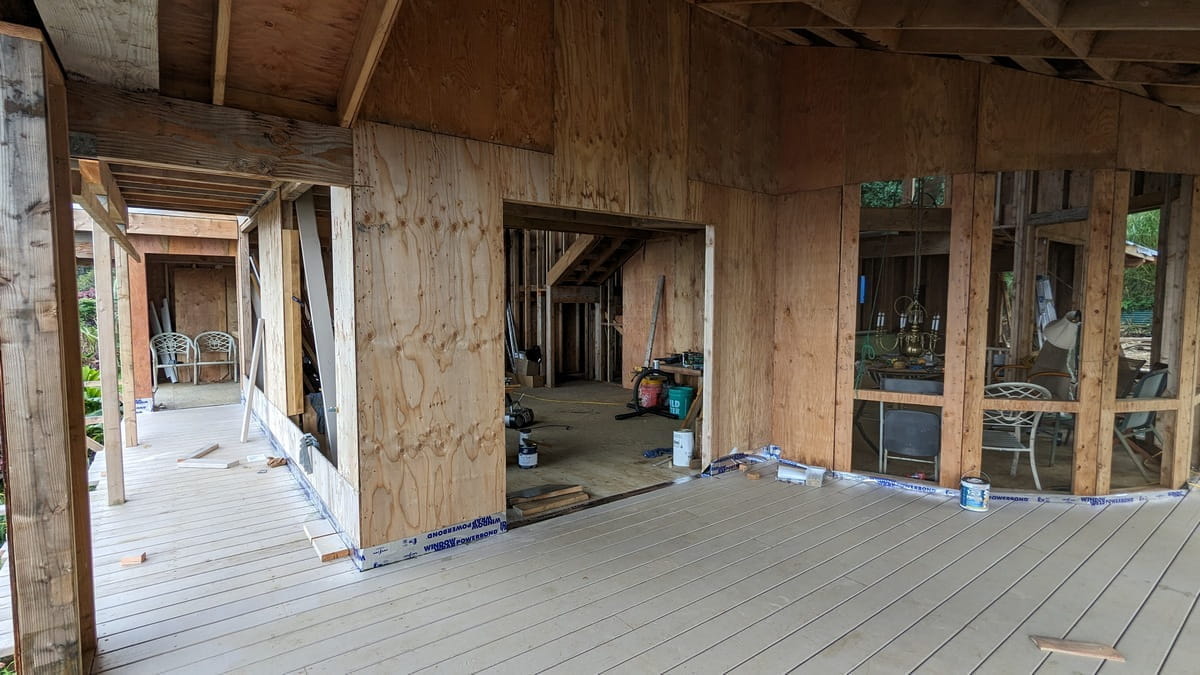
Walkway from the Other End
This is a picture from the front corner of the big lanai. The walkway across the front of the house is on the left, the lanai in front of the front door (that's still just a big hole in the wall) with the dining half circle on the right.
Waipio side Lanai
Same picture location as the one above, but looking at a different angle. The lawn still needs to be brought up level with the lanai floor, but there's still a lot of things left to be done.

Big Steel Plate
Simpson fittings aren't always the answer. We had some lovely folks over on the Kona side cut this bracket out of 1/4" plate steel. This will hold the center post to the main roof beams. Those monster honking big beams that somehow (they still won't say) Nick & Ethan managed to get up to the top of the roof.
These two plates will be through bolted to the big beams and they won't be going anywhere. (Not that they really are even without the bracket, but when going for overkill one may as well be thorough)
If you like, you can send us an email and ask about bunnies, yarn, Hawaii things, what we should have on our webpage or just about anything else.