Hawaii "Owner-Builder" Construction
📐 May & June, 2024 🔨
Foundation Continues
and more drains - oh frabjulous joy!
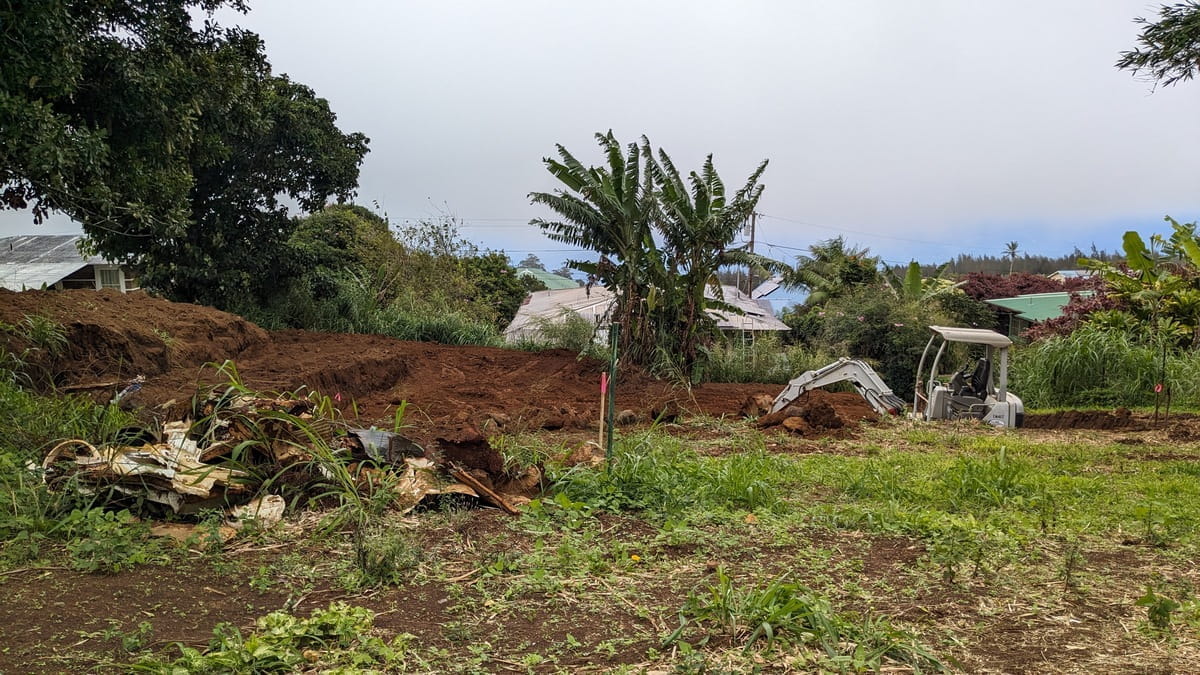
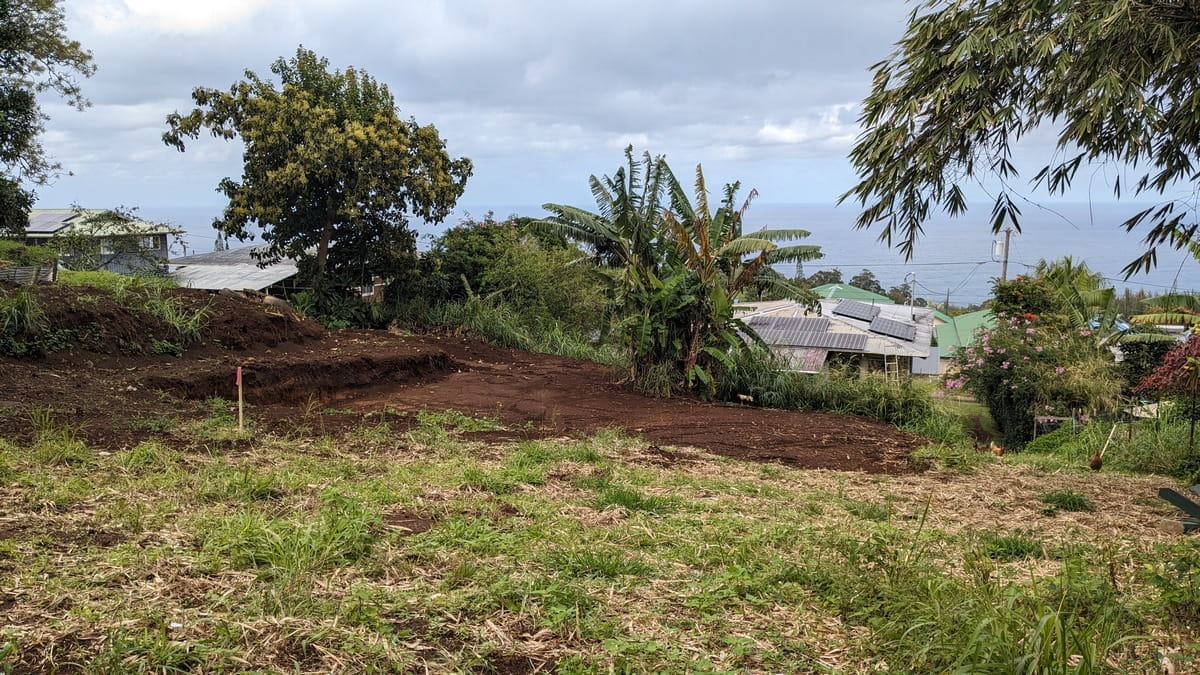
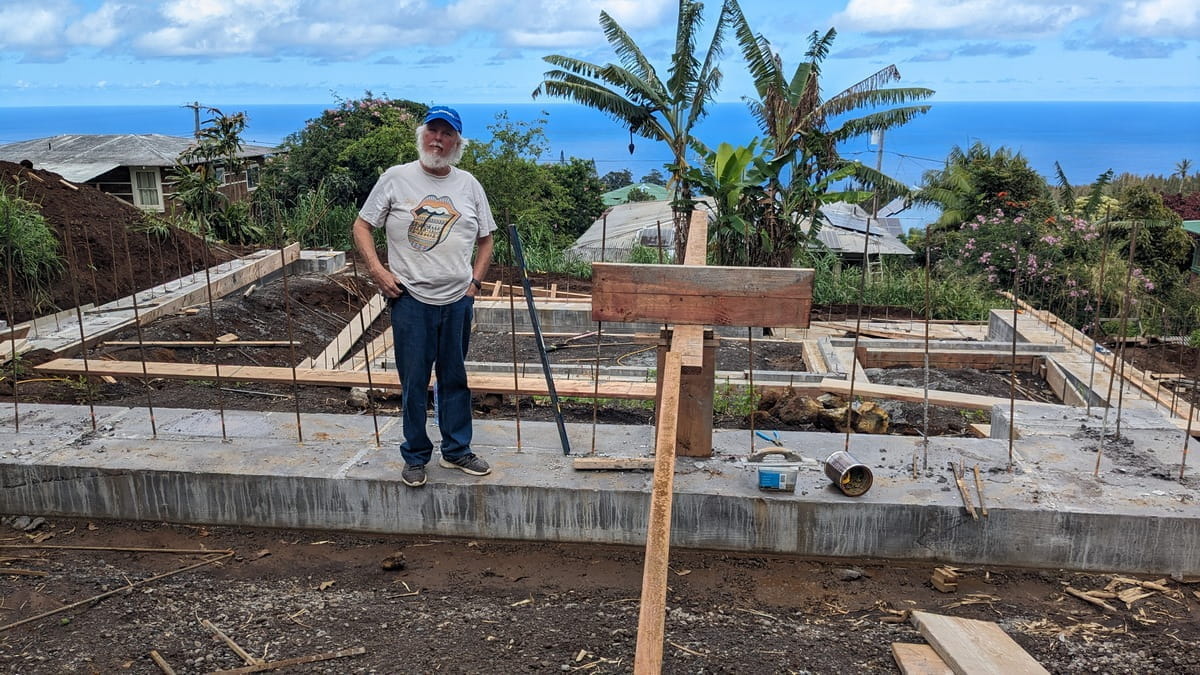
🌺 May Day Digger 🌺
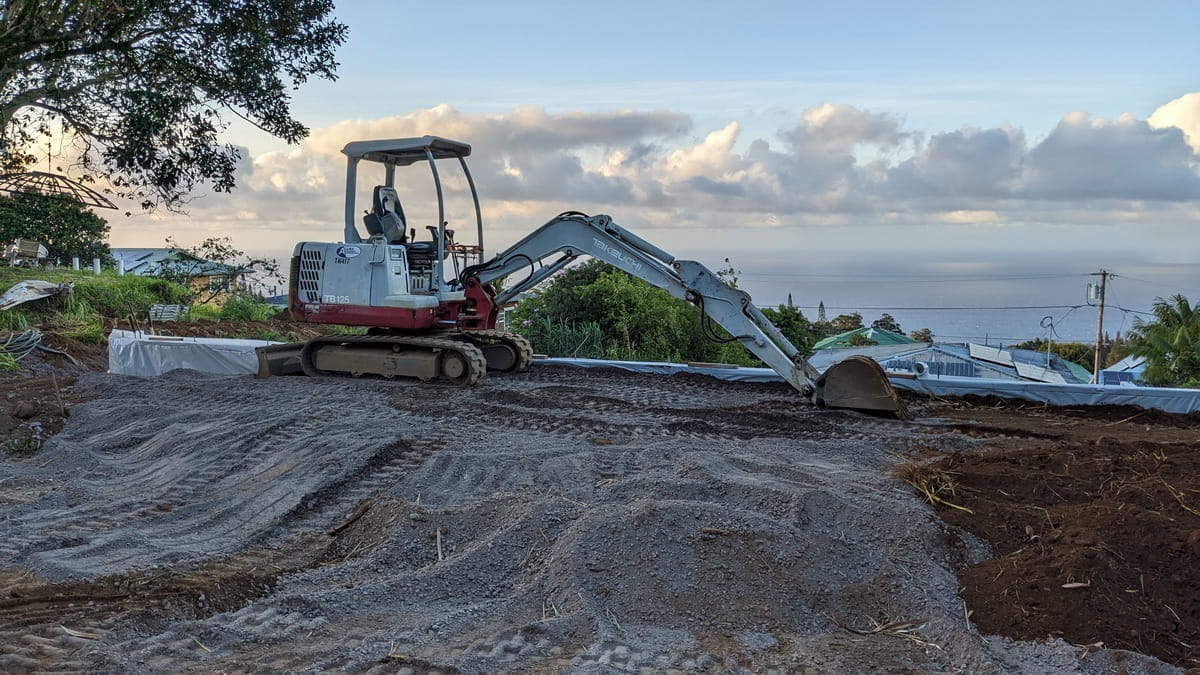
It was May Day and we didn't put a lei on the Digger!
May Day is Lei Day in Hawaii and I suppose we could have put a lei on the Digger, but well, I don't think the Digger cared. Plus we don't really have enough flowers for a lei that big! This picture is an early morning shot at the beginnings of a lovely day. We'd been plagued by rain in March and April, May was much better. It was actually dry and dusty for parts of it.
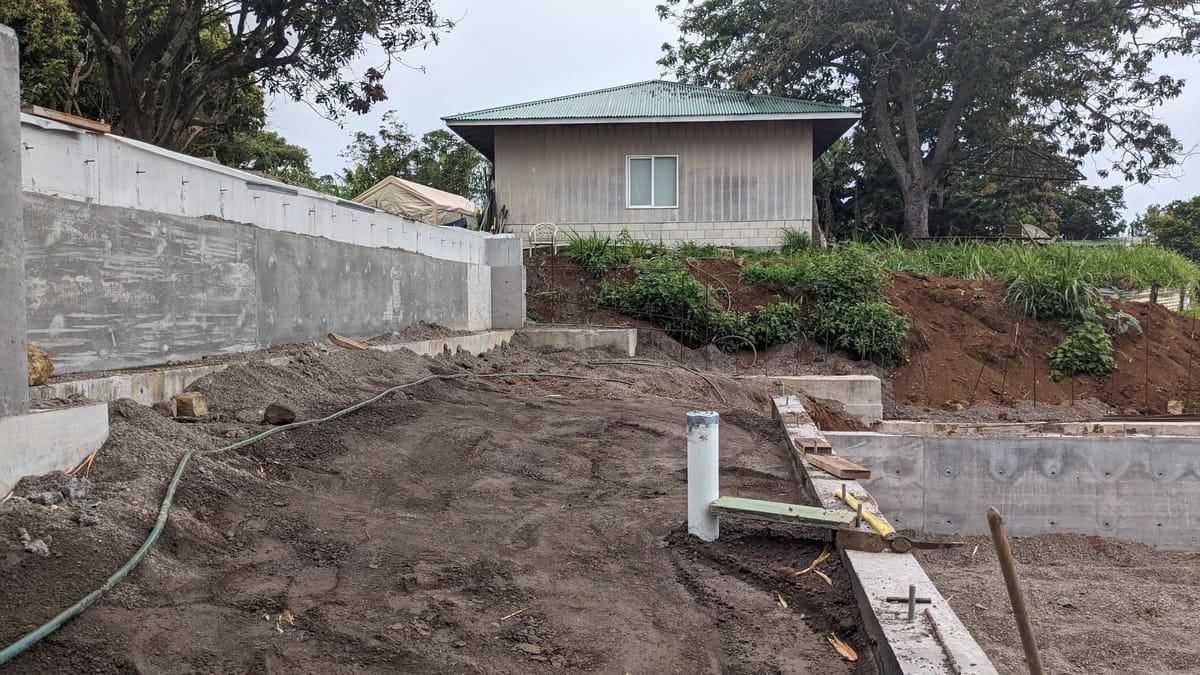
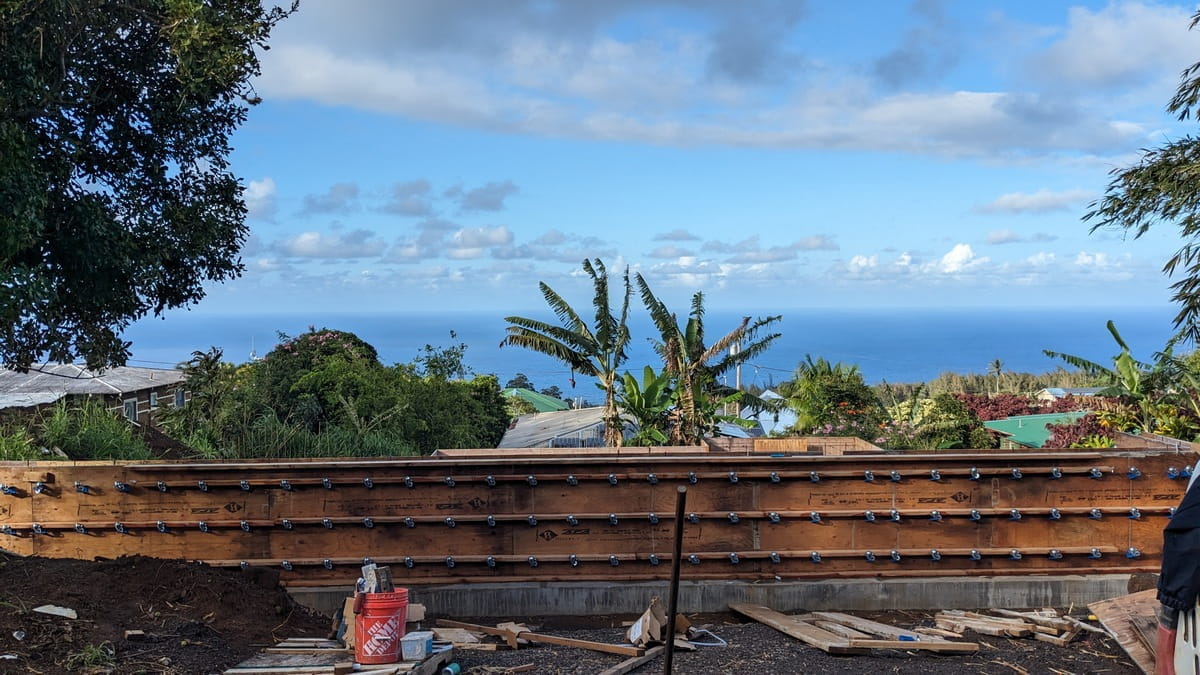
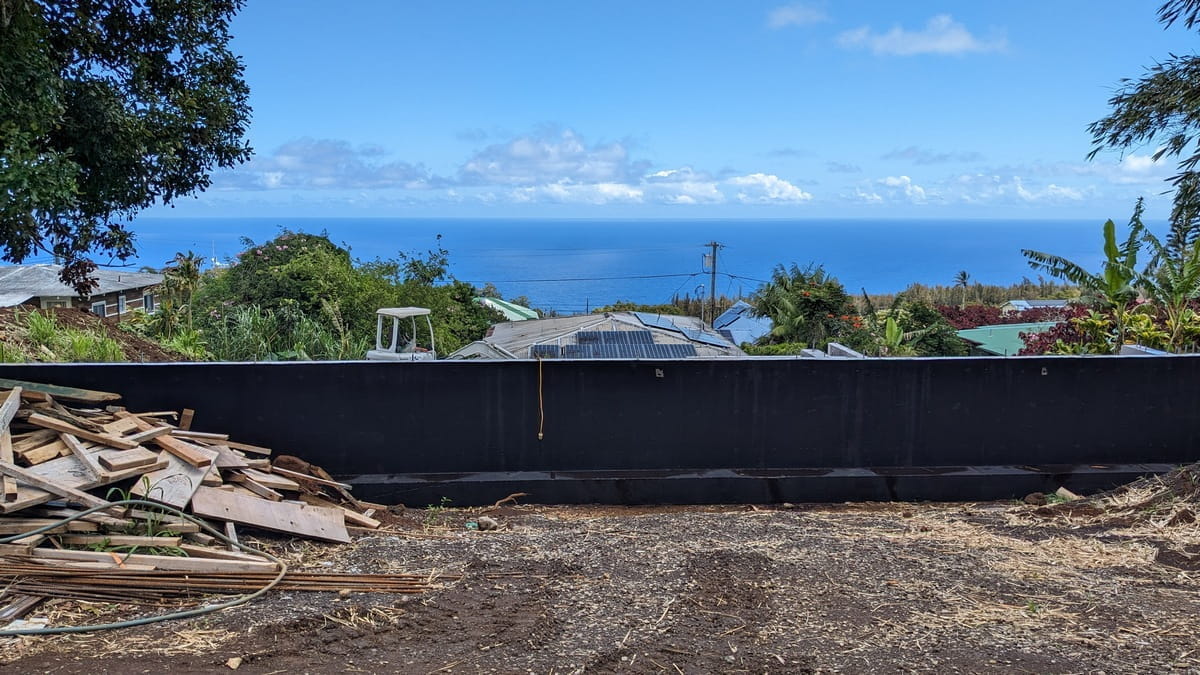
Back Wall mostly filled
it took a lot of gravel from Tyrone
(and still needs more!)
It may not look like much from this angle, but the back four foot tall wall is now mostly filled to the top. Remember when it was a four foot tall wall standing on a foundation a foot and a half thick? That's about a total of five feet of compacted gravel fill. This is where the carport will be. There will be even more gravel here to fill it a bit more from what the picture shows. Eventually, the top of the carport concrete slab will be dead level with the top of the back wall. Which will be the floor level for the interior floor. No steps anywhere - that's the plan! Now all we need is more gravel. Truckloads of it. Fortunately, we can text Tyrone and gravel will appear.
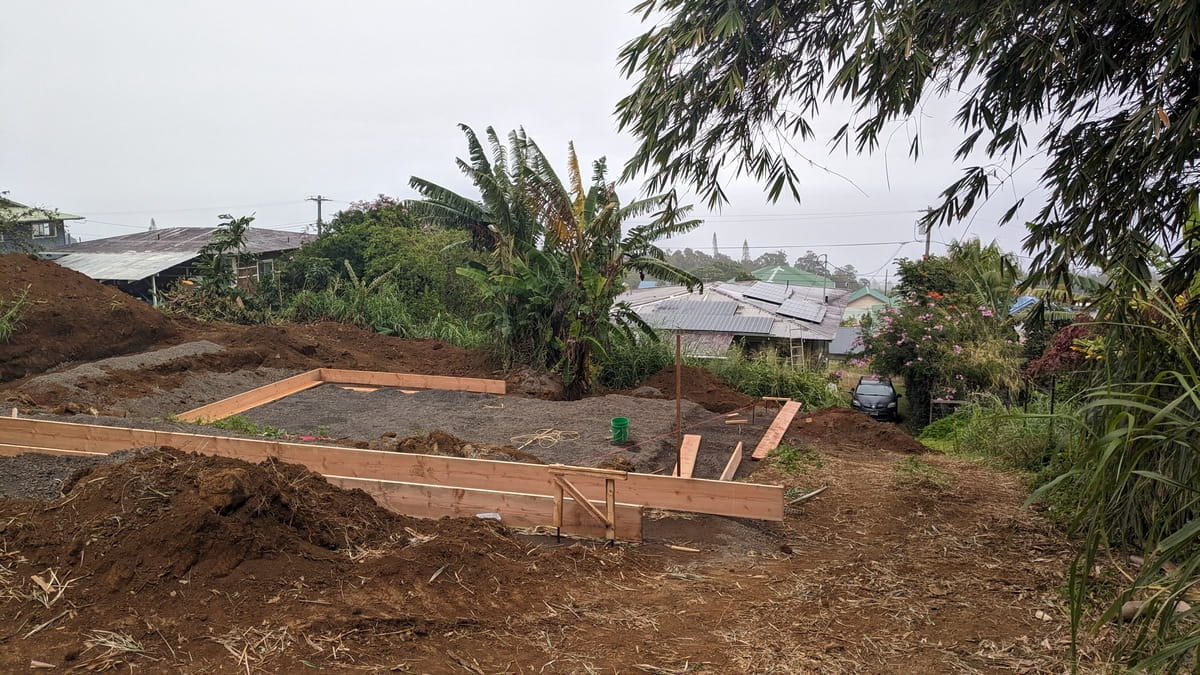
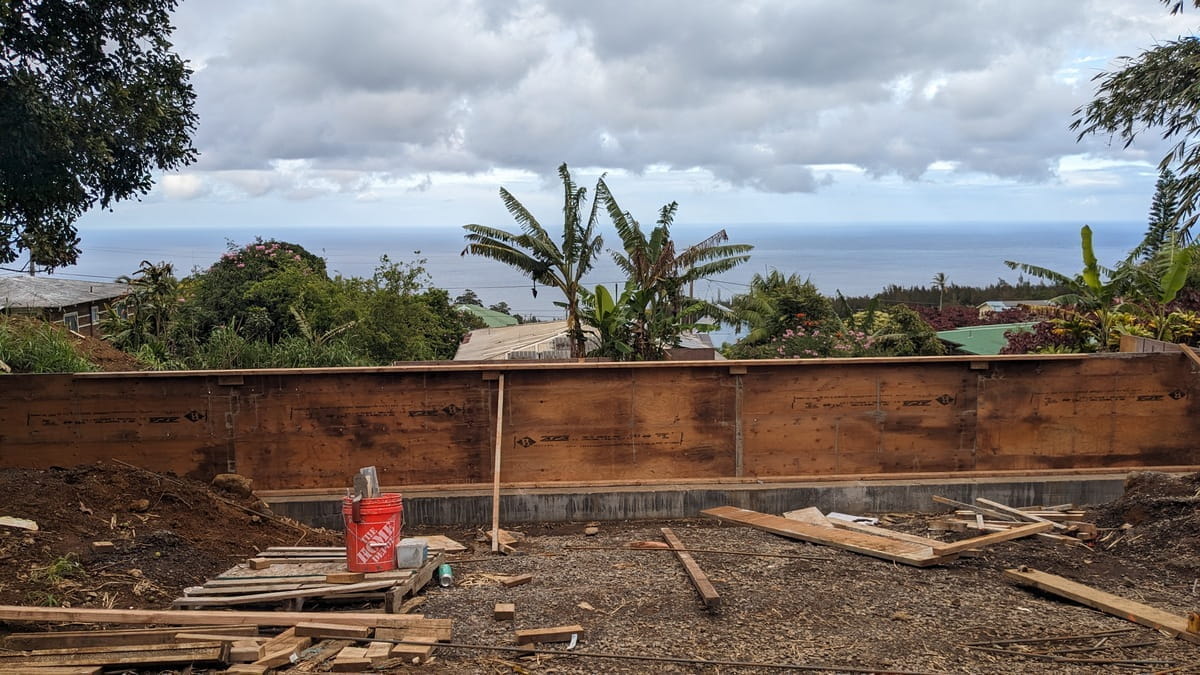
Back Wall
same view from the Waipio side
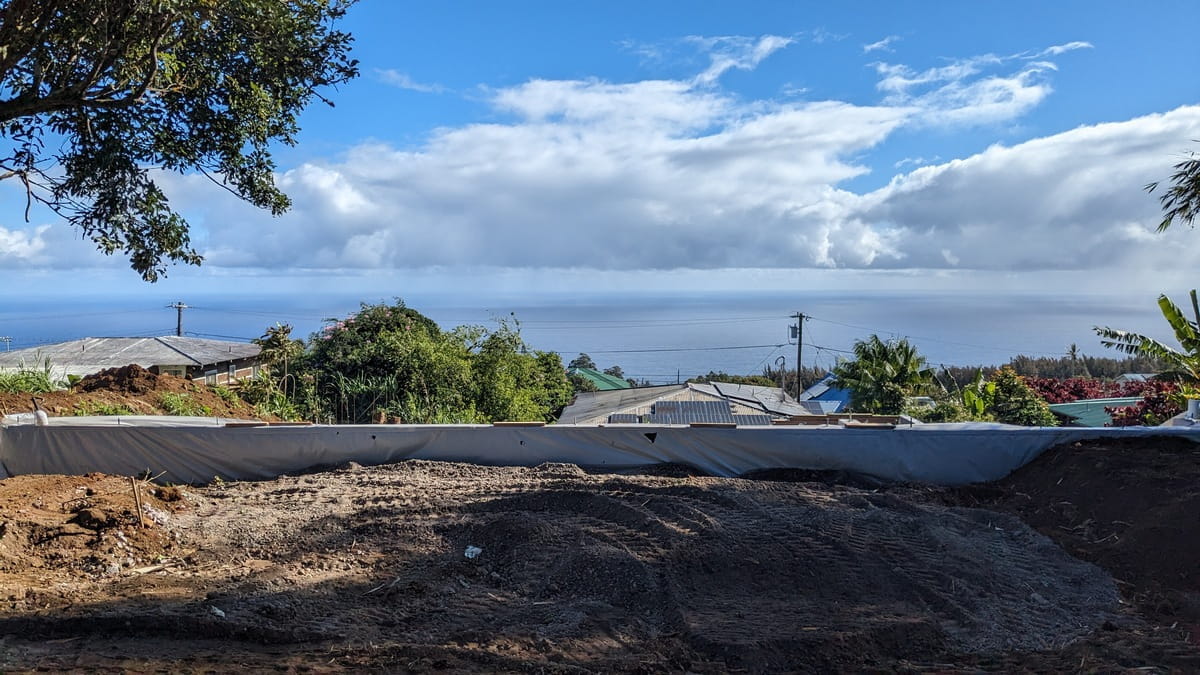
A lot of these pictures are taken from the same spots so towards the end of this webpage, there's a slide show of the center of the back wall from January to June. At the moment and in this picture there's not a lot of construction visible from this particular picture site since it's all below ground level. This is at the back mauka fenceline on the Waipio side of the existing driveway.
When the project is finished this will be looking at the Waipio-mauka corner of the lanai. There will be a bit of connecting driveway between the existing drive and the carport which will be on the other side of the mac nut tree. The driveway will go between the lanai and the mac nut tree. The drive will continue across the covered carport and then probably continue on down the other side of the house as well. Depends on how well we can make the elevation changes at the other side of the carport. There is quite a bit of elevation changes on this project which adds to the complexity of the build but having 'The Digger' sure helps.
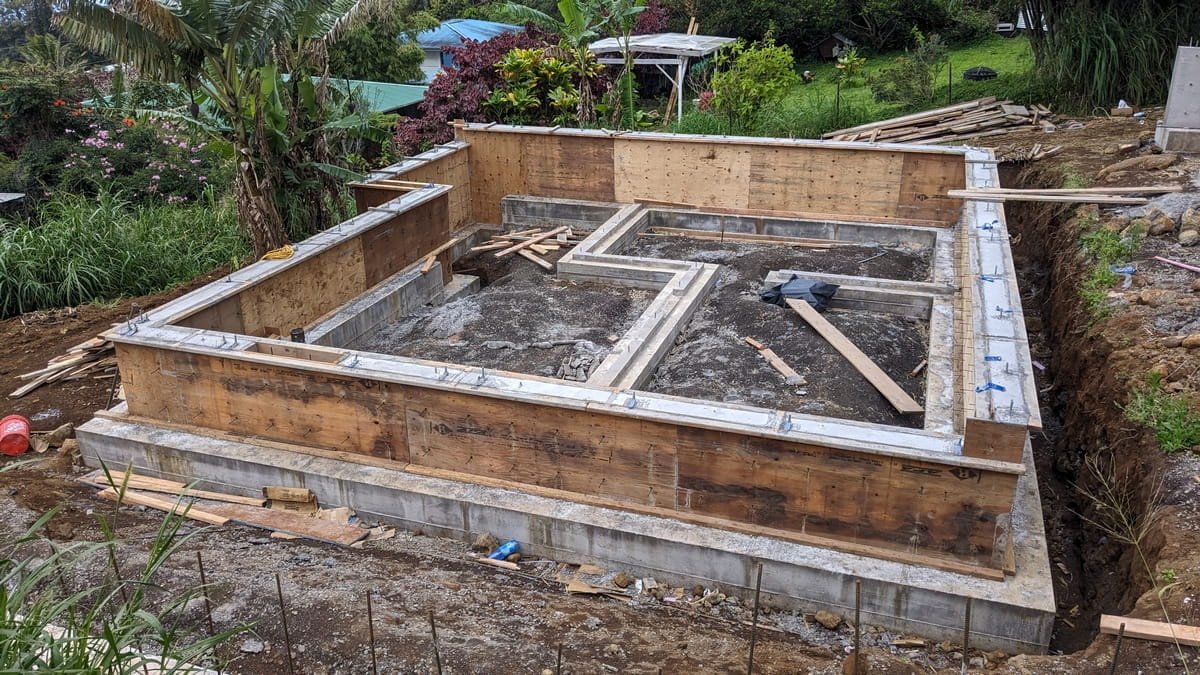
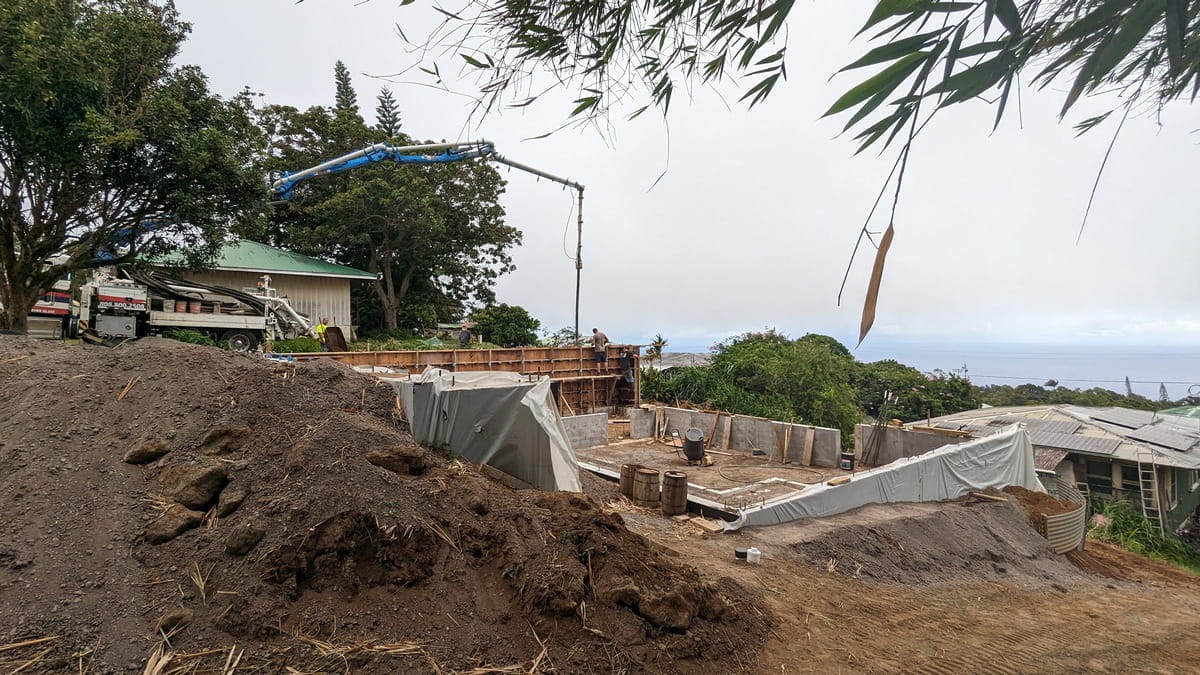
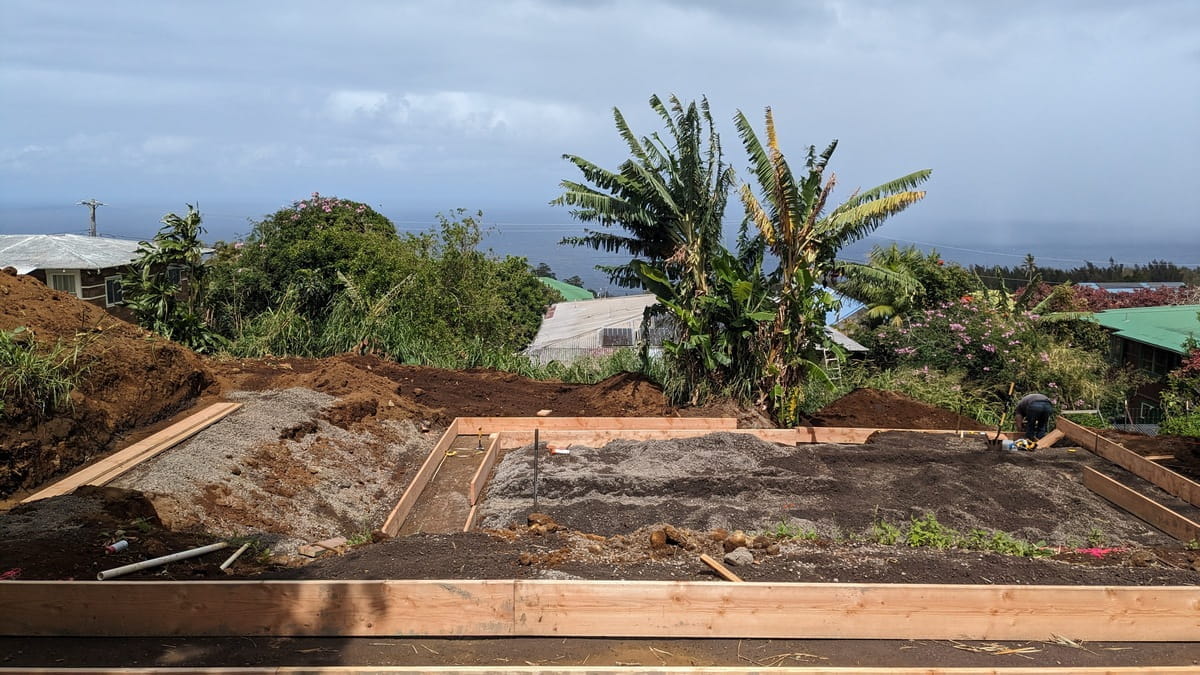
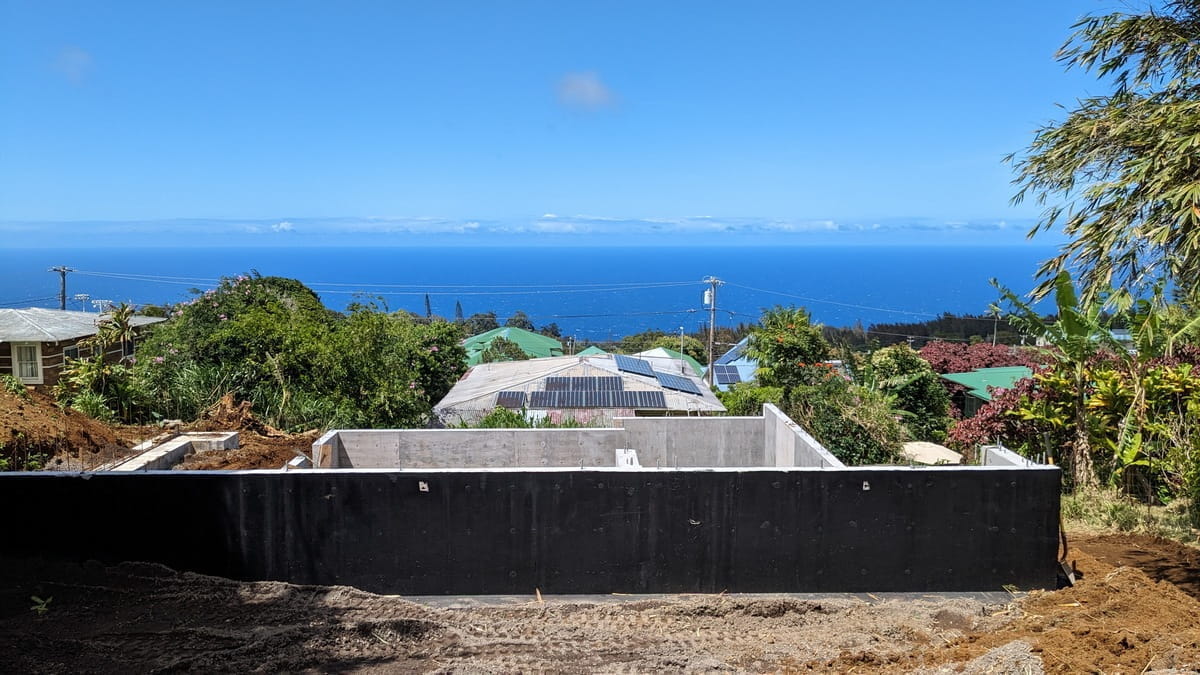
Most of the Foundation
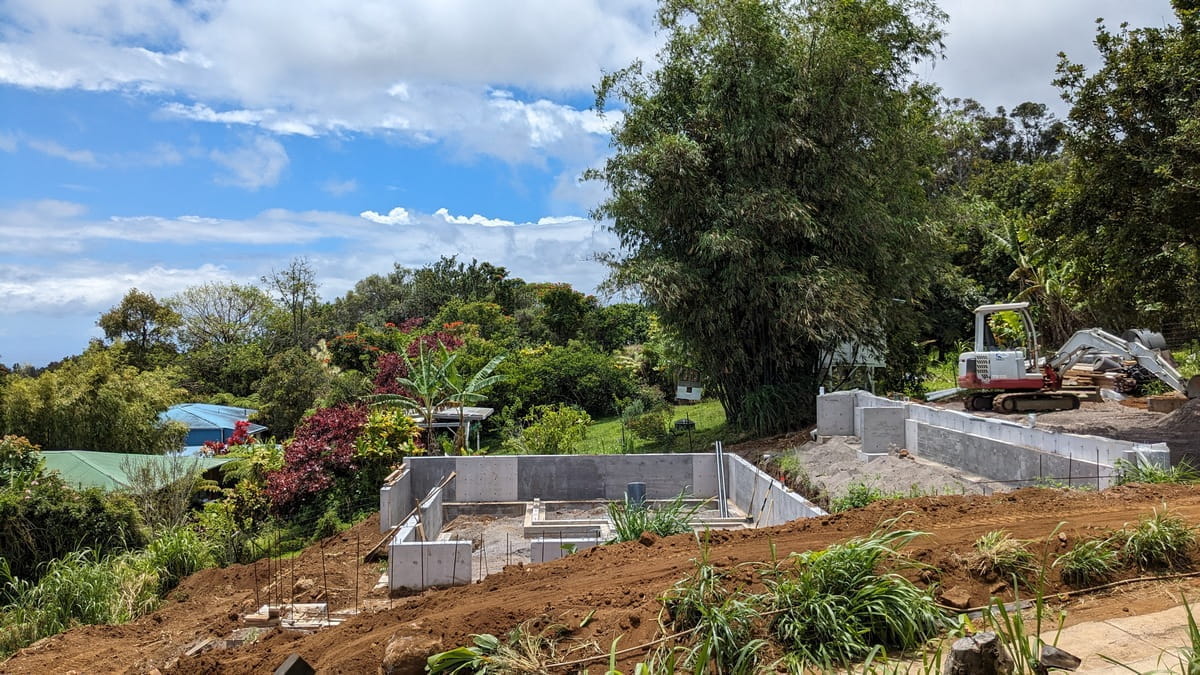
from the avocado plateau
This picture is taken from the Avocado Plateau, which is a great spot for pictures. Eventually, it should almost be an extension of the living room, even though the Avocado Plateau may probably be higher than the living room. There will be a bit of stairway up on the plateau side of the driveway to get up to it, but we're still aways away from that. How to reinforce the sides of the Avocado Plateau is a whole 'nother project.
This picture shows the major elevation changes in the foundation. The wall to the far right in the picture is the back mauka (mountain side) wall. That wall will support the back wall of the house and be the defining spot between the house and the carport. The top of that back mauka wall is approximately four feet above the lower foundation walls in the middle of the picture.
The lower foundation walls will have some wooden wall framing added to the top of the concrete walls to bring their top level up to match the back wall. The main floor framing will be at that level. In the foreground of the picture you may be able to see a line of rebar sticking up which is where the last of the concrete foundation walls will go. Currently, (early to mid-June 2024) that wall is formed up but the concrete won't arrive until the 17th. Apparently this is a busy time of year for the concrete folks so we have to make appointments as to when they will appear.
From this picture location at the edge of the Avocado Plateau, we are looking at what will eventually be a big lanai, the dining room (it's a big half circle of windows that extends into the lanai area) and the Waipio end of the front walkway that goes across the front makai (ocean) side of the house. (At the moment, all we can see of that eventual walkway is the rebar sticking up where the concrete foundation wall will be poured.) The lanai will have a roof over it and be about twelve feet deep and run the length of the house. It's facing the Avocado Plateau since otherwise it would be directly facing the prevailing tradewinds which are directly off the ocean. Nice cool winds, but a lanai with a bit of shelter from the winds will be more usable than one directly facing them since there's almost always ocean breezes.
Hmm, a guess a lot of the house in this picture is still kinda "virtual", huh? There's programs which do virtual three dimensional drawings with fly throughs and other fancy stuff, but that takes a lot more time than drawing up building drawings so they didn't get done. 2D AutoCAD is enough fuss, adding in another dimension adds in another required layer of time and there's too many other things to do (such as update this website).
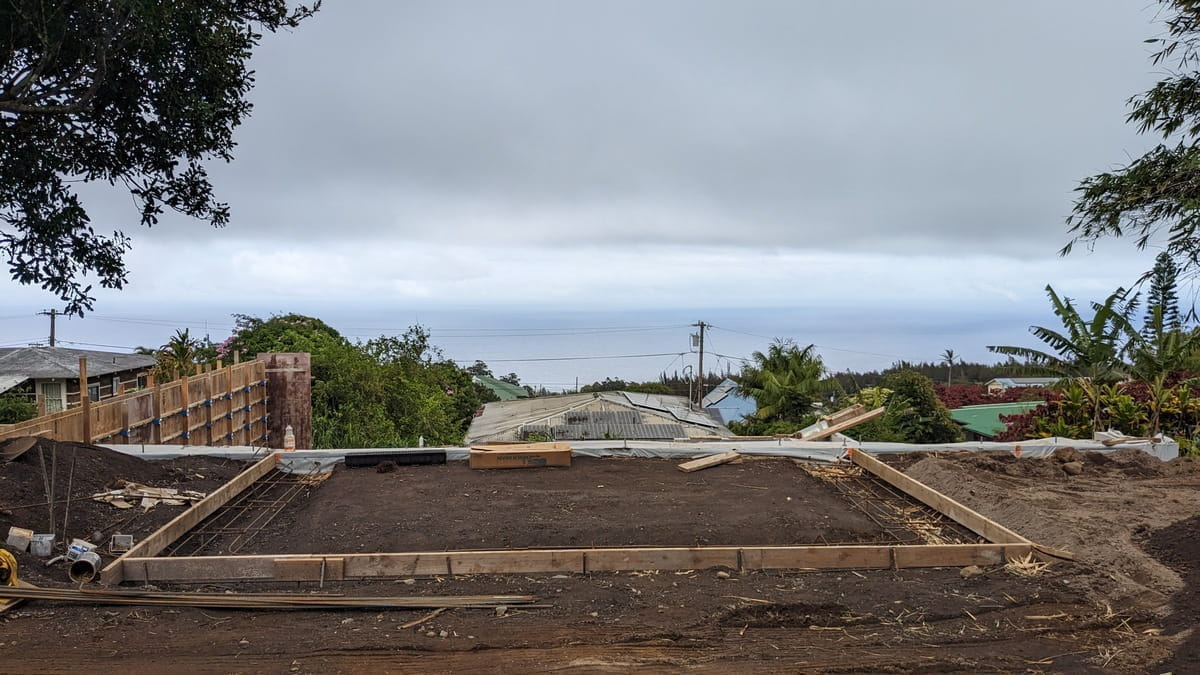
Eventual Long Storage?
(it will have a low ceiling)
We always seem to be storing long things from lumber to kayaks, so a long storage area will be useful. This is actually a terrace for the hillside in an effort to not have an eight foot tall retaining wall. The force of soil is huge, add in water and it gets worse. Having shorter walls keeps the forces smaller. It's also why there's a line of perforated pipe behind the walls, that lets the water drain out and decreases the hydraulic pressures. Hamakua soils, IMHO, are slippery and somewhat mobile, which is why these concrete foundation walls are so substantial. We could have made them smaller, but it seems a cheap bit of insurance to add more concrete. It's not a spec house, a flip or a contractor house, we're building this one for us to live in and I don't want to fix the foundation forty years from now.
Since it will be an outside storage area, we're adding in gravel here and packing it flat, no need to pour concrete. Between the ease of getting more gravel - one text to Tyrone and *poof* more gravel appears - along with the gravel stomper machine, flat gravel is easy.
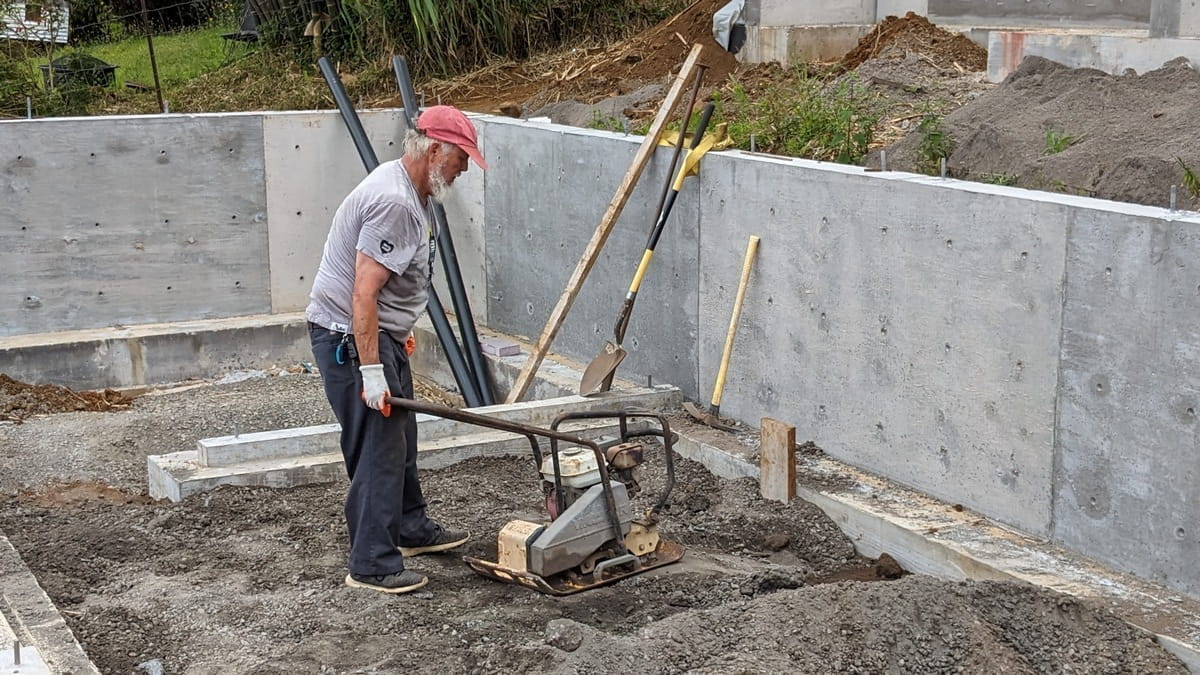
Gravel Stomper Machine
(I'm sure it has a more official name)
Having proper tools sure helps! This whatever it's called machine stomps gravel flat. That's pretty much all it does, but it does it really well. It's pretty heavy and immobile when it's not running, kinda an odd machine. We usually pick it up and move it with the excavator, not sure how other folks move theirs around.

Stomper Rescue!
wet gravel eats stompers! who knew?
It seemed a good idea to stomp the gravel after a rain since gravel is usually sprinkled with water to keep the dust down while stomping. After a heavy rain, the gravel is really wet. HOWEVER, wet gravel eats stompers! These machines can pretty much only be easily moved while they're running but on wet gravel instead of moving sideways, they dig in. Once they've gotten into a hole, they don't climb out, but just keep digging deeper. Arrgh!
Fortunately, the digger could reach the stomper and was able to lift it out of the hole. Held it up at a nice working height to be cleaned off, too.
Lots of fill required
(we haven't counted the loads of gravel)
This is an earlier picture of the lower foundation from March 27th, but it shows the original levels of the spaces between the foundation footings and walls. We want to have level gravel up to the top of the foundation wall footings. The one front corner (over on the far left side where those short boards are all in a pile) has almost three feet of gravel fill. There's at least a foot of gravel needed pretty much everywhere else. Several loads of gravel were even added before the concrete wall forms were shaped up, but we will still needed a lot more gravel inside the foundation area to level it.
Getting gravel inside
(too bad the digger can't reach further)
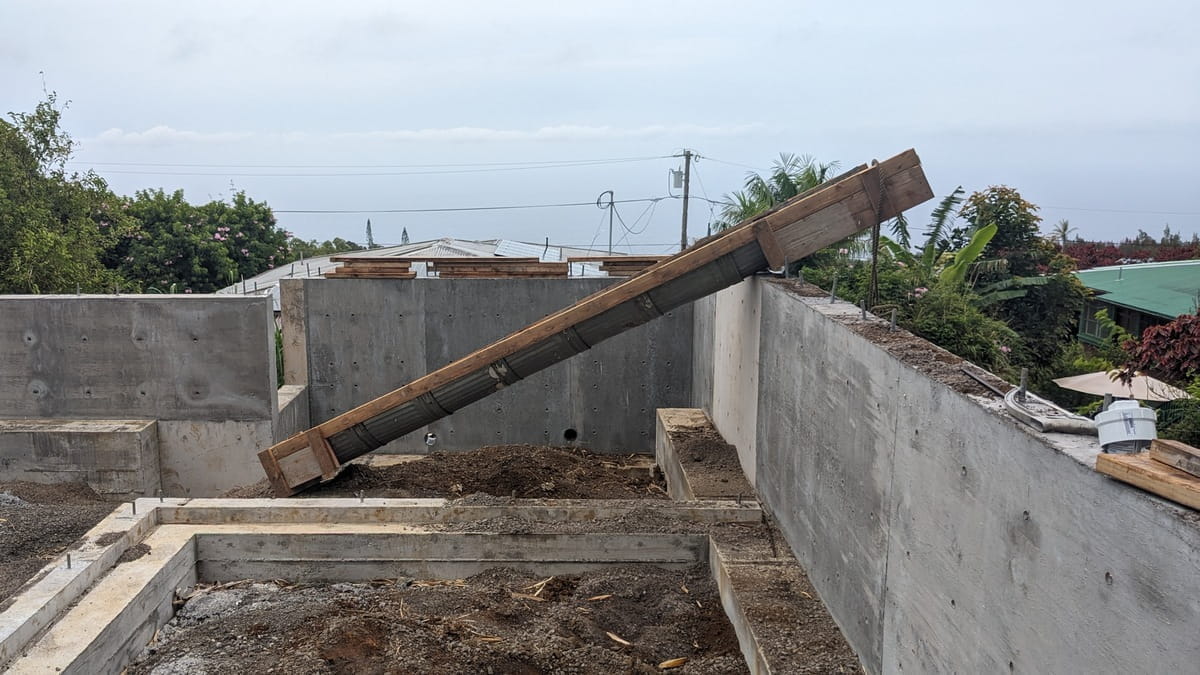
A great way to get gravel inside!
amazing what can be done with thrown away trash cans
This is another of the Great Amazing Rossini's superpowers. He fixes things.
The basic problem is getting the gravel to the center of the foundation. The digger only has about an eighteen foot reach, which doesn't quite work for a forty foot wide foundation. So, at the transfer station (our local dump) he found a lot of metal trash cans which had been thrown out because the bottoms had rusted through. Perfect! He lined them up and reinforced them with wood slats (if a 2x bit of wood can be considered a 'slat') and it became a perfect gravel chute. It was even sturdy enough to survive the project. I may repurpose it yet again into some sort of raised bed garden to grow lettuce, perhaps?
Flattening and compacting gravel
add gravel and flatten, it's been a week of it!

Almost finished with interior gravel
It isn't strictly required that this area be filled with gravel and flattened, but more than likely we will be keeping things here since it will be dry and under the house. With a flat gravel floor, it can be some sort of useful space. If we wait until the walls are framed on top of the conrete foundations, it will be a lot harder to get gravel in here. We're also waiting for the conrete walls to cure before Nick & Ethan come back and frame on top of them, so may as well use the time to add gravel.
We were getting gravel to the inside of the lower foundation in any way we could. The gravel chute is made of thrown away metal trashcans which had rotted out bottoms. They were cut in half and set into a wooden frame to make a long chute to the middle of the foundation. The digger can't reach the middle and now that the walls are poured, it can't get to the middle at all.
In the corner where the chute is, the depth of gravel is almost three feet. That's a lot of gravel fill which was brought in one excavator scoop at a time and then packed down with the gravel stomper.
That corner is particularly deep because we had to go down to undisturbed soil for the foundations. The other option would have been to add compacted gravel and then put the foundations on top of that, but deeper foundations are structurally stronger. Of course, we now have to do some work to the outside of that corner.
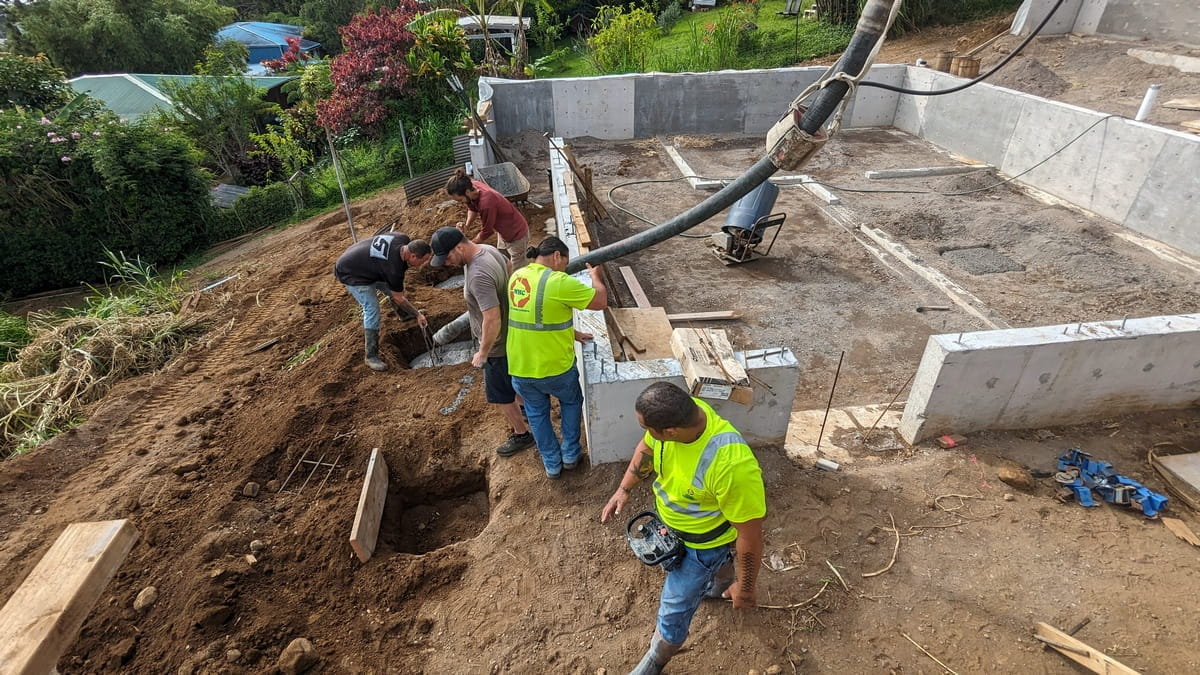
Corner Reinforcement
aka "keeping soil uphill"
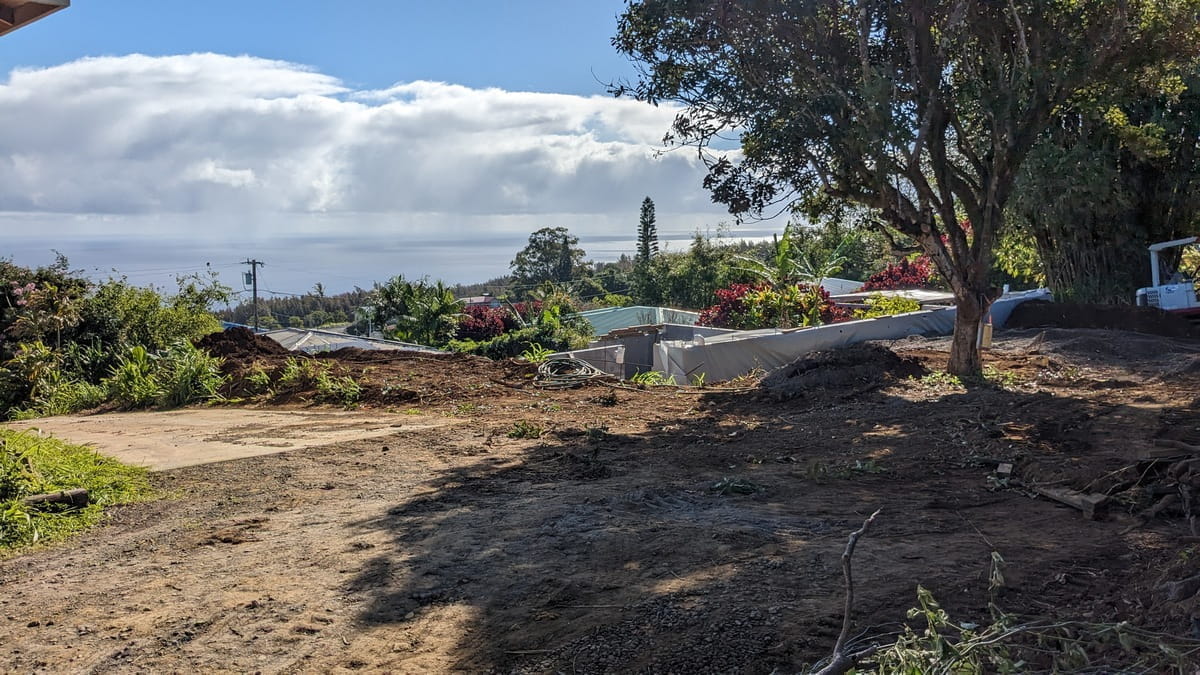
Lower Hilo - Mauka corner
Needs gravel here, too
The whole project is on a hillside, we're always having to make adjustments and accommodations to try and outwit gravity. Plus we occasionally get a little bit of rainfall. Guess it's called "rainy season" for a reason and so erosion is also a major concern.
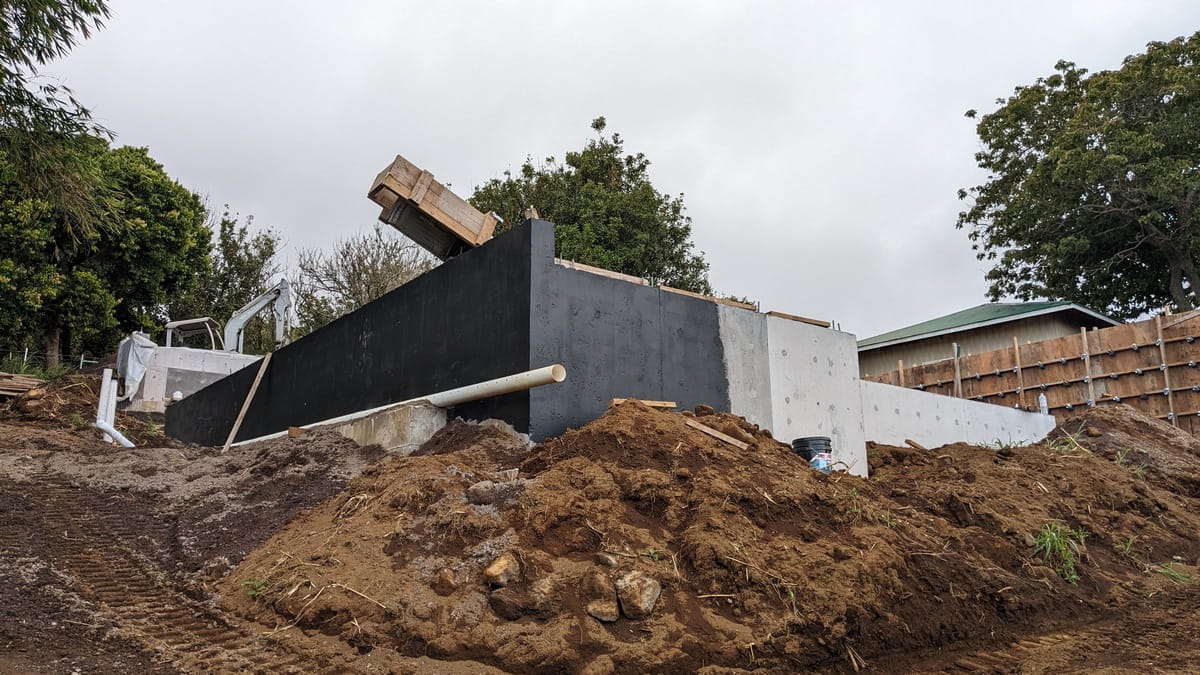
This is the lower Hilo/Makai corner and it needs gravel outside as well as inside the wall. The white pipe is the "French drain" which will help keep the foundation dry. The black paint is also waterproofing. And there will be a plastic "waterproof membrane" (fancy word for a sheet of plastic, don'tcha think?) on the wall, too.
That wooden square sticking up above the wall is the end of the gravel chute. We were adding gravel to the inside of the foundations for almost a week although we were also working on French drains and other things as well. After the walls get framed up, in order to get gravel to the interior, it would involve wheelbarrows. Gravel chutes and excavators are much easier, even though it did take awhile to get all the gravel in there.

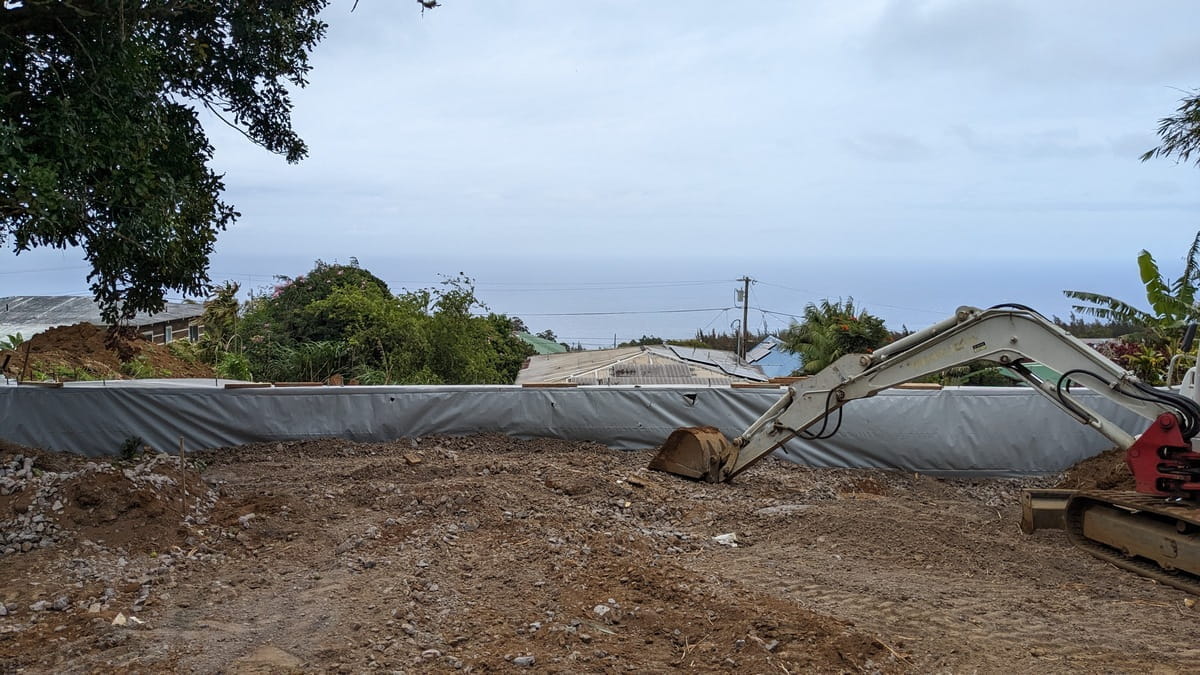
Steep Corner
Needs some sort of soil retaining system
Any waterproofing we can add is a good thing which is why the big sheet of white plastic. Periodically, we get a lot of rainfall, so we're hoping all these measures will keep the foundation dry.
Erosion is also a very probable problem, so we will need to do something to keep this corner stable. Some options would be a "rock faced embankment" although - unless we stuck the rocks to the hillside with concrete - that would need weeding or other maintenance. The crew, Nick & Ethan, will also be doing some framing on top of this wall, so having some sort of semi-level area to work for them would be good. We could also just add in a lot of rocks to the soil here and hope the rain doesn't wash all the soil away although that would again be a problem to keep weeded.
In the back ground of the picture, off there to the right, you can see the forms for the final concrete wall. That will support the outer edge of the lanai and the top of that wall will be the final floor level for the main floor of the house. There's about four feet of wooden wall framing that goes on top of this corner to raise it up to the level of the top of the final concrete wall.
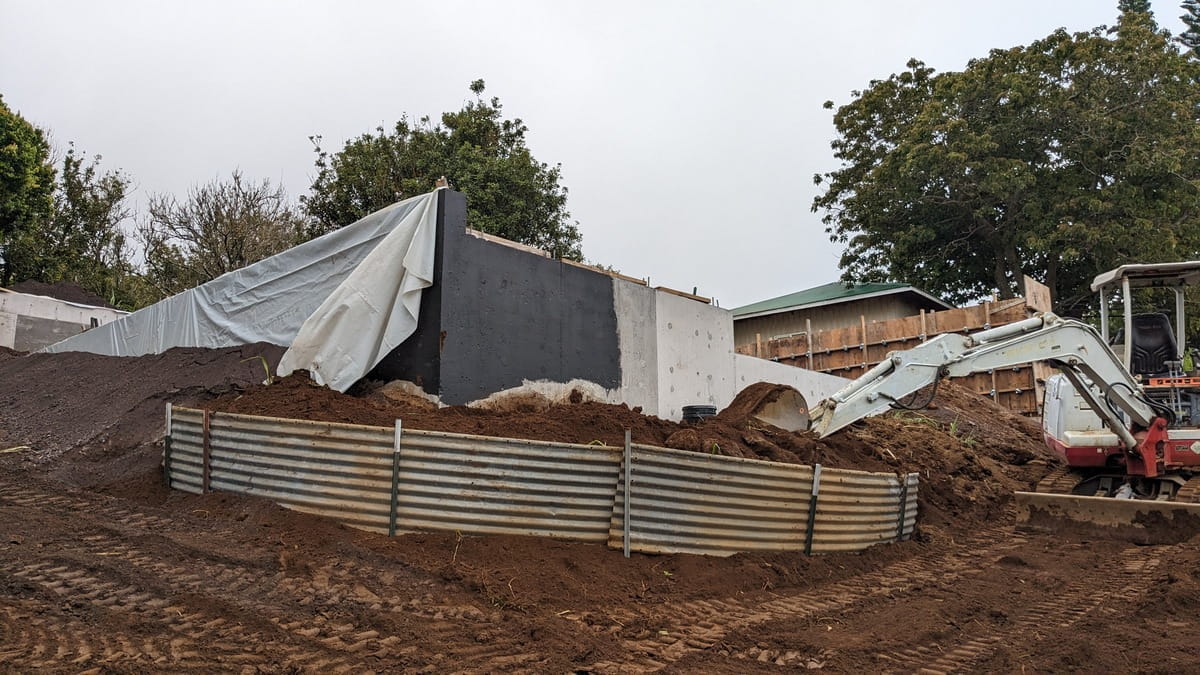
Repurposed Water Tank
may not be fancy, but it should work
There needs to be something to keep the soil and gravel up against the building so we're using some old water tank galvanized sheets to keep the corner soil contained. They're heavy gauge galvanized curved sheets of corrugated steel. This picture was the first attempt, it wasn't straight and wasn't very sturdy so we got some new posts and bolted the sheets together for the next attempt. Construction things frequently work better the second time around.
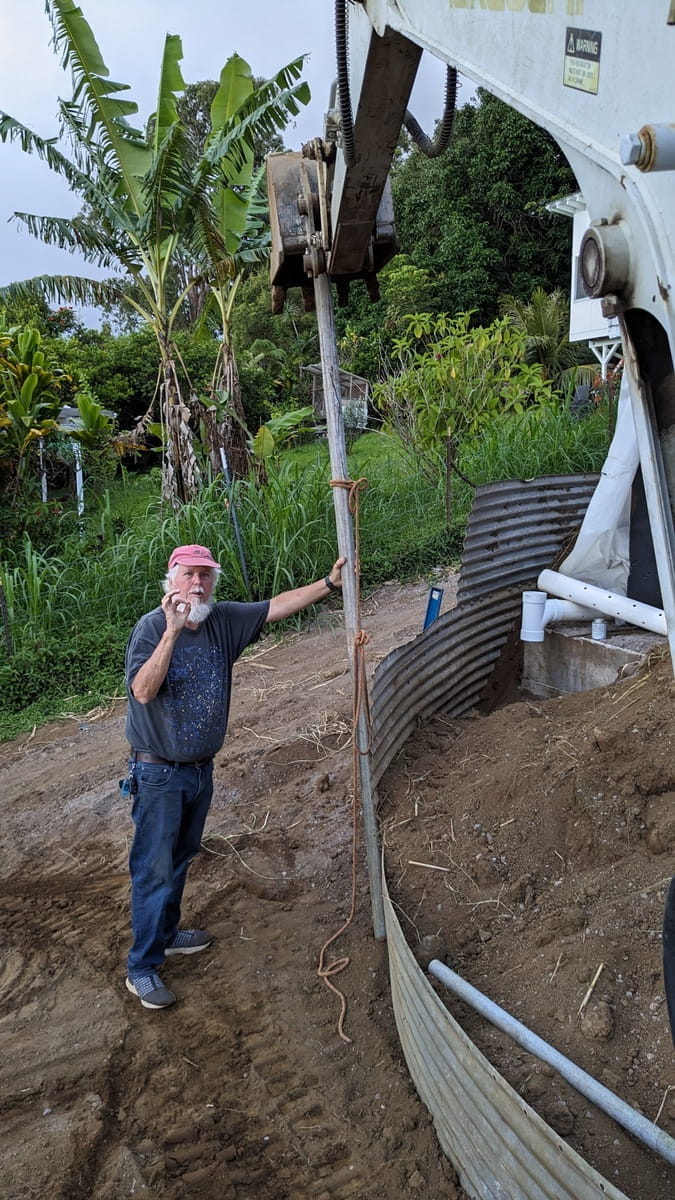
Installing Posts
much easier than using a post pounder
Instead of trying to use a traditional post pounder on an exceptionally tall post, it's surprisingly easy to push them into the ground with the digger. It's all done verrry slooowly because of possible injuries to people and pipes and we managed not to injure any people although one pipe was bent. It was then straightened as well, but that wouldn't have been a people option so it was good that it was a pipe. Hydraulics are absolutely amazing!

The "Tank Corner" during the last big concrete pour
(still needs more metal sheets)
This picture was taken June 17th, during the (hopefully) last of the big concrete pours. It still needs more sheets of galvanized iron, but there is also going to be an electrical conduit that goes up to this corner of the building - kinda where that white spot is - so we can't add more water tank sheets until after the electrical line is installed. Eventually, the water tank corner will circle around to parallel with the front of the house. Then we haven't a clue how we're gonna keep the soil where it should be. There's also "something to be done" with the Hilo side of the house (the left side of the picture) to keep the soil and gravel up against the foundation there.

Mahealani Rose
(not positive on that spelling)
That Water Tank Corner is gonna look pretty tall although there will be some more fill near the bottom so that may shorten it's visual height. When we were visiting Canada last year, there were a lot of city flower pots that had sweet potato vines running over the sides various canna flowers in the middle. That might look good here and we like eating sweet potatoes! Maybe some climbing roses? We have a "Mahealani" rose which is a red mostly thornless semi-climber which would perhaps cascade nicely over the side?
There's also nasturiums which can cascade nicely, although they go nutz and then die off so there'd be periods of visible water tank siding. Sweet potatoes pretty much keep going. Wonder if something like watermelons could be done? They'd have to have some sort of support for the melons, but I like watermelons! Well, can't do much gardening until after the house is built so there's time to sort this out.
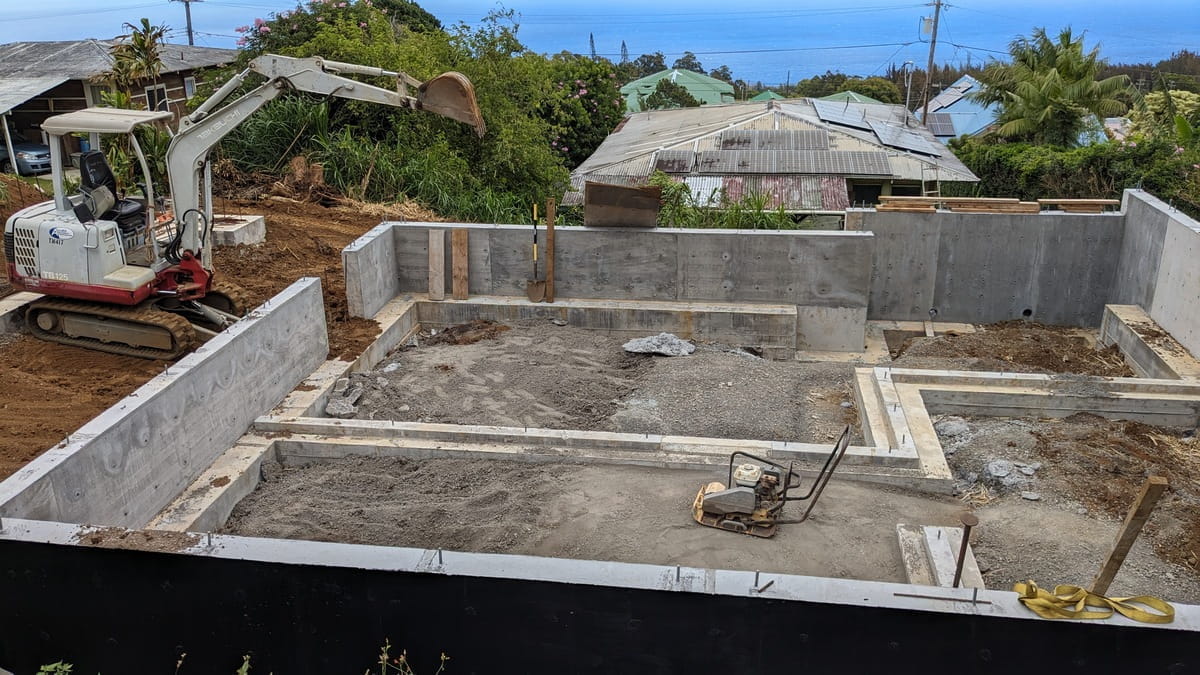
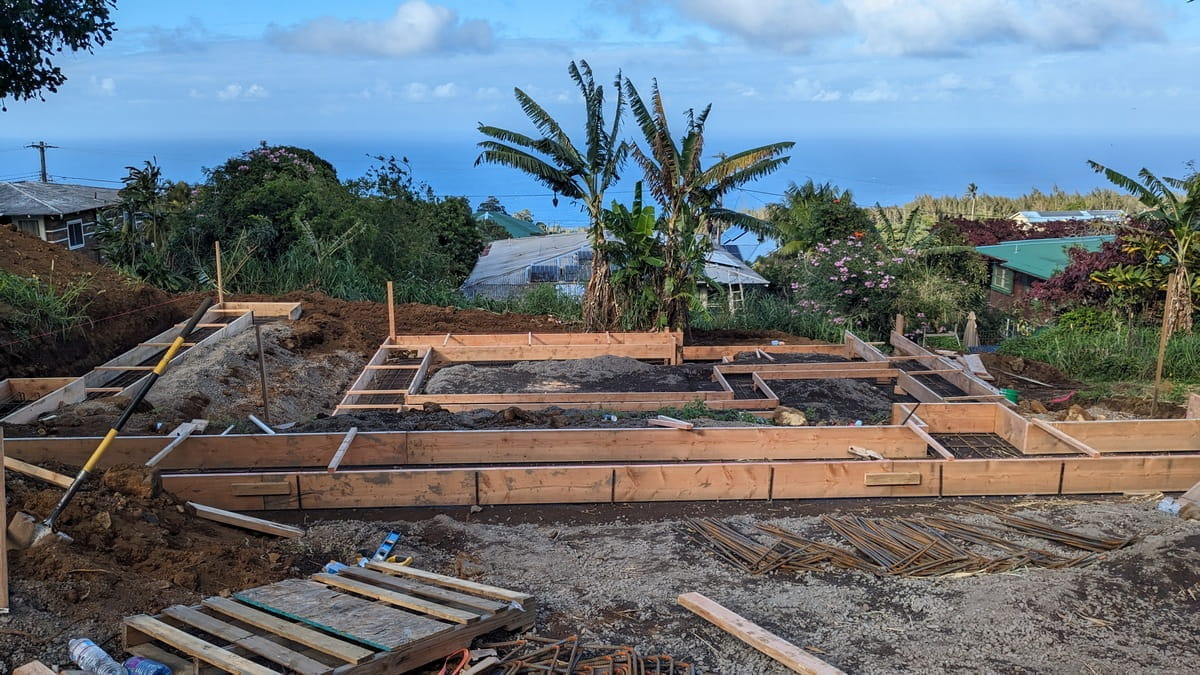
Concrete Pour Overview
pumper trucks sure do help
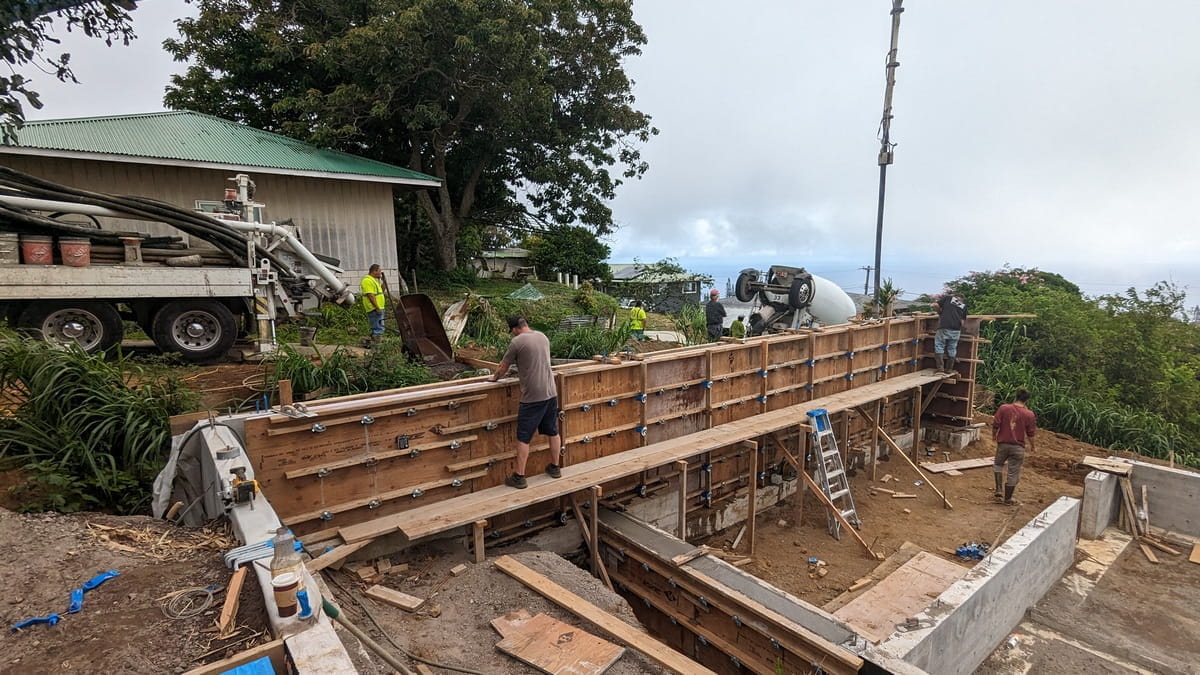
Nick on the Wall
site built scaffolding
Concrete workers
the guy in front has the pumper truck joysticks
June 17th, 2024, this is hopefully the last of the big concrete pours. The last (and biggest) foundation wall was poured, a small wall at the back of the lower lanai (holds back the soil to make the "long storage" area level) was poured, three "isolated" footings for the front walkway, the carport slab and the footing for under the center post that holds up the ends of the center ridge roof beams. Kinda all the odds and ends of the concrete that hadn't been poured during one of the earlier pours.
I'd wondered how Nick was gonna levitate up to the top of the wall to finish the top edge - especially since that's gonna be visible when the house is finished. He built some scaffolding and it all worked great.
When the house is finished, the top of this big concrete wall is gonna be seen as a narrow strip of concrete between the front lawn (which is technically on the 'side' of the house) and the lanai. So the top of the wall needed to be finished nicely since that will be the final visible finish. Most of the rest of the tops of the concrete walls will be covered with wood framing so the actual finish doesn't matter as much.
***
Slideshow!
***
Center Back Wall from January to June, 2024
The back wall of the house is between the carport and the rest of the house. It is a four foot tall concrete wall which holds back the soil and levels off the back yard. The top of the back four foot tall concrete wall will eventually be the finished floor level at the interior of the house. There's a trench drain between the carport and house in case of excess rain. There's also a French (perforated pipe) drain along the back, but it doesn't show up in any of the pictures.
This is a slideshow of fifteen pictures which will automatically scroll through and then start over at the beginning. They should change every six seconds and if you want to see a picture in a stationary format, click on it and it will open in a new browser window.
This series of pictures was taken from January 1st, 2024 to June 17th, 2024. It's mostly from the center of the back property line and shows the back of the house where the carport will eventually be.
January 1st, 2024
halfway through initial digging
(the pink stake is at the center back of the house - between the house and carport)
February 18th, 2024
still rough excavation
(oops, this picture is from the side)
February 24th, 2024
starting the forms for the wall foundations
(this picture is from the side, too)
February 28th, 2024
still putting in forms for the foundations for the concrete walls
March 1st, 2024
Still putting in form boards and now rebar, too
March 17th, 2024
concrete poured, measuring for the wall height.
(the top of that wall is finished interior floor level)
March 19th, 2024
form boards for back "mauka" concrete wall
March 22nd, 2024
form boards ready to pour

April 4th, 2024
Taking the form boards off the concrete wall
April 16th, 2024
lovely concrete wall
Concrete form wires removed and holes patched
April 22nd, 2024
starting to paint black waterproofing
(and bananas in the background have been moved)
April 27th, 2024
Black waterproofing and starting to fill in with gravel
April 28th, 2024
White plastic "waterproof membrane" and more gravel fill
there's a French drain across here, too, but it's buried
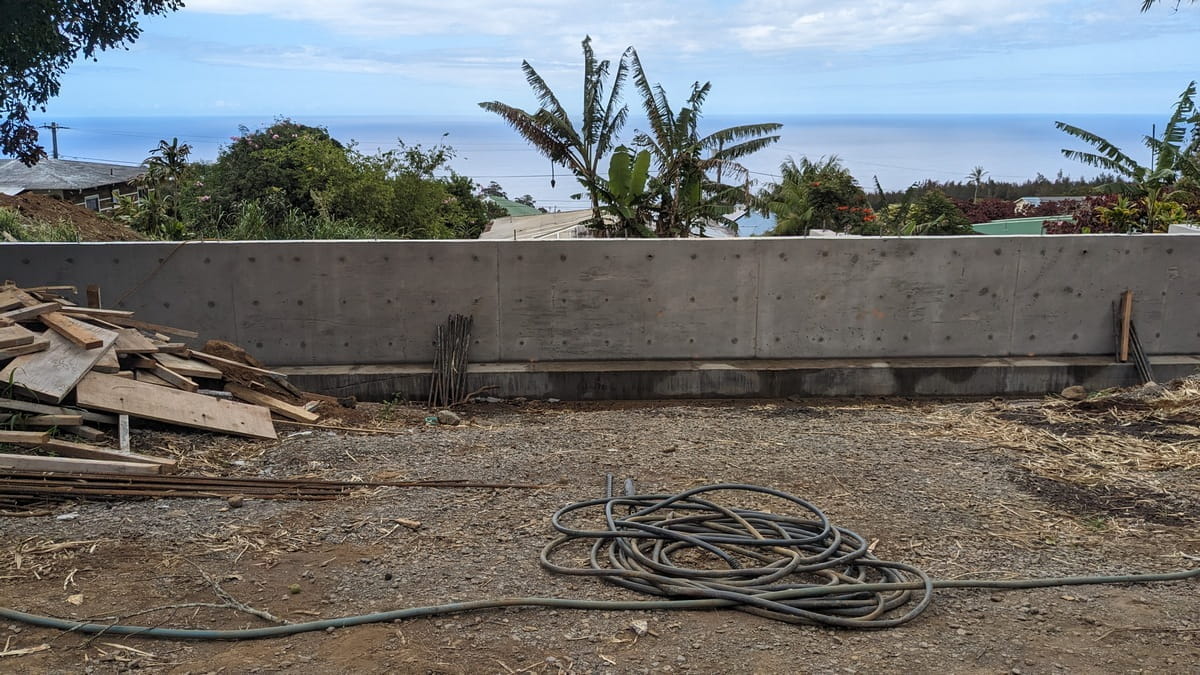
June 5th, 2024
Almost ready to pour the carport slab, needs a trench drain placed next to the wall
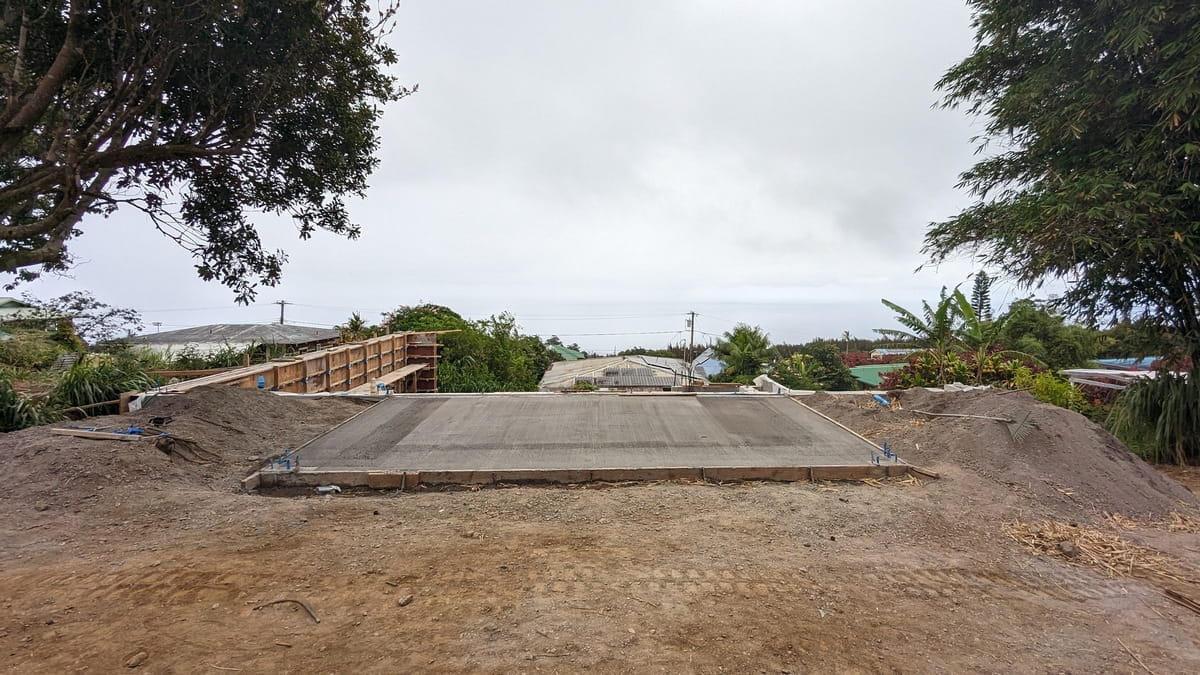
June 17th, 2024
Carport slab! Yay!
The back mauka concrete wall was pretty much poured at the original grade of the property. From there, the four foot tall wall was poured and backfilled which brought the level of the back yard up to the level of what will be the finished floor level of the interior of the house.
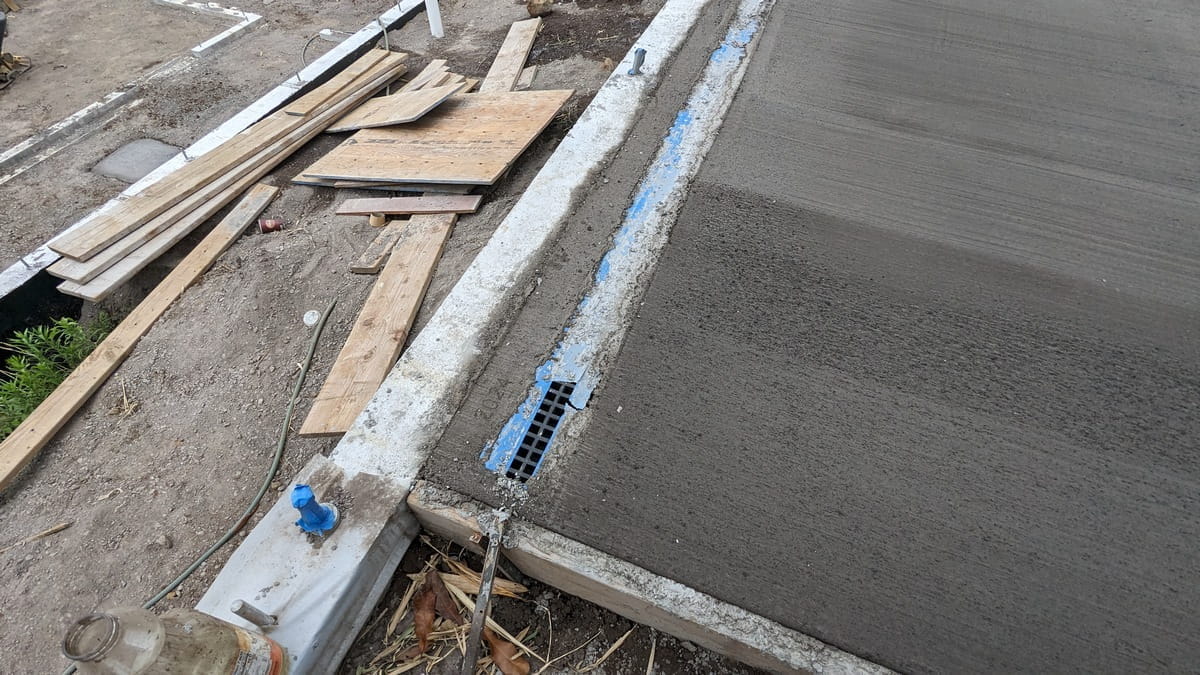
Trench Drain in carport concrete slab
hopefully effective flood insurance
Underneath the blue masking tape is a trench drain. Hopefully the tape worked and kept all the concrete out of it. We will find out soon!
If you like, you can send us an email and ask about bunnies, yarn, house building, Hawaii things, what we should have on our webpage or just about anything else.
Mail to: Hillside Farm Hawaii