The Second Half of September 2024
🔨 📐 Roof Decking! Yay! 📐 🔨
Less rain inside, yay!
(still gets drips, though)
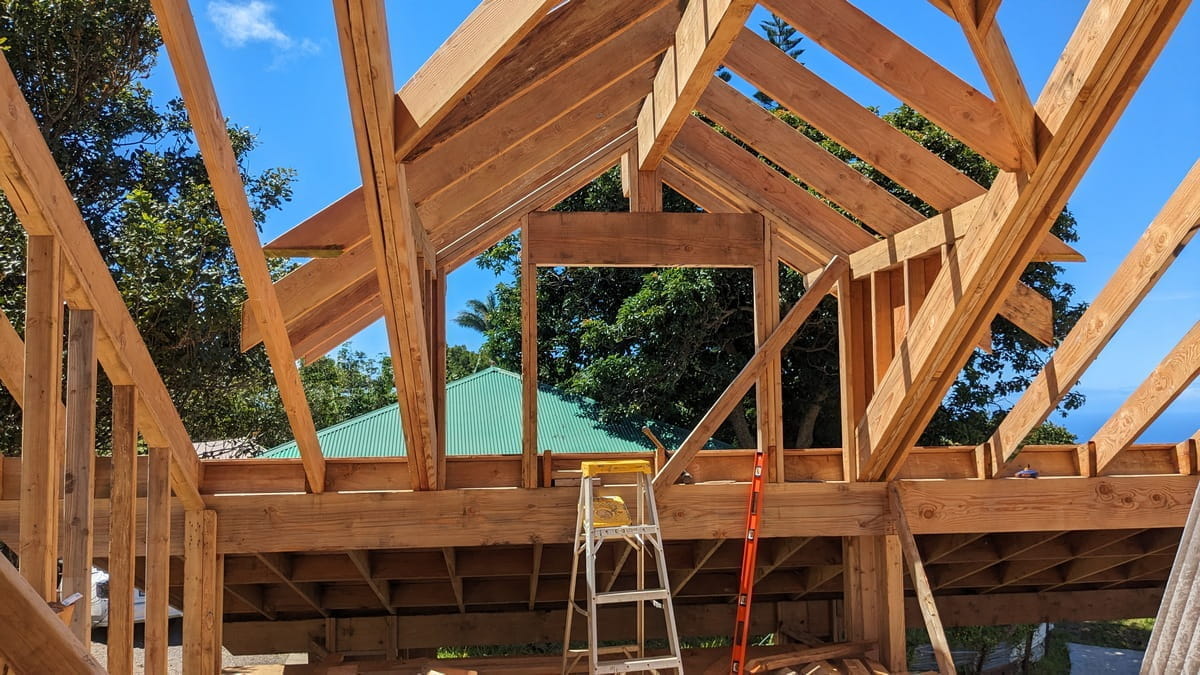
September 16th, 2024
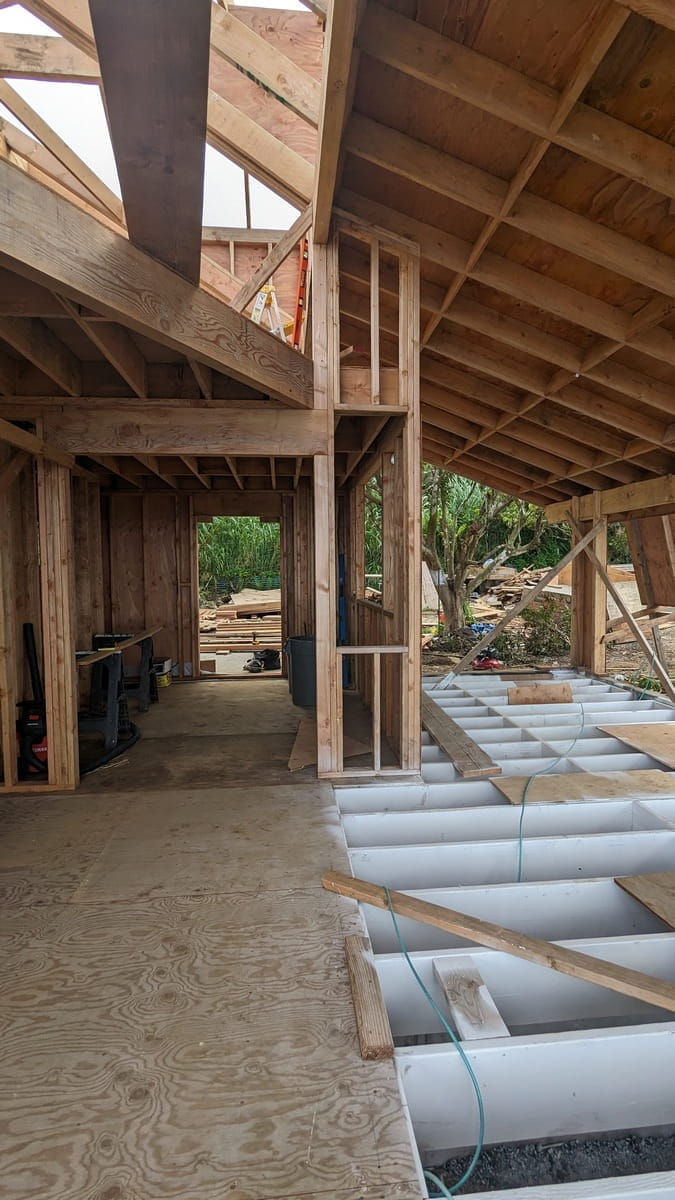
Edge of Dining Area looking towards the Kitchen
This is the view from the sorta near the front door as of September 16th, 2024. The door, of course, still isn't installed and it's still all in rough framing. But, once one walks in from the front door, glancing to the right will have a view across the dining area into the kitchen. Not a very formal entrance, but we are doing a casual "beach house" sort of theme. Hmm, actually, I think the viewpoint is not from the front doors directly, but inside them and almost to the middle of the dining area.
The white painted floor joists are for the lanai and that has some of the roof decking over it now. The rest of the house has more roof decking so we hope the interior won't flood as much as before. It won't be dry until we get the tarpaper and metal roofing on, but apparently we have to have an inspector come look at the nailing pattern first.
September 17th, 2024
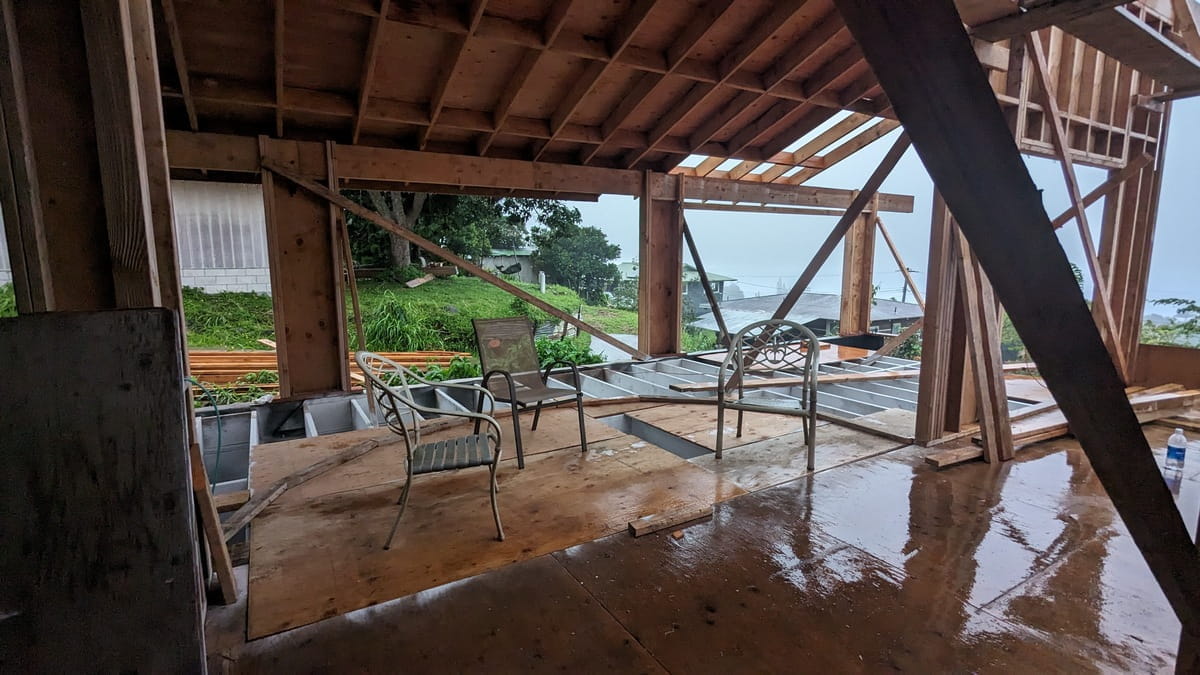
Rainy Day Dining Area View
Here is a view from the hallway (more or less) looking towards the dining area (it's also a bit of a rainy day). I don't know if you've noticed, but it's always being described as the dining "area" and not "room" since it doesn't have walls. There will be a half circle of windows bumped out into the lanai area to create the area so no actual walls or much of a separate "room" at all. Hopefully, the dining area will almost feel like an outdoor area with ocean views. We will see how it turns out.

Across the Living Room View
I'm not sure if the floor plan is too "open" or not. This is the view from the front Hilo/makai corner of the living room looking towards the dining area. It does give a nice long view plane (longer view distances help a house feel larger) but I'm not sure if it will be too open or not. It's always good to have some walls to separate sounds from one area to the other.
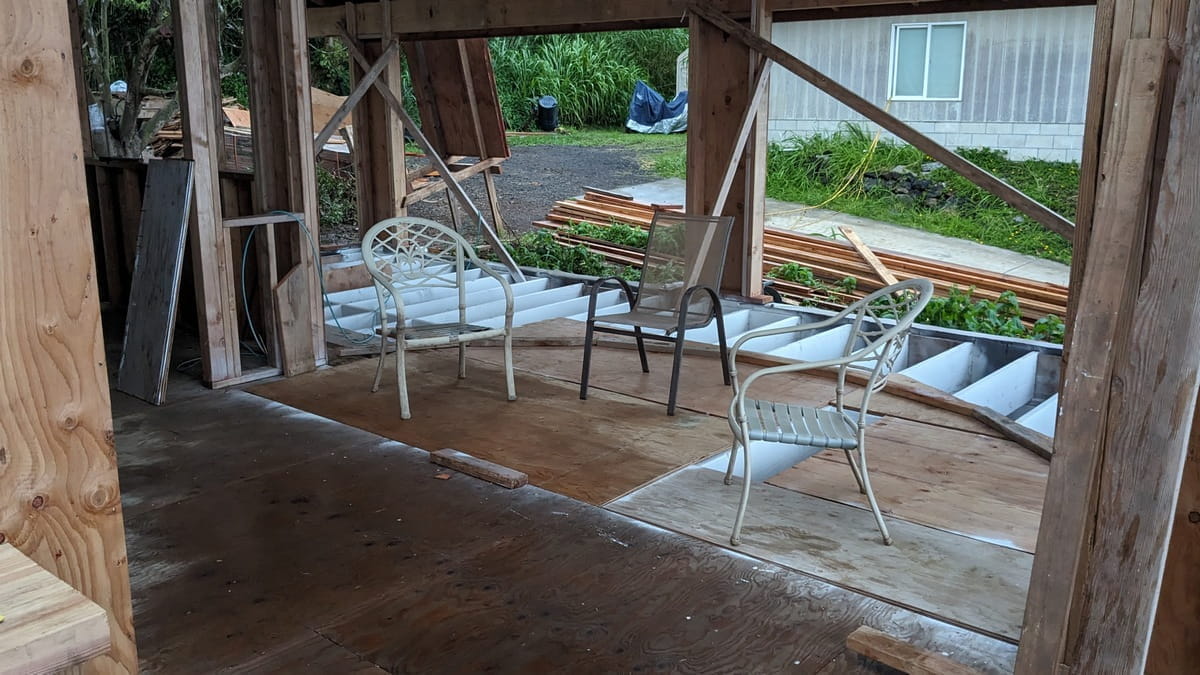
Dining Area View from the Living Room
Same viewpoint as the picture above, more or less, but closer in. We've put down some floor boards, but they're not nailed on, just sitting there. It does let us put a few chairs in there to get a feel for the space. It won't be huge, but with a nice round table and more chairs, they should all comfortably fit, ( we hope! )
Because it's a dining "area" and not a "room", the chairs can encroach into the walkway if necessary. Also, without a wall, there's no need for a bit of walk space on either side of it. There is only need for one walkway and saves about three feet of overall house width. (It's a tricky thing to keep a house small when one wants a spacious house.)
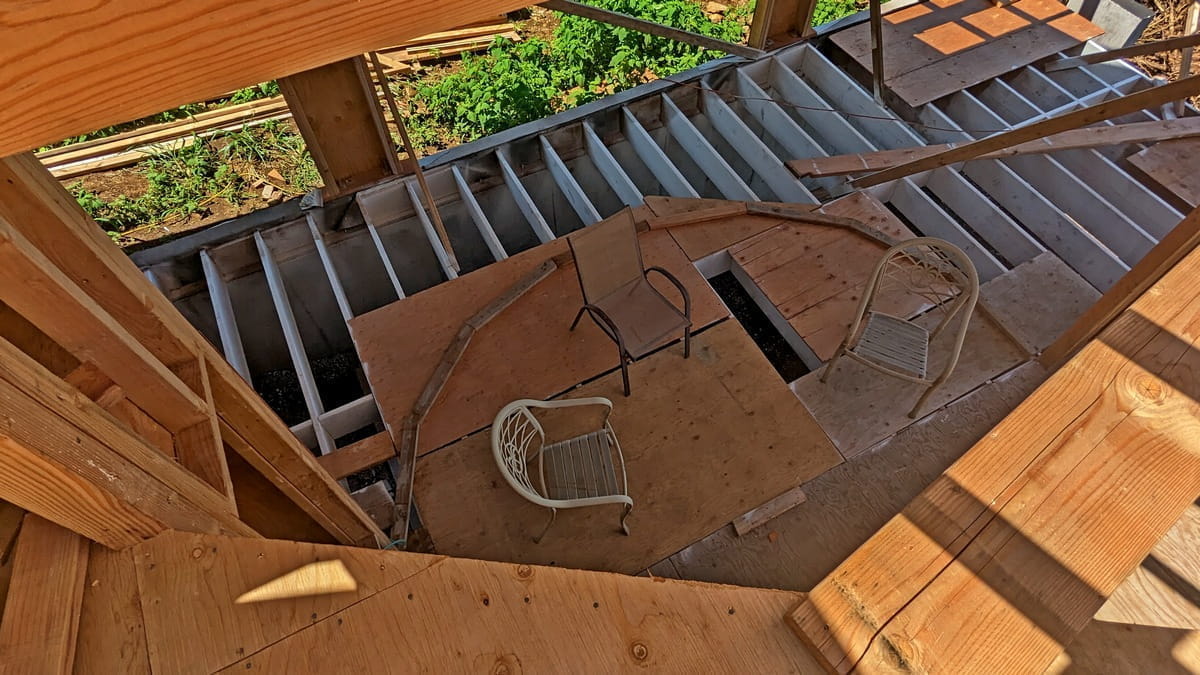
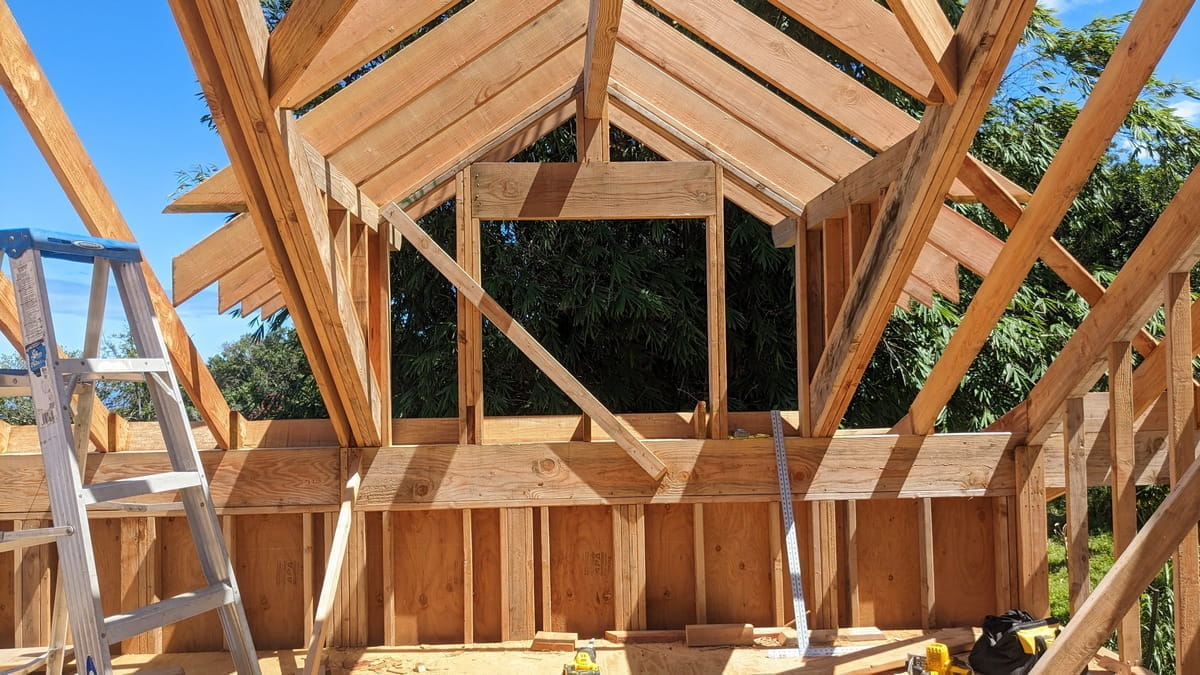
Dining Area View from the Loft
This house is a bit more 3D than some; there's the somewhat open loft area which allows us views from the loft down into the dining area. There will be views from the loft down into the living room and even views from the loft over into the sun room (what we used to call the "living room extension"). Houses on one story don't have to worry how the two floors interact with each other.
This picture is looking down into the dining area from the upper loft. (Ignore the hole in the floor, it's just boards laying there, they're not nailed or anything.) Imagine it with a round dining table. One with chairs all the way around it. With a smaller three foot table there will be room for people to walk behind other folks sitting at the table. With the bigger five to six foot table, hmm, well, maybe everyone will have to scrunch up? Perhaps we can have a three foot table for everyday use and have a bigger tabletop that can be put on for larger groups?
We have some dear friends on Oahu, Jim & Edna, who have a round table with two tops and it works a treat for them. Actually, their house has influenced this one quite a bit. They have the "secret" door between their living room and office so we have planned for a similar one between the living room and the middle bedroom (the room between the sun room and back main bedroom). Their secret doorway is sections of wall that hinge in to create the opening between the two rooms. We're using the same method, but changing it to bookcases instead of a bit of wall. I think it will be easier to build it more invisible using bookcases. Since we're duplicating their secret door, we may as well duplicate their table, too?
September 18th, 2024
Waipio Dormer
The dormers are pretty much framed, but not roof decked yet. We are finding that the window size isn't common, especially for the double hung windows we are hoping to have there. We may have to buy new windows made to fit? This is the Waipio side dormer, so it has a view of the workshop roof as well as the big avocado tree on the avocado plateau.
This dormer is above the kitchen which is extended two feet into the lanai area. Which gives us an interesting two foot undercut under the dormer. Not quite sure what will go there, possibly a line of large storage drawers? If there's a built in window seat/bed, then the drawers could extend even futher back and be about four or five feet deep? Hmm, well, don't have to decide now. If you have any good ideas what to do with this area, send me an email! It's much easier to make these sorts of choices before it gets built instead of trying to chnage it after something else is built.
Hilo Dormer
The Hilo side dormer. The neighbor is planning to take down the big bamboo so we are really happy about that. Not that we dislike bamboo, but they are pretty persistent about expansion. This one is a "clumping" bamboo instead of a "running" type, but even a clumping bamboo is persistantly expansive and extend the edges of the clump by a foot or two every year. Which would then have it through the fence pretty soon. Nick has already had cut a the bamboo back a bit from where it was bending over to the roof. But, if it's moved, then that isn't anything to worry about. Yay! It will also allow a much better view from the window, too. Woot!
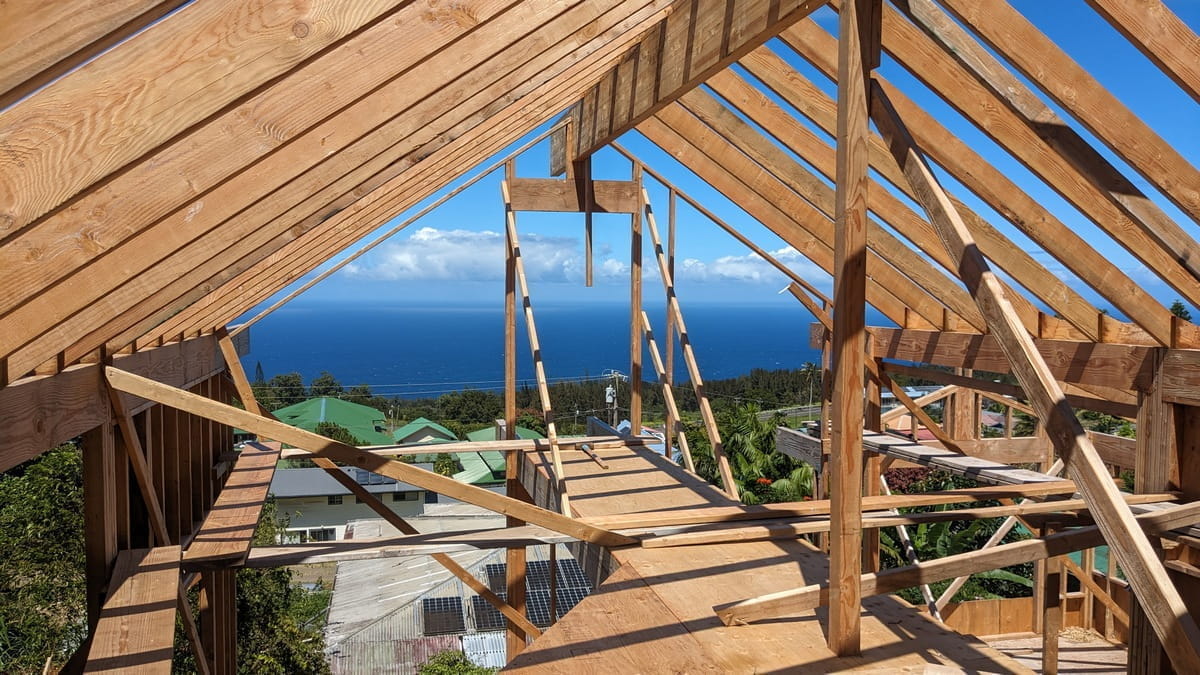
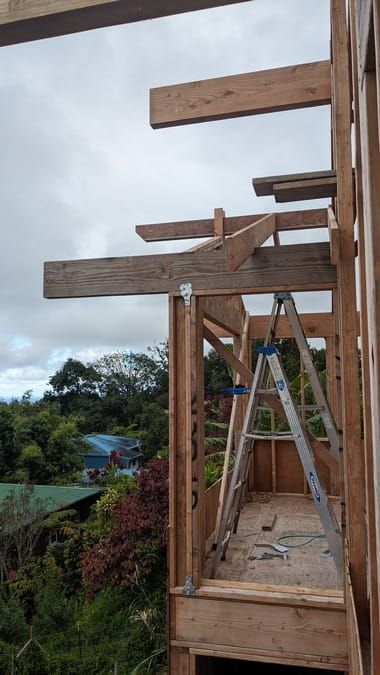
Looking to the Ocean from the Loft
This picture is looking out towards the ocean from the loft. Obviously we still aren't quite sure what windows are going in the front wall so Nick hasn't framed it up yet. He does have all sorts of interesting boards set around as scaffolding. When he wants to work in an area, he just nails up a bit of support and then puts some boards across it and continues working. He doesn't seem to have any fear of heights at all, I find it pretty spooky to walk along the catwalk without any railings, even though it's four feet wide.
From the Catwalk towards the Mountains
This is the view from the front of the spooky with no railings catwalk looking back towards the loft. The loft doesn't have any railings yet, but it's not as spooky as walking the catwalk. I don't even think about walking sideways across on Nick's scaffolding boards!
There will be a proper stairway up against the edge of the loft on the left side of this picture. However, rather obviously, it's not been built yet. The stairway is fairly down on the list of Nicks' upcoming projects. Had I been doing the framing, I would have built it much sooner so going up and down between the main floor and the loft would be easy. But, Nick knows what he's doing and he can pretty much levitate anywhere he wants, from what I've noticed.
September 19th, 2024
Sun Room Entrance
Well, in this picture, it's probably best to imagine a walkway across the front of the house into this Sun Room doorway? There will be a door here which will open into the sun room (which we had been calling the "living room extension"). This exterior walkway across the front of the house is mostly so we will be able to wash the front windows without using a ladder. I'm not sure where the dirt on windows shows up from, but we're always having to clean the front windows on the house below this construction site. That is the house which we are currently living in and will be the next restoration project after this house is finished. I'd expect the front windows of this house will also find dirt somehow, although the dirt may be from the gravel road in front of the houses along our road? This new construction is further away from the gravel road so perhaps the windows will stay cleaner?
We've also changed the railing construction across the front walkway from glass railings to stainless steel wires instead. Wire railings won't need the same amount of cleaning as glass ones and Rossini was able to use his superpower to find stainless steel wire at a really good price. Having someone with his superpower of sourcing things has done wonders for this project. His first big find was the excavator, after all!
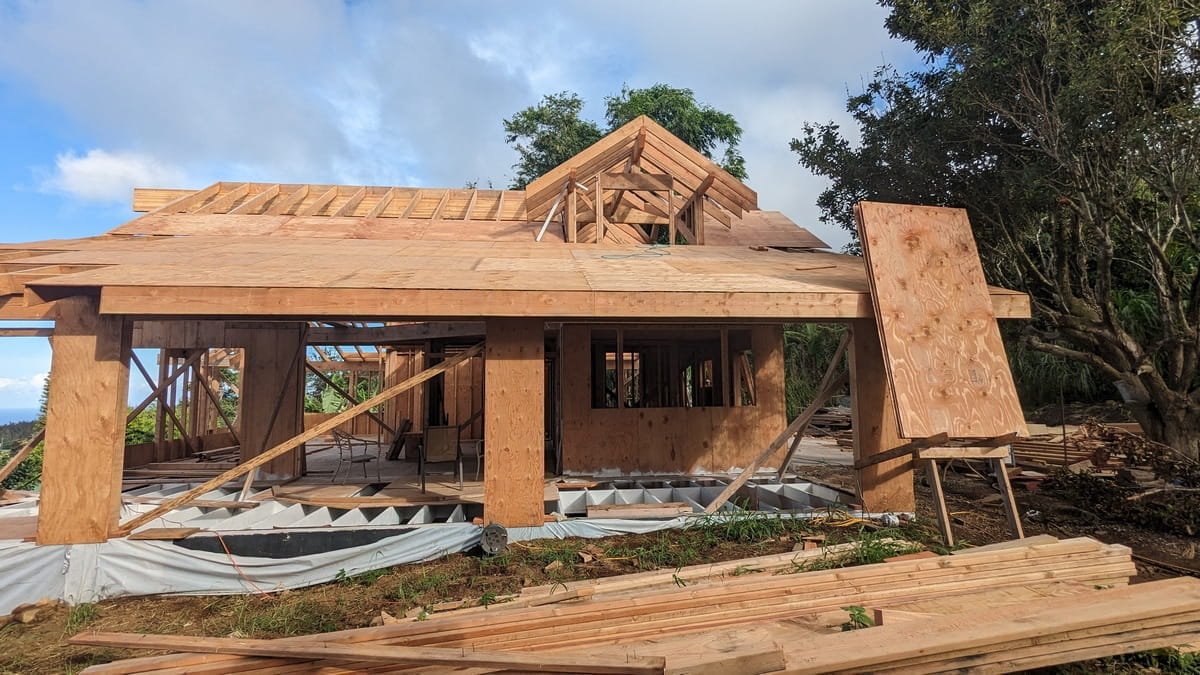
Looking up at the Front of the New House
This is the 'culvert corner' looking up at the front facade of the new house. There's some of the roof rafters now, but they don't quite extend all the way to the front yet.
Apparently, we have to have a "siding inspection" so the inspector can make sure enough nails were put around the edges of the siding. Which means all the siding has to be installed, as well as the roof sheathing before we can put the tarpaper on the sides or the tin roofing on, either. After the inspection is done, then we can put the tarpaper on the building and start on the shingles. I'm supposed to be the shingle installer, although I think there will need to be some sort of scaffolding, I don't have Nick's powers of levitation.
The exterior shingles will be the same as the ones we used on the restoration of the Little House, which is on this website under the "Renovation" tab above. But, (in case you don't want to be distracted by other tabs on this webpage) the siding will be brown three tab asphalt shingles. There will be white trim around the windows and doors along with two white "belly bands" to match the 1950's houses next to this one. We may as well have a matching set and if we cover the walls with shingles, it won't ever need to be painted. Guess we're a bit lazy and don't want to paint a house every seven to ten years?
September 20th, 2024
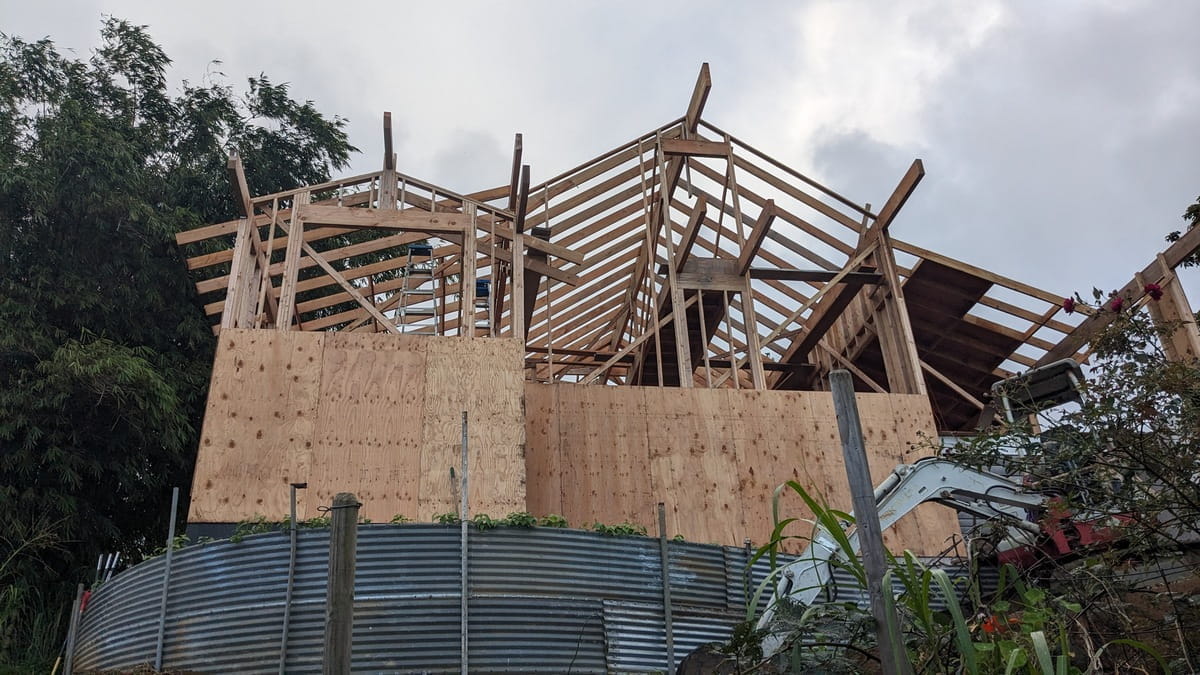
Waipio Side View
Nick has been doing all the work on the project for the past few weeks by himself (not sure why, haven't asked) and he's made several of these brackets that hold the decking so he can reach it from the roof and not have to climb up and down the ladder all the time. For it just being him, the project has continued to progress quickly.
In the picture, there's only three of the four lanai posts visible, the lanai does extend quite a bit out of the left side of the picture. At some point, the lawn will be almost level with the lanai so folks will be able to easily walk from the lanai out onto the grass.
We are beginning to see the shapes of things now. Starting on the left side of the picture and ignoring the missing part of the lanai, we can imagine the lanai running the whole length of this side of the house. There's the dining room 'bump out' into the lanai. There's the big kitchen window looking out over the right side of the lanai. Behind Nicks' roof decking stand is where the driveway will go between the end of the lanai and the mac nut tree.
Waipio Side View from Behind the Workshop
Same view as the previous picture except from behind the workshop instead of from the driveway. Now you can see all the lanai posts. The Building Code doesn't allow for the usual 4x4 porch posts like we used to use. Something to do with sheer forces as well as uplift forces during high wind events. Each of these "posts" are a minimum of 16" wide and have lots of Simpson fittings (those metal fittings now used everywhere in construction) in them to keep the wind from ripping off the lanai roof. During Hurricane Iniki back in the '80s, there were a lot of videos of roofs flying off and they all peeled up from the corners. There isn't enough area on a 4x4 post to install all these metal fittings so now our posts look like small sections of wall, which, is what they actually are.
The requirement for all these metal Simpson fittings has added several thousand - if not more - to house construction costs. Each individual fitting isn't too bad, usually just a few bucks or even less for the smaller ones. Although some of them can be much more expensive such as twenty to a hundred each, especially the big ones for hold down strength in small areas (such as those lanai 'posts') but even with the inexpensive ones, there's just so many of them! Every four feet and they start from the concrete slab all the way up and over and back down to the other side. This is the required 'continuous load path'. This 'load path' starts with a Simpson fitting embedded in the concrete foundation and then there is a Simpson fitting solidly attached to each end of each board along the way. There will be a fitting at the bottom of the stud and then another one at the top of the stud. More metal across the ends of the floor framing or the top plate on the walls, then more fittings to the roof joists, etc. All the way to the top of the house and then all the way over to the other side. Each and every four feet all the way around the house.
Another sorta new requirement is the roof decking. It's now required to have a layer of at least 1/2" plywood under the tin roofing. (This is Hawaii Island, about 90% of all roofing is metal roofing.) Add in some more thousands of dollars for the now required roof decking. For about a decade and a half after the roof decking requirement came out, it was allowed to use a big criss cross of metal Simpson strapping instead of the decking. There didn't seem to be any specific requirement for how much strapping, sometimes I saw it at one big cross per roof side, other times it was every four feet there'd be a strap. But, then several years ago they decided that the strapping wasn't good enough and now we're back to 1/2" plywood decking. I suspect the folks making all these decisions aren't actually building houses themselves.
When I started drafting blueprints in Hawaii back in the late seventies, a typical building would start out with what were called "tofu blocks". These were concrete blocks that were 16" x 16" x 8" with a smaller 8" x 8" x 6" block set on top. No cement or anything, just set on top. Then a square of sheet metal with turned down edges called a "termite pan" was then placed on top of the concrete blocks. Then a 4x4 post was stood up on top of that. The post could be up to ten or twelve feet. It was braced "2, 3 or 4 ways" with a 2x4 at a 45°. That was it, foundation done! This "post and pier" foundation saves on having to do much ground work since the house is raised up off the ground so the ground doesn't necessarily need to be that flat. The raised foundation also allows loads of ventilation under the house to keep it cool. And, gives you a lot of under house storage area. There's thousands of houses built with this type of construction still standing but we can't build them like this anymore.
The roof rafters on these sorts of houses were sometimes as far apart as five feet. Four feet was more common, though. Then a 2x3 'purlin' was laid across these roof rafters every two feet to make a grid of boards and then tin roofing was nailed to the boards and then your roof is done. No roof decking, no insulation anywhere.
If I felt like going way off the deep end, I could talk exhaustively about "single wall construction" which is another way we used to build houses but don't anymore. However, I suspect that single wall construction relied on a better grade of lumber than we currently have available as well as a somewhat higher level of carpenters since there's no rough framing but pretty much all finish work.
Okay, I can't resist just a small description: in single wall construction, it starts with the previously mentioned post and pier floor and then instead of stud walls (2x6s or 2x4s that are 12" or 16" apart) the walls are made of 1" thick boards face nailed vertically to the sides of the floor platform. The only thing holding these walls up is the shear strength (amount of force necessary to snap the nail in half using a sideways motion) of the nails used to nail the boards onto the floor platform. If the boards aren't "tongue in groove", then there's a thin board called a 'batten' used to cover the cracks between the boards. Some houses had battens on just the outside, some had them on both sides of the boards. There's also a 'bellyband' of horizontal boards nailed to the side of the wall to help hold the vertical wall boards tight together. Some houses had one belly band on each side, some had two on the outside, it varied depending on who was building thehouse. A horizontal board went around the top of the walls and that supported the roof rafters, purlins and tin roofing.
With single wall houses, if there's a knot in the vertical wall boards that falls out, you can look outside through the knot hole. But, we don't build these types of houses anymore. I kinda like them since there's no place for bugs to hide in the walls, but they are a bit noisier than double wall construction if there's a rooster crowing outside your bedroom window. But, all this is what we are NOT building, so I'll get back on topic now.
September 21st, 2024

Dining Area Chandelier?
I dunno if you've been pricing light fixtures lately, but fancy ones are just a tiny bit expensive these days. Actually, all construction materials are way more expensive than last time I built a new house, but that was a few decades ago. This chandelier was a fairly high end fixture at one point, however, (fairly obviously i.e "like duh!") it's had a really rough life, especially lately. It is quite large, has eight arms and weighs I'd guess a bit more than forty pounds. Replacement cost on something like this would be hundreds of dollars if not up into the four figure range if we were trying to match the size and weight of this one. It isn't thin sheet metal, it's cast and machined for the round parts and solid for the arms. Which I wish it wasn't it, be nicer if they were hollow for the wires, but we can work with it.
Ross in his magical Rossini guise rescued this chandelier from being thrown away. I'm not sure if he rescued it for it's recycled metal value or because it is an interesting thing. That rescue was several years ago and well before we started building this house. For a year or two, it was in the pile of things in the front yard that usually has nasturiums growing over it so you don't actually see the things in it so it sorta fell out of sight for awhile. Then it got rescued (yet again) from there and hung up in the avocado tree for awhile. I'd thought it'd be fun to put some solar lights in it so the tree could glow at night. However, chandeliers are held together with 3/8th inch threaded steel pipe and steel rusts, especially in locations this close to the ocean. The internal steel pipe rusted through and the chandelier fell out of the tree. Which is when this picture was taken.
So, of course since I really need another project, it's being polished and restored back to being a functional light fixture. We will see how it looks after it gets fixed. The polishing will not be back to 'perfect', but at least some sort of 'vintage' shiny, we hope. I hope for shiny, but don't expect absolutely perfect. (Perfect takes a LOT longer than almost perfect.) It will also then eventually go back to the brown tarnished brown brass color since I will probably be too lazy to maintain 'shiny', but I hope it can start out at least a little bit shiny.
Perhaps if it is hung on a hook with a plug near the hook, I'd be able to take it down for cleaning? I really can't imagine trying to polish a chandelier while on a ladder. How do folks keep these sorts of things shiny or do they just let them become tarnished brown again? Car wax? There's lacquer, I suppose, but then the lacquer has to be removed before restoring it once it tarnishes a bit. Well, I guess we will find out?
September 22nd, 2024
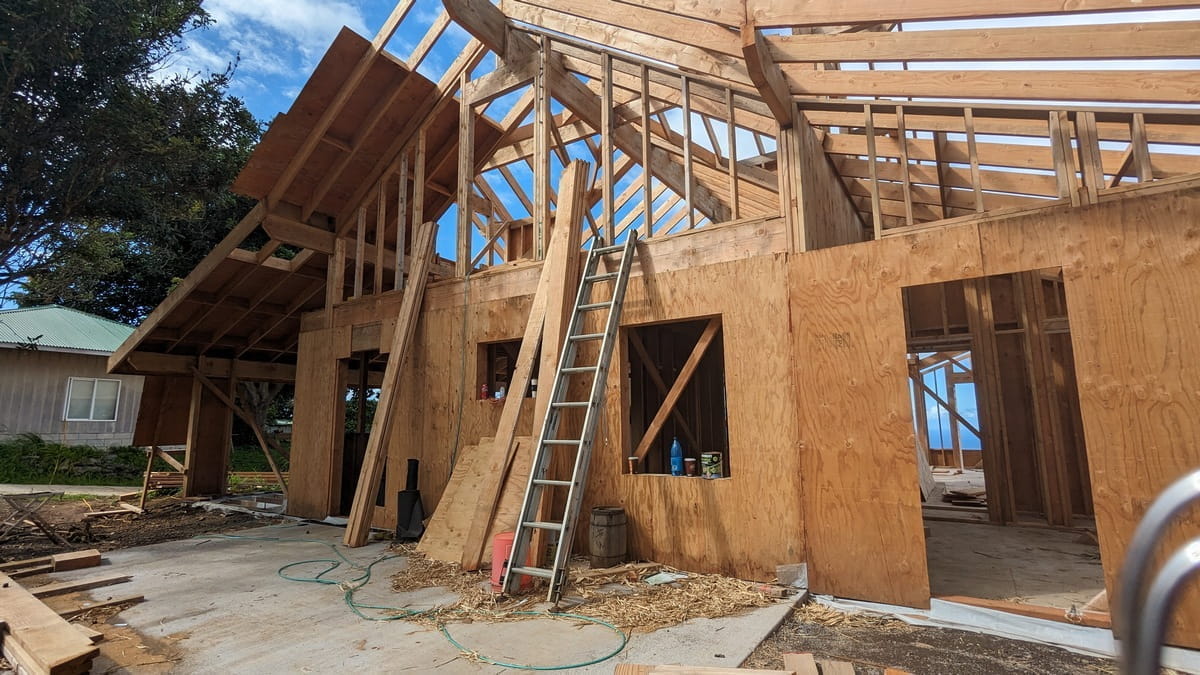
Mauka Side of the House
So far this ladder is the only way up to the loft but we are still able to walk through the back wall so it works. On this mauka (mountain) side of the house, there is the concrete slab for the carport - which will have a roof over it, eventually. (In all actuality, this "eventually" is probably in a week or two so it's probably not all that dire of an "eventually"). The door on the right is the back door to the main bedroom. Then two bathroom widows, although they are for two separate bathrooms. Then the kitchen door, which, I suspect, will be the most frequently used door into the house.
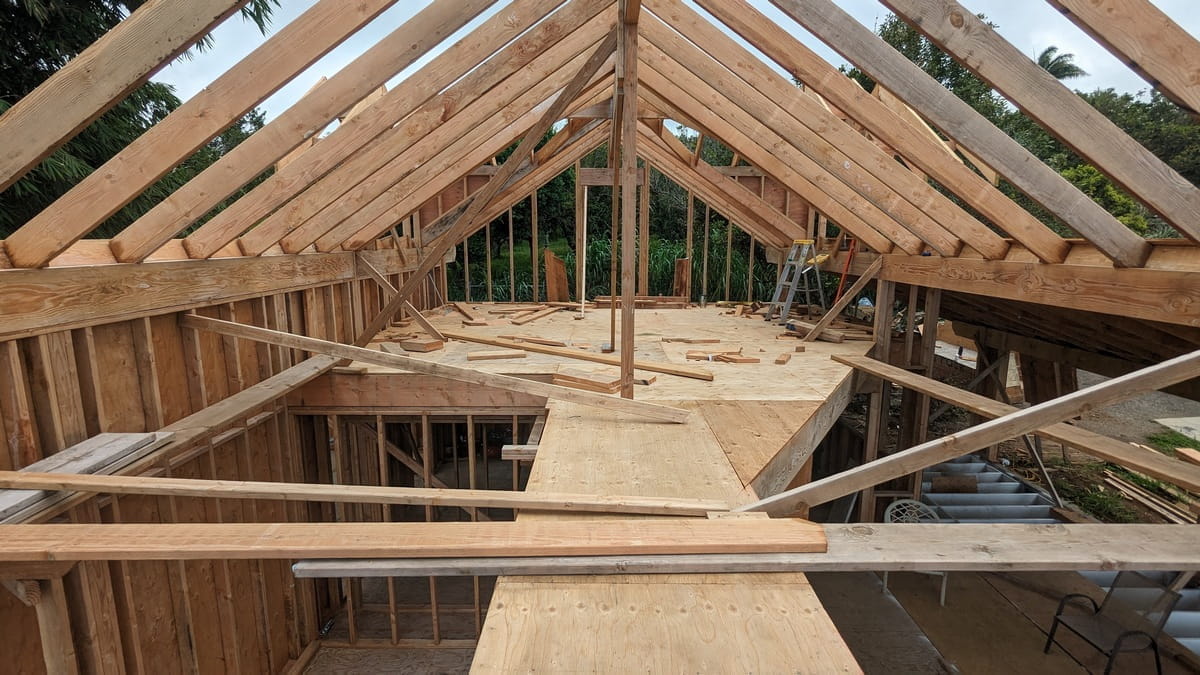
September 30th, 2024
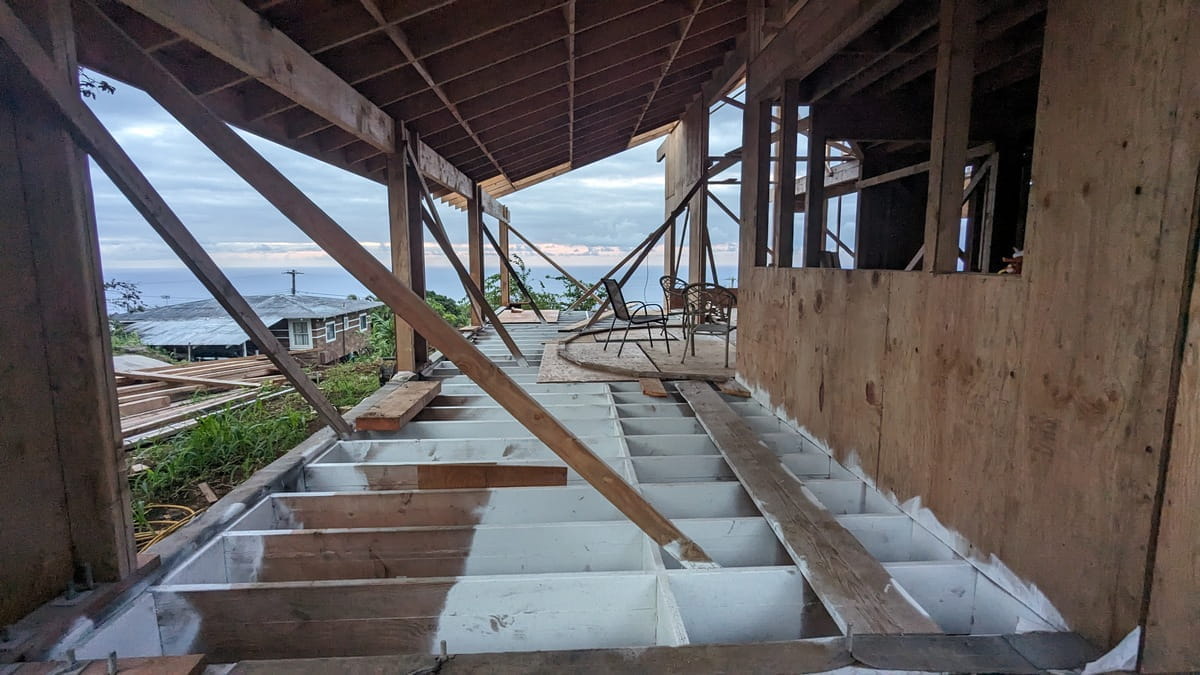
View across the lanai
Still no lanai floor decking but the dining area half circle has a line of floor plates to indicate where it will be. As well as a few chairs to help show how things will fit there.
With the dining area bump out, it should make for a nice wind free area at this end of the lanai. The view will be better from the other side of the dining area half circle, but there's possibility of there being too much wind in that front lanai area to be used all the time. When we were restoring the little house next door, we found quite a few days which were too windy to be comfortable sitting out on the lanai. It has absolute direct ocean wind access, though. This one does, too, out at the end. The sides are a bit more protected yet we still want the view.
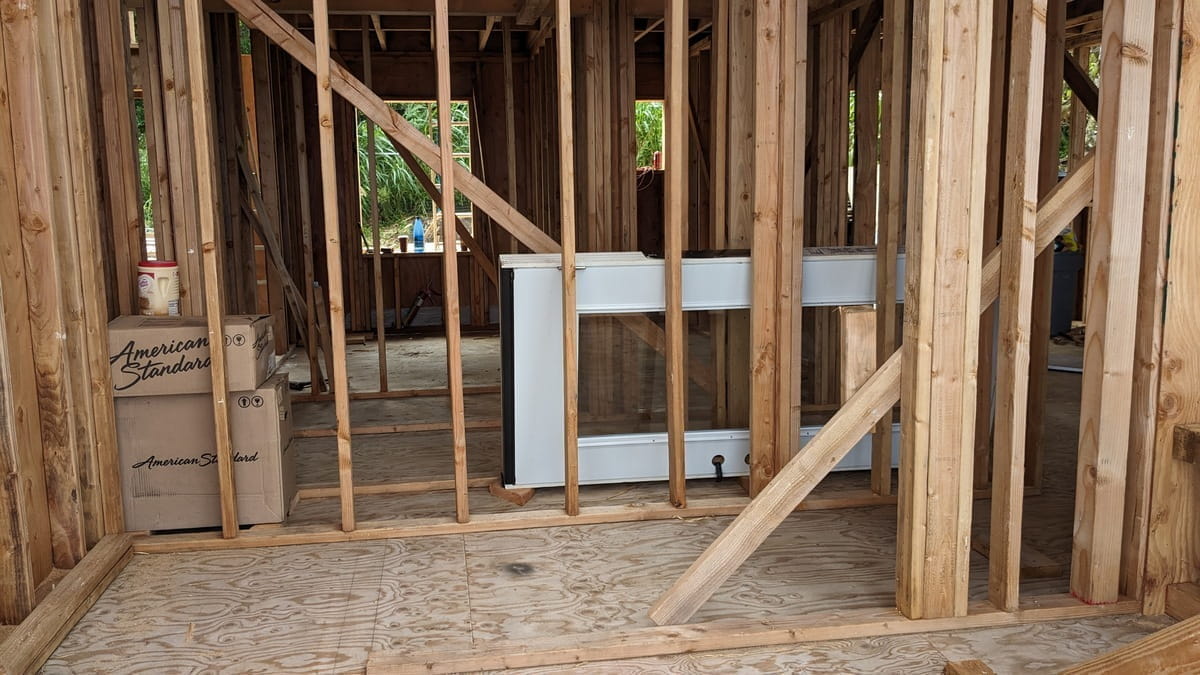
Starting to gather more "parts"
Generally I suspect folks have more "stuff" and other assorted house parts on site at this point in construction, but we're just now starting to gather up the doors, plumbing and other house parts. We already have several of the doors, but we still need to source some more doors and build the windows.
Half of the big French entry door is here, the other half still needs to be picked up. We only have the Prius with roof racks to haul stuff so it's a two trip event for the big door. There's a nice steel framed glass door for either of the upper loft exterior doors and a couple really tall louvered doors. We will have to see if those will fit for maybe the laundry doors? There's a lot of nice door framing, we just need the doors to frame.
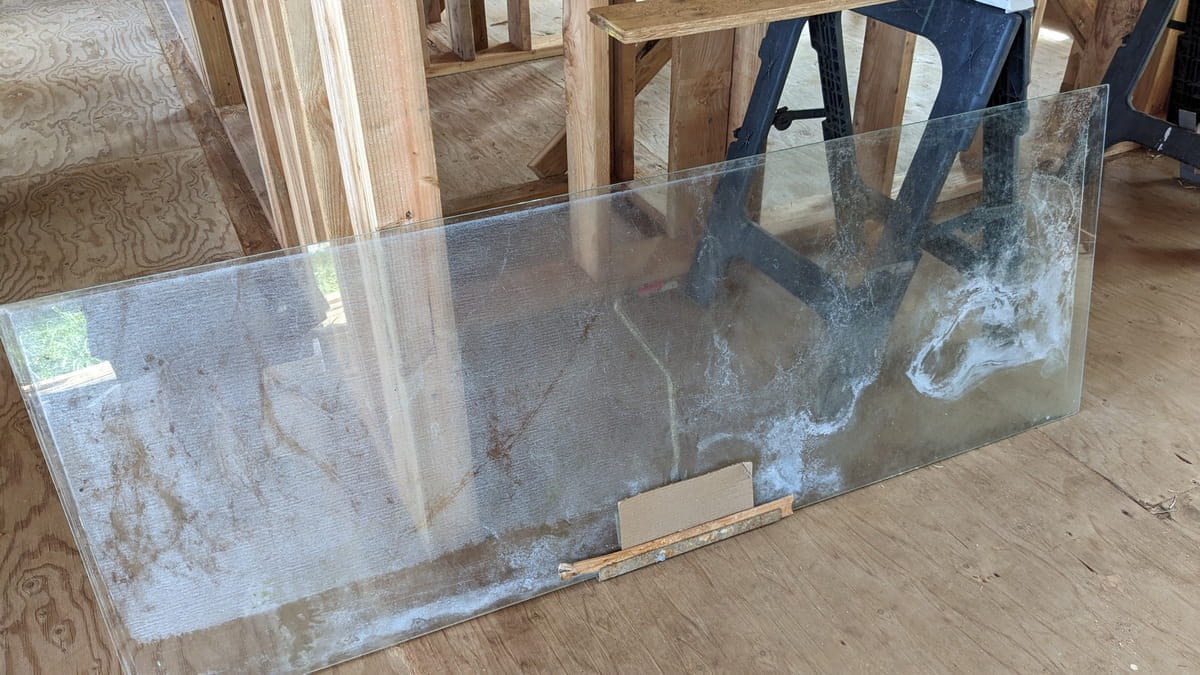
Watermarks on Tempered Glass
Well, our window construction project now has an additional step. How does one get watermarks off of glass? Vinegar? I'm sure there's some sort of watermark removal process, guess I get to go find out. It is tempered glass, though, so it will be good for windows. Once it's cleaned (and not all of them are this dirty) it will be framed with wood and then we will have windows for the house. Fixed glass windows don't require screen behind them so the view is clear. There will be louvers below the fixed glass for ventilation.
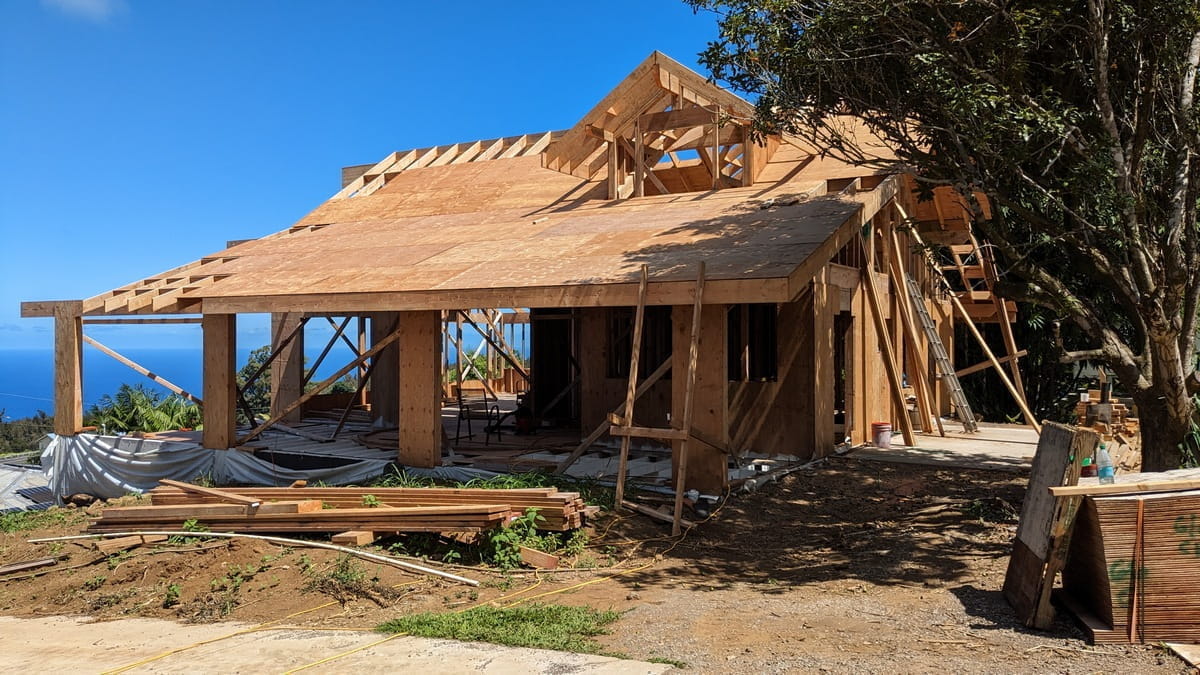
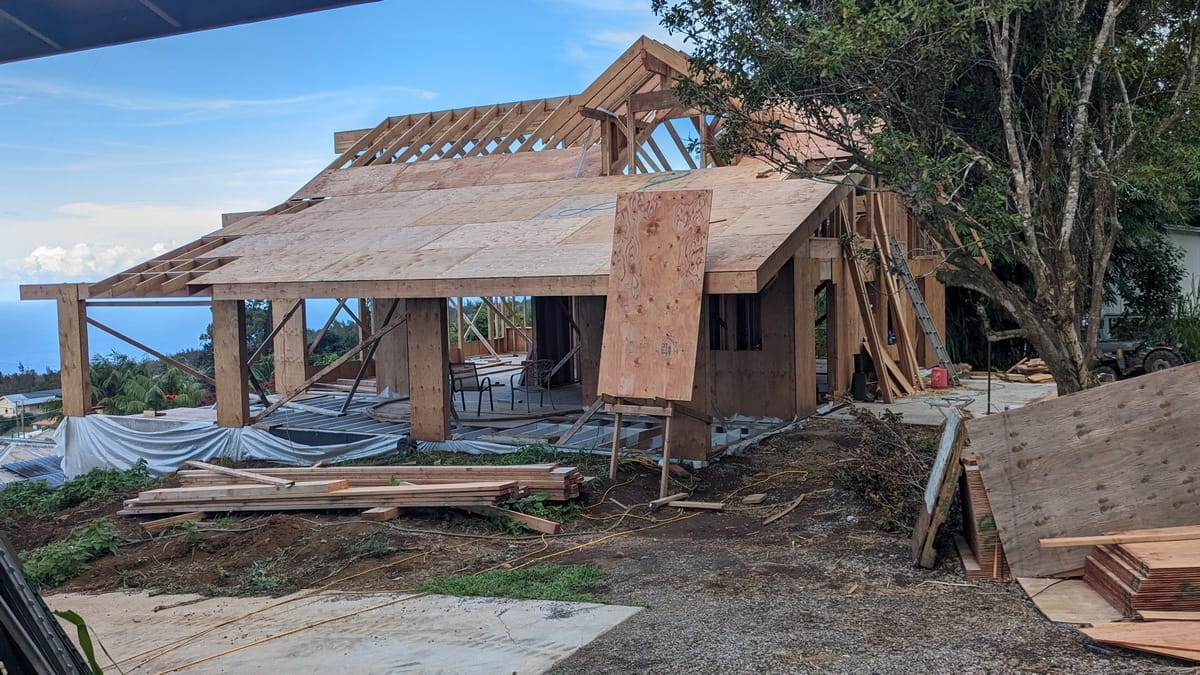
Waipio side view
End of the month Waipio side view. There's lots more roof decking visible in this picture and a lot more has been done this month that isn't visible in this picture.
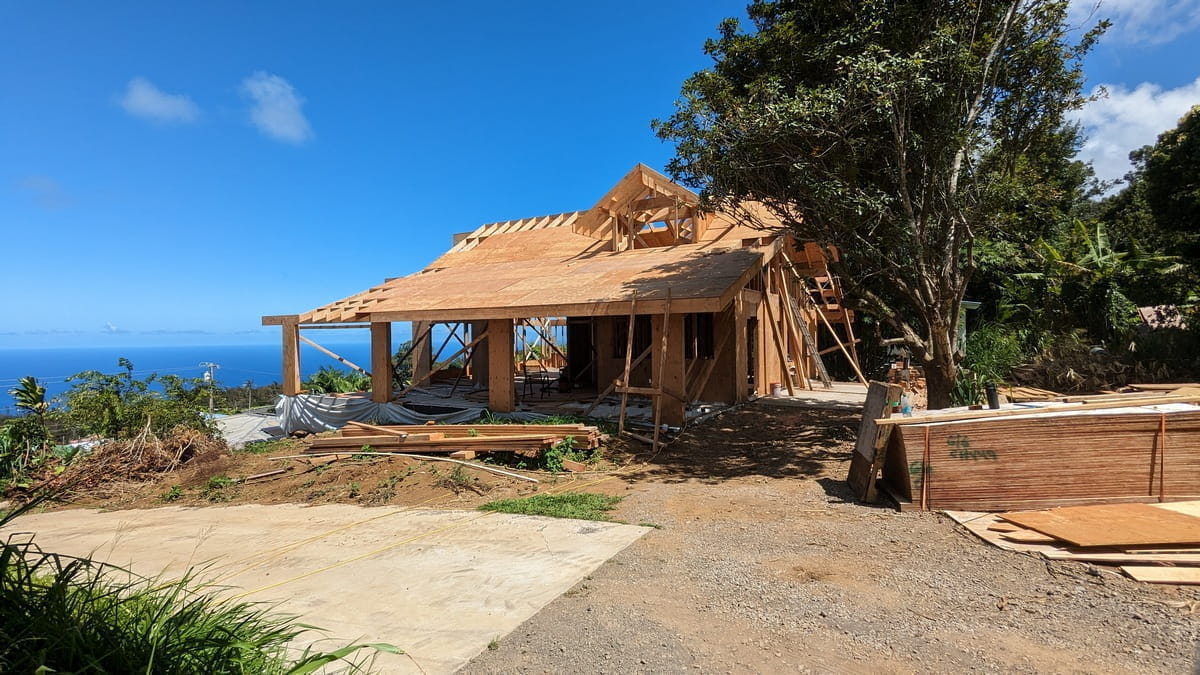
Waipio side view (again)
Same view as the previous picture, although from a bit further back. Kinda helps show how the house fits into the landscape.

First Harvest! Ha!
When the culvert corner was installed, some beans were planted along the edge. Mostly since beans add nitrogen to the soil so it's the beginning of creating some nice soil for the final landscaping. However, now we have nice beans to eat. Yay! They're very tasty so I think I'll plant more. More tasty beans, more nitrogen for the soil. Win/win in my book.
This has gotten us up to the end of the month of September, 2024 and this is probably enough picture for one web page.