
Flat Land Hutches
We moved to town which is a really good thing, and the lot was pretty flat, that's another really good thing. We were and are still "Hillside Farm" since we'd already had the name for a few years, but it was so nice not being on a hillside. Much easier when you don't have to look for a flat spot for hutches. So it was time to build another hutch. This time we started out with at least a sketch of what to build.

A Plan!
For this set of hutches, as usual, we'd gotten the ten foot long roll of 1/2" x 1" wire. It's two and a half feet wide by ten feet long, which is just about perfect for a hutch floor. This hutch was only eight feet long or less though, if I remember correctly, so we had a bit of extra wire left over, but there's always uses for bits of leftover wire. Hmm, looking at the drawings, it's noted that the length is 6'-3"? That's an odd number, we would have had to have cut down an 8' long 2" x 4" since they don't come in 6' lengths. Maybe the cut off pieces were used for the cross framing? Wish I would have taken better notes. Hmm, some of the lumber is listed as 'liberated' which means I was swiping it from a different project so the odd lengths are probably to match lumber that I already had laying around.
The basic plan for this hutch was a wooden "H" frame with the wire floors nailed to the frames. The hutch doors are made of refrigerator racks since we can get them from the local dump. Reuse is better than throwing them into the landfill. Refrigerator racks are also nicely flat and stable like plywood except they're better at ventilation than plywood.
For what it's worth, this plan has drawbacks several years later when the hutch wire rots out from use. To replace the hutch floor, too much of the hutch has to be taken apart to fix it. But, it worked for three or four years before it needed any major repairs.
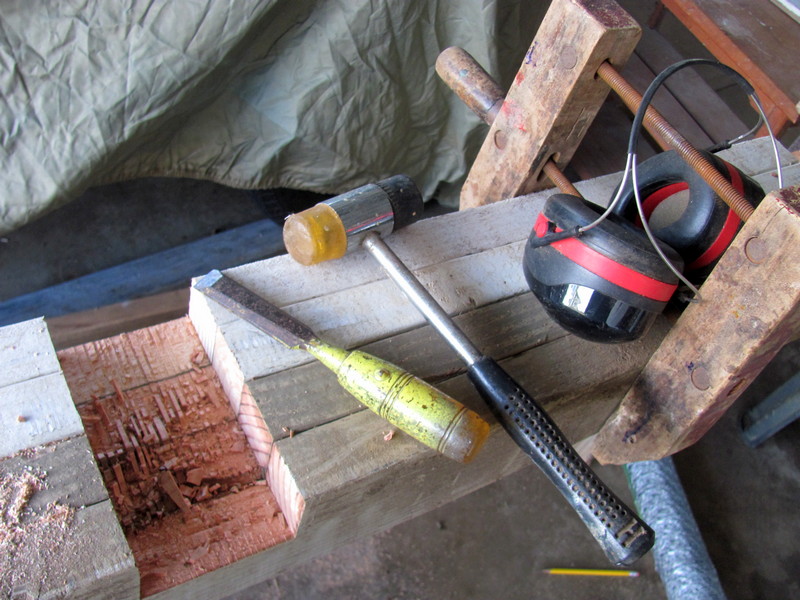
Making matching notches for the cross frames
The basic plan involves a bit "H" shape, so to make it stronger the cross pieces are set into the legs. Since we're working on flat land, it would be good if all the legs are the same length so the legs were clamped together so all the notches would be cut out at the same length.
A circular saw was used to make multiple cuts along the area to be a notch. Then the remaining wood was hogged out with a chisel and mallet. Choose whatever tools and methods work best for you, this was just what worked for this project.
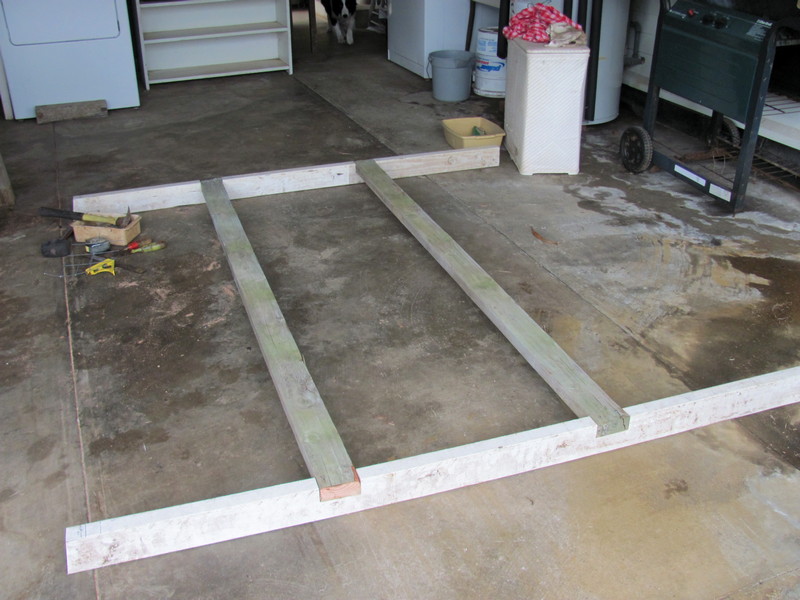
Having a flat spot to build is a good thing!
The house in town not only had a flat yard, but a huge carport with a flat floor, too. Hutch building is much easier when there's a big flat spot to work with. Not that it's overly apparent in the picture, but the front posts are taller than the back posts and there's a notch at the top for the cross piece to for the roofting. Once the notches were cut, the frames were assembled in the carport. They are light enough to be carried out to the bunny yard.
Which, looking back on it, is another drawback to this type of hutch. Once it's built, it becomes one big hutch and moving it takes multiple people and trailers. But, at the time, I thought we wouldn't be moving for decades. Oh well! We were there for about four years before we bought a 'rental' house that wasn't nice enough to rent so we had to move into it and rent out our nice house with the flat yard, but that's another story, this is supposed to be about bunny hutches.
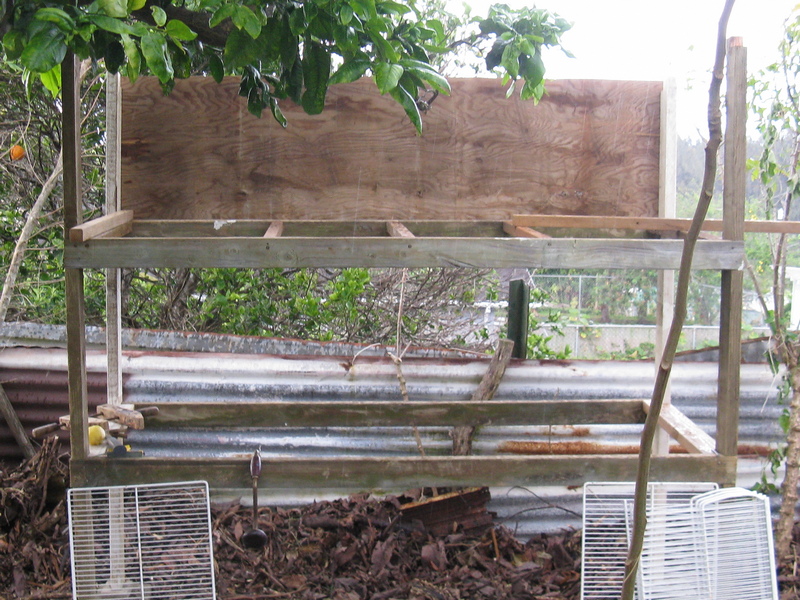
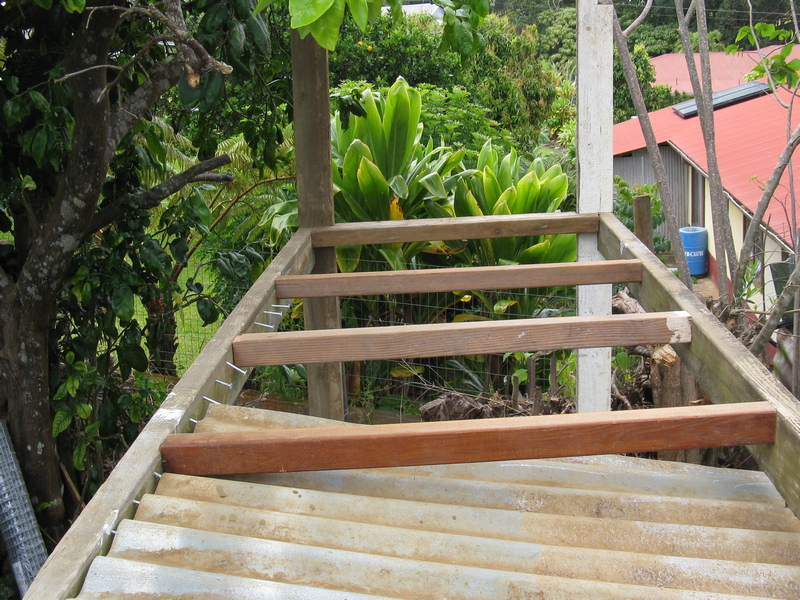
Starting the frame out in the bunny yard
When setting up the frame out in the yard, put some sort of waterproof block at the bottom of the posts. Wood can soak up moisture from the cut ends, so if they are set on a concrete block set on the ground, the ground moisture will wick up through the concrete block into the bottom of the posts and cause them to rot. We had some 'Trex' decking laying around which is some sort of plastic 'lumber' used for lanai decking. I put pieces of that at the ends of the posts to provide the water blocking. You can use bits of tarpaper, tile, metal roofing, roofing shingles, cut a soda can into a flat aluminum bit, whatever you have around that will provide a waterproof block between the end of the post and the concrete block.
Because of the moisture and rot issues, the hutch posts aren't set into the ground. We were using treated lumber because of the amount of termites we have around here, although we did put wire over the treated lumber parts so the bunnies couldn't chew on it. If termites and excessive moisture aren't problems where you are, then you could use different methods.
Another thing to notice in the picture is that the front crosspiece is a 2" x 4" and the cross bracing going between the front and back hutch frame is 2" x 2". That allows for the metal between the hutch floors to be set up under the 2" x 2" bracing and be out of sight behind the 2" x 4" crosspiece at the front. If the hutch is longer - ten feet or more, then the front crosspiece should be a 2" x 6" or wider. Or have an additional leg in the middle of the hutch.
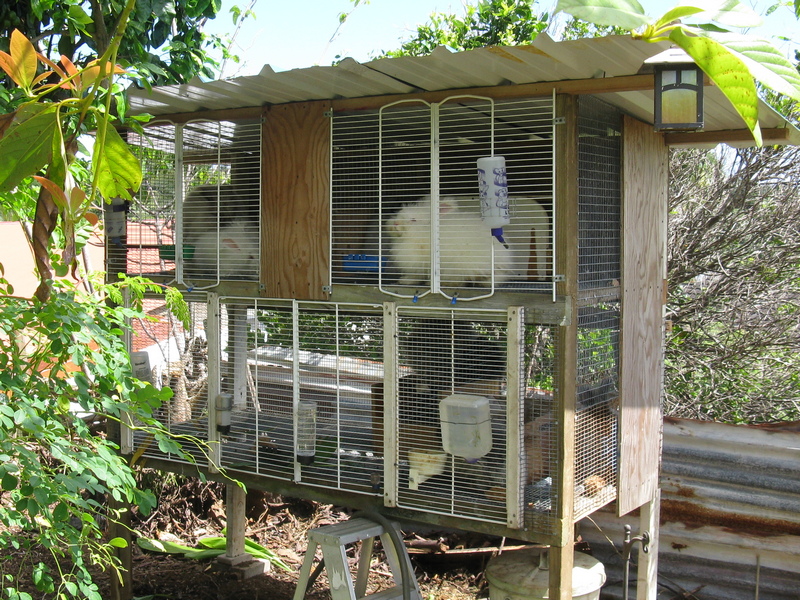
This hutch is a two layer hutch and the lower layer has some wind protection from the tin roof 'fence' which was at the back of the lot. Since there wasn't much wind protection for the upper layer, a back plywood wall was added. That also stiffened the hutch up a lot. A flat dimensionally stable sheet of whatever - plywood, roofing tin, refrigerator rack, etc.- can do a lot to make a more stable hutch. If you don't have a big sheet of anything stable, then a diagonal brace can do the same thing to create 'shear' stability. ("Shear" is a sideways structural stability. When you push on it sideways, if it has shear walls of some sort, it won't push over.)
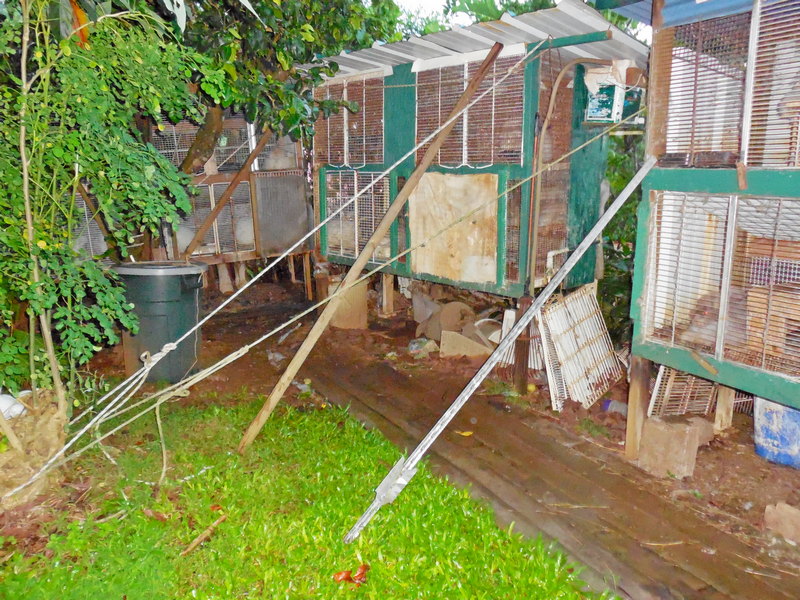
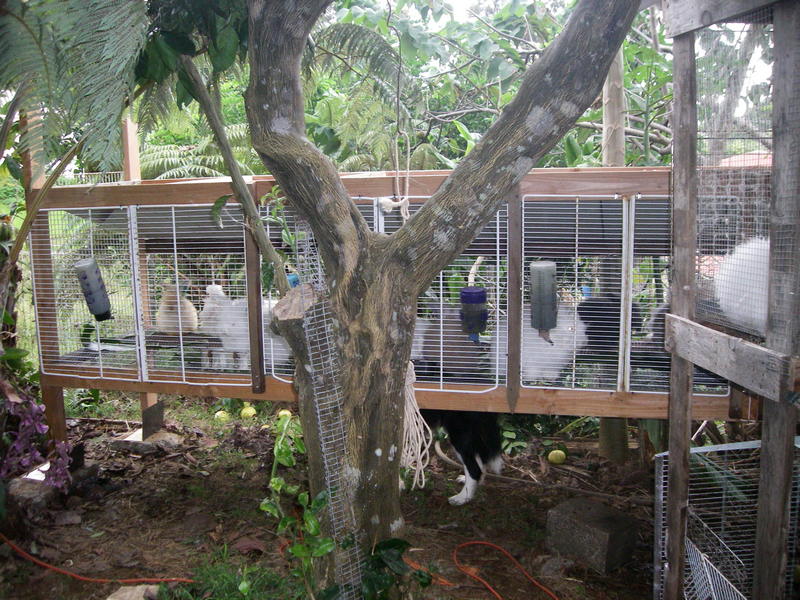
Finished hutches bracing for a windstorm
Because the hutch posts are set on the ground and not into it, the finished hutches are susceptible to winds. We had a hurricane headed towards us so the hutches were braced for high winds. The posts are to keep them from blowing forward and the ropes are to keep them from blowing backwards. They're tied to a moringa tree trunk since the moringa doesn't have enough limbs to blow over. We didn't have any trees blow over, but tying a hutch to a tree that falls over would just take the hutch with it.
Should we want a windproof hutch, either using metal posts sunk into the ground for the corner posts or having a stake of some sort set into the ground would help a lot towards wind proofing them. Using metal corner posts makes it harder to attach the wood parts to it, but they wouldn't rot. They would rust, though. There's a lot of things to take into consideration when building things.

Simpson CB44 fitting from Lowe's
Should we want a windproof foundation, there's a metal Simpson fitting that an be set into concrete. The picture up above is from Lowe's but if there's not a Lowe's near you, other folks also sell them. Get one of these types of fittings, dig a hole, slam some rebar down at a fortyfive degree angle with the ends still sticking out into the hole area. Put the Simpson fitting in there with the ends of the rebar sticking through the lower stirrup of the fitting. Then pour Quickcrete or any other type of concrete into the hole to glom everything together. I don't have the math on how much wind it would take to blow that over, but with that sort of foundation, I'd not worry about bracing the hutches for hurricanes. The posts would break off before the footing would pull out of the ground.
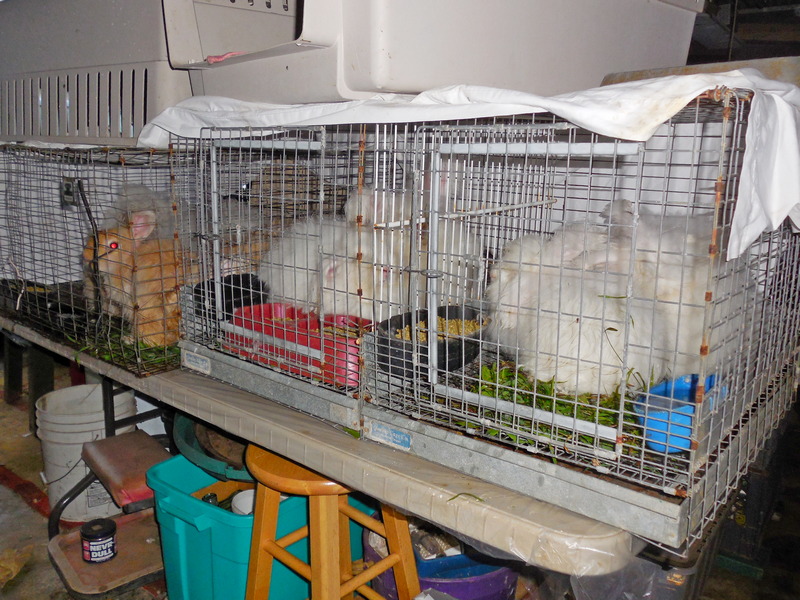
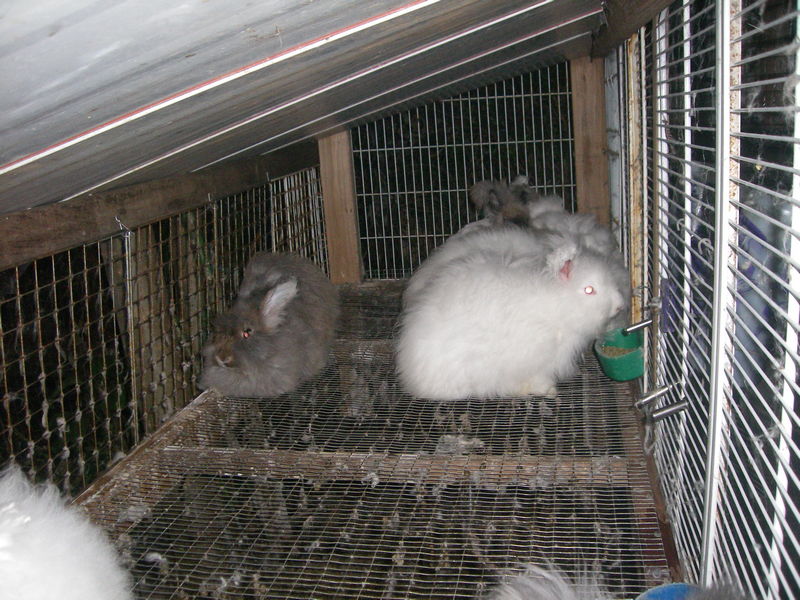
Bunny Hurricane Refugees
Sometimes no matter how well the hutch is built, the bunnies may need to be elsewhere. We had a hurricane heading towards us, so we brought all the bunnies inside the carport for safety. Their hutch was braced and it did well in the wind, but it was soaked and the bunnies wouldn't have been all that happy riding the hurricane out in their hutch.
But, this is about building bunny hutches so I'll get back to that. But, part of building bunny hutches is making them suitable for many conditions. Bunnies need to be secure from weather as well as predators.
putting in the tin roof between the hutch layers
Because we had limited space, we built two layer hutches. To keep things from the upper level from falling onto the lower bunnies, there's a bit of tin roofing between the two layers. This was our first attempt at double layer hutches and it should have been at a steeper angle. It kept the lower bunnies clean, but it wasn't steep enough to be a self cleaning roof.
I like the less space that a double layer hutch uses, but I'm not sure if we will build any more of them. It's a tradeoff between ease of feeding (less distance to travel to feed them all) and the occasional cleaning necessary for the roof between the hutches. A steeper angle of roof between the hutches makes the distance between the two layers higher which is also another consideration when doing a double layer hutch. I need some sort of short ladder in order to reach the back of the upper layer.
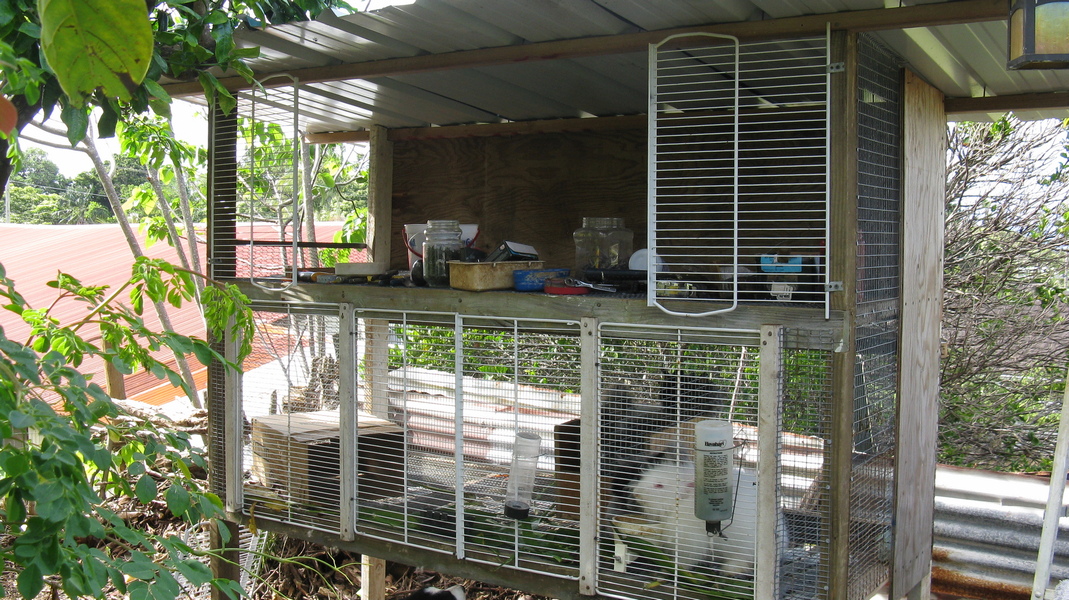
free doors are a good thing
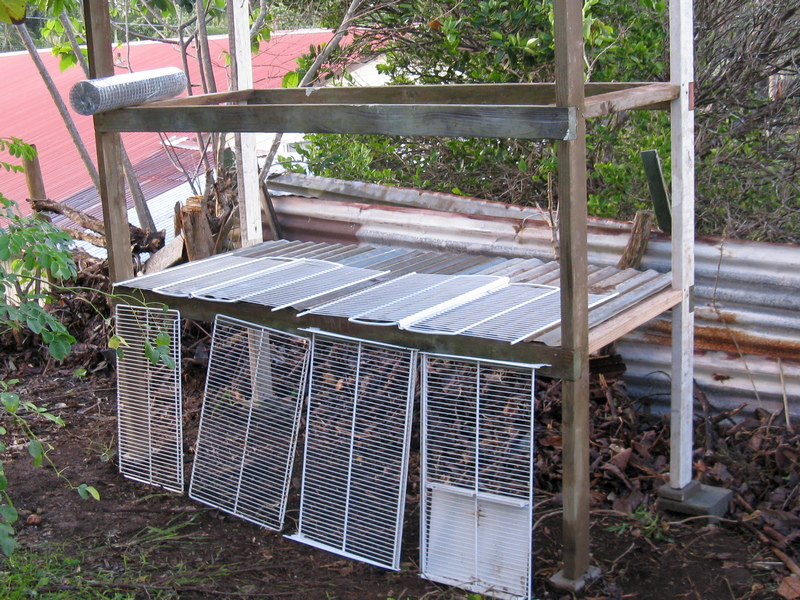
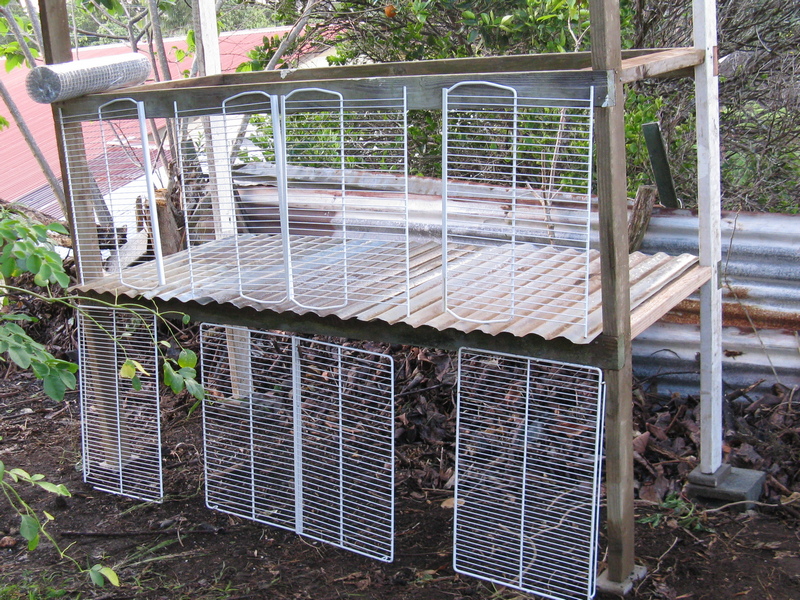
Refrigerator rack doors
Since we're using refrigerator racks for doors on this hutch, they would get laid out along the hutch frame to figure out which sets of doors would fit where. The racks are held on with whatever we can make work. Frequently, it's a bit of wire in a loop held on with screws. There's probably wiring clips which could be bought at a hardware store which would also work, but then you have to go to the hardware store and give them money in order for that to be an option.
The floor wire is still in a roll, that's what's sitting on the top level of hutch. The ceiling/roofing for between the hutches is laid out and not installed in this picture, either. Basically, it's the wooden frame before all the various wire racks, floor wire or anything else is hung on it.
If the refrigerator racks don't quite fit the frame, then short bits of wall can be added. In the upper level where we wanted a bit more weather protection, we used plywood panels. For the lower area which we wanted to have more ventilation, we used some of the extra flooring wire that wasn't used for the floor.
half built but bunnies already
We're usually building hutches because we need them, so as soon as any bunny space gets completed, there's usually a bunny to move into that space. The bunnies are used to us doing things near by, so they don't grumble too much if we're out there constructing their hutch while they're in it. We also bribe them with tasty ti leaves, bunnies are really susceptible to bribes.
In this case, all the noisy parts of the construction were already done. All we have left to do is to arrange the doors on the upper level and install the water system. That's pretty quiet things since the doors are held on with screws and the water system is mostly glued together PVC piping. I should make the water system a separate page, so I'll not go into the details here.
Once the roof is on, we would usually just leave the tools out in the hutch, too. Makes for easier construction if we didn't have to bring the tools and hardware supplies out each time.
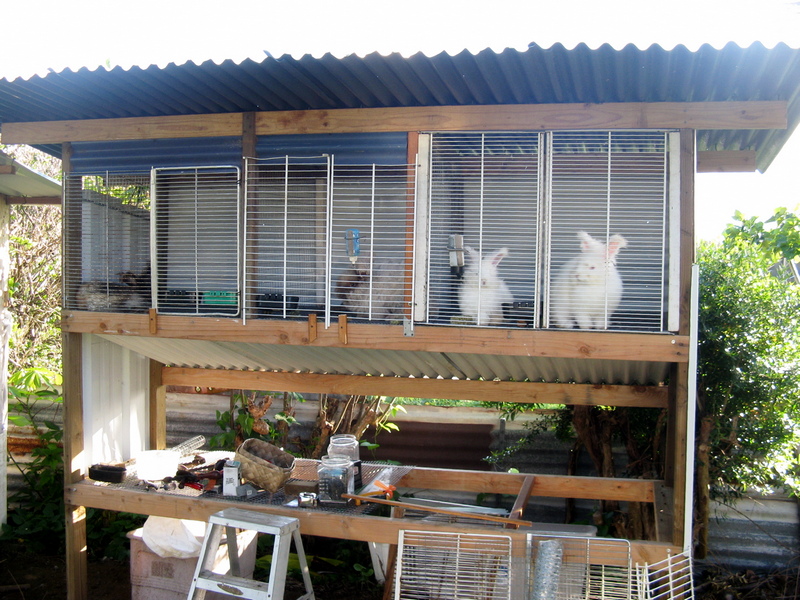
This is the second hutch built in the flat bunny yard.
The first hutch went together pretty well, so we built the second hutch there pretty much the same way. It got populated with bunnies before it was finished, too. We did get more of a slant on the metal roofing between the two hutch layers. That kept it a bit cleaner, but it still needed occasional cleaning.
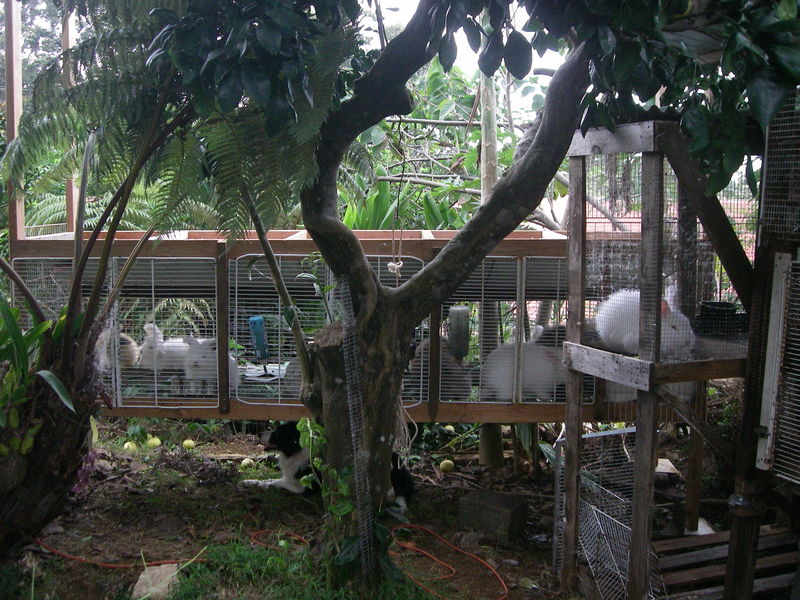
Big Bunny Hutch #3
We were still short on bunny space so an even bigger third bunny hutch was being built. Pretty much the same type of construction as the first two, but it was longer. You can see the temporary bunny hutch off on the right side of the picture. We try to keep enough space for bunnies, but we'd had quite a few babies that year. This third big hutch was set up as a long run so the bunnies could get more exercise in it.
We learned a lot building these hutches, although we didn't get to use them very long. The third hutch wasn't even completely finished before we bought another house and moved to the other side of town. We were back on a hillside with this house, so we're still aptly named "Hillside Farm". (Sigh!) The link for the next (and current) hutch is: Modular Bunny Hutches
