( our hearts and best hopes go to everyone impacted by the Covid-19 virus.
Just because we're doing non-Covid things, doesn't mean we have forgotten the folks suffering from the virus. We also really appreciate all those folks out there keeping things going and keeping everyone as healthy as possible )
April 30th, 2020
Getting Stuff Done
well, sorta? The project list isn't any shorter yet
Are the rest of you out there finding that all these "stay home" days aren't as productive as you'd expected? Around here, it seems that as soon as one project is done, four more pop up on the 'to do' list? It's like projects spawn new ones instead of getting done and staying done themselves.
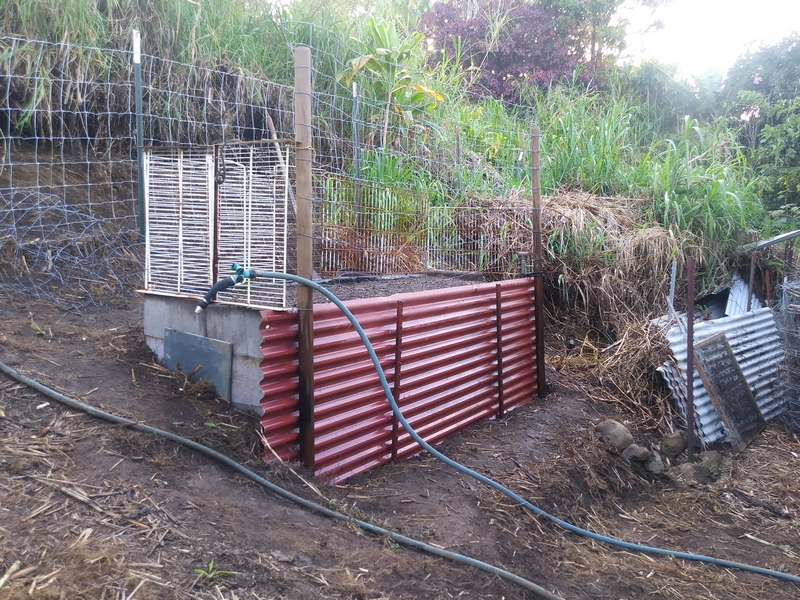
The Newest Raised Bed Garden
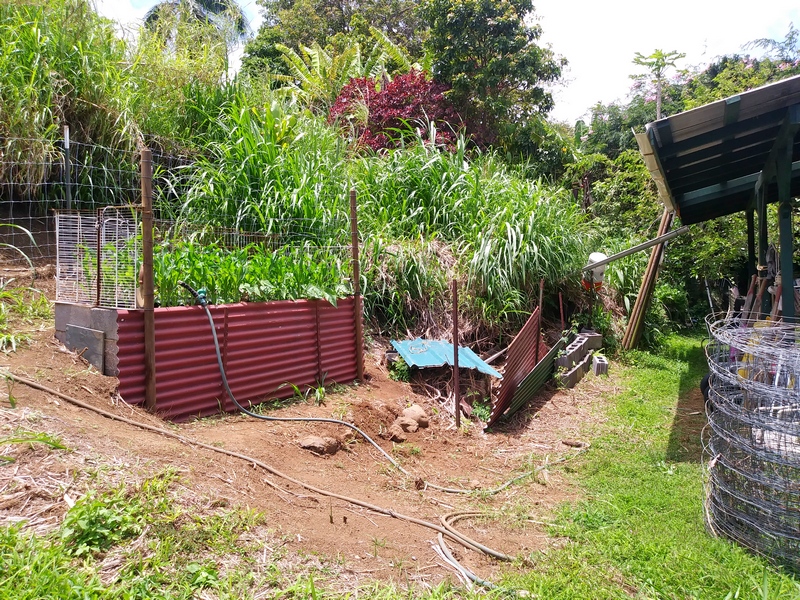
and the next garden site behind it - as if we need another project
The raised bed garden done earlier this month is a really good thing. Even though the stuff growing in the new garden is a lot like the stuff growing behind it, those are actually very different plants. In the garden is sweet corn, behind the garden are those really tall grasses which we are trying to get fenced in so sheep can eat them.
The sweet corn in the new raised bed garden is growing well, the watermelons and beans are also sprouted and the beans are starting to twine up the fence. However, now I need to clear out the next garden area - see that big pile of tall grasses behind the new raised bed garden? - and build the next raised bed garden. Another new project on the project list. I need to finish the sheep fence, too. This first garden was sorta part of the sheep fence project since once we had the tall grass cut back for the sheep fence, it seemed a perfect time for the newest garden .
I've been taking daily pictures of the garden sprouting and growing, I should see if I can make a time lapse picture with it and post that somewhere perhaps maybe make a garden page on this website? That would be a whole new section on the website. I did add in a New Changes" page so folks can keep up on what's going on with the website. It's under the "Farm News" drop down button should you want to find it later.
But, anyway, the new raised bed garden is growing well and I'm thinking of starting the next one sometime soon. It's on the project list, just not up at the top yet.
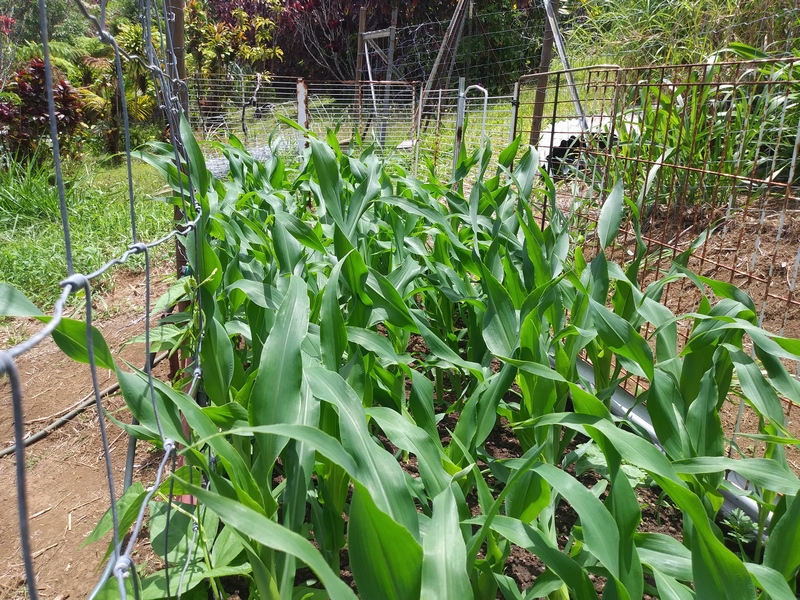
April 29th corn crop
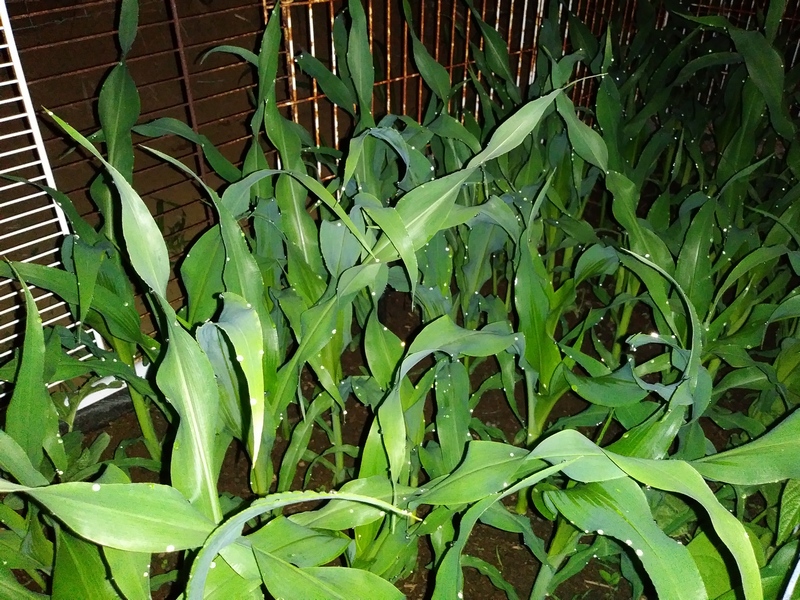
what's with evening water droplets?
Here's today's corn pictures. So far the corn crop is doing well even though it's pretty closely planted. It gets a lot of water and fertilizer, so we will see how close corn can be planted and still survive, let alone thrive.
I've been noticing these odd water droplets in the evenings that show up on the edges of the corn leaves. The bean and watermelon plants don't seem to do the same sort of thing. Why water droplets on the leaf edges? Is the plant trying to water itself? Is it trying to get rid of excess moisture? Does corn always do this? I've never noticed it before.
However, we have the internet! I can look it up! Hmm, according to this article on a website by Larry Hodgson, The Laidback Gardener (nice name), there's something called 'guttation' where too much water is exuded by the leaves. So, guess I've been watering the garden too much but with the raised bed garden being fairly severely overplanted, I figure too much is better than too little. The soil does drain well, so hopefully root rot won't be a problem.
Other green growies
multiple places to grow things is better than just one
The other raised bed garden is doing well with beans, lettuces and celery. There's a huge tomato plant growing there which is supposed to be 'Chocolate Pear' although there's no tomatoes yet. The "Greasy Grits" beans have been going gangbusters. They set a lot of bean pods and keep a lot of them up at the top of the plant and easy to reach. Pretty tasty pods and I think they may make a good soup bean, too. They are a true 'string' bean, though, and must have the strings removed before cooking them or the strings will be really hard to chew. Or, just pick up a bean with your fingers and sorta strip the tasty bean part out from between the strings, but don't let your mum see you do that.
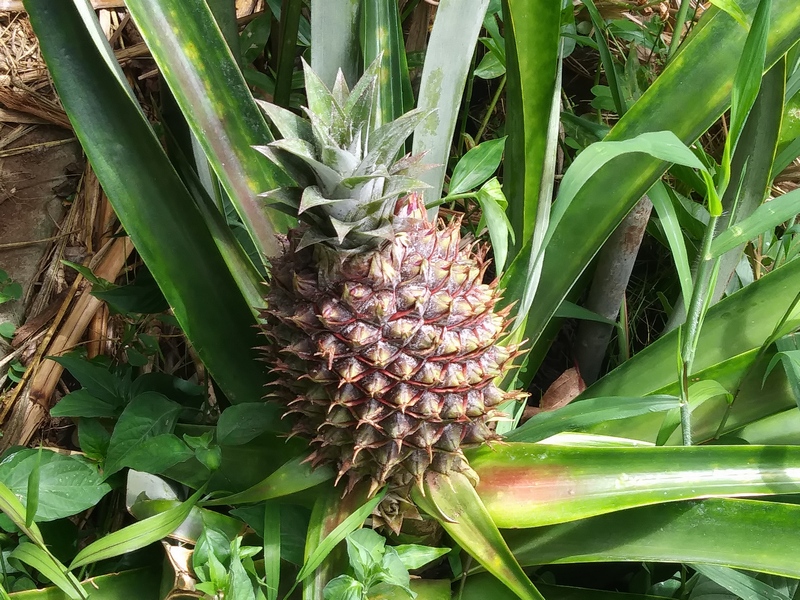
The little pineapple by the bunny hutch is continuing to grow bigger. So far it's been safe from weed whackers although since it's not in a raised bed garden it's within range of possible weedwhacker damage. Pineapples are usually a late summer sort of thing, so we will see if it gets ripe around late summer.
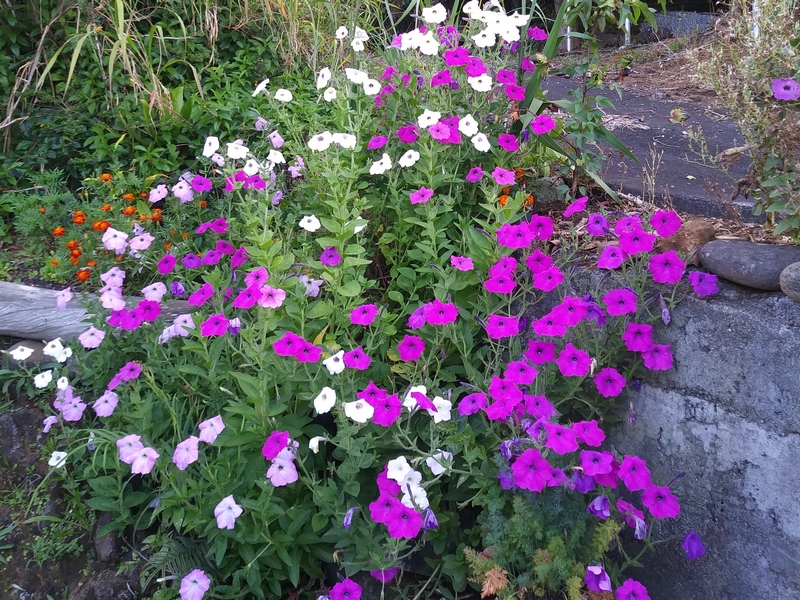
Petunias
from seed!
I've never tried growing petunias from seed before, it took awhile for them to get started but now they're very vigorous. They smell nice, too! They are called 'Balcony Mix' if I remember correctly. Some sort of semi-trailing variety and in a mix of colors. These were started inside and then planted out when they were plants instead of planted as seeds.
I know, they're "just petunias" but it's kinda nice growing some old standards. I like marigolds and nasturtiums, too. Well, for that matter, I like dandelions as well, but don't tell that to most folks on the mainland who seem to think dandelions are evil incarnate. In Hawaii since we have a year round growing season, we don't fuss much with trying to get a 'perfect' lawn. Seems like half the time we're trying to keep the 'lawn' from eating the house. Which is why we're fencing the back yard for sheep.
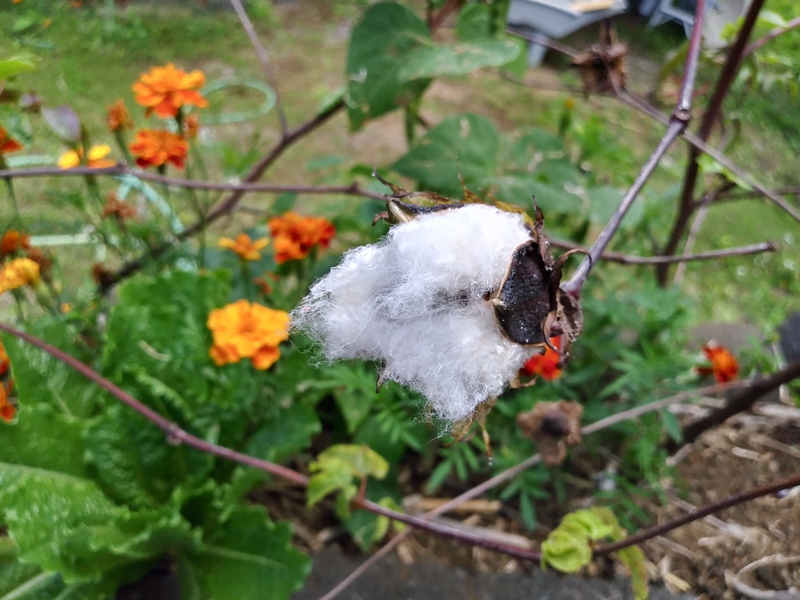
Bleak Hall Sea Island white cotton boll
the birds have been helping harvest them lately
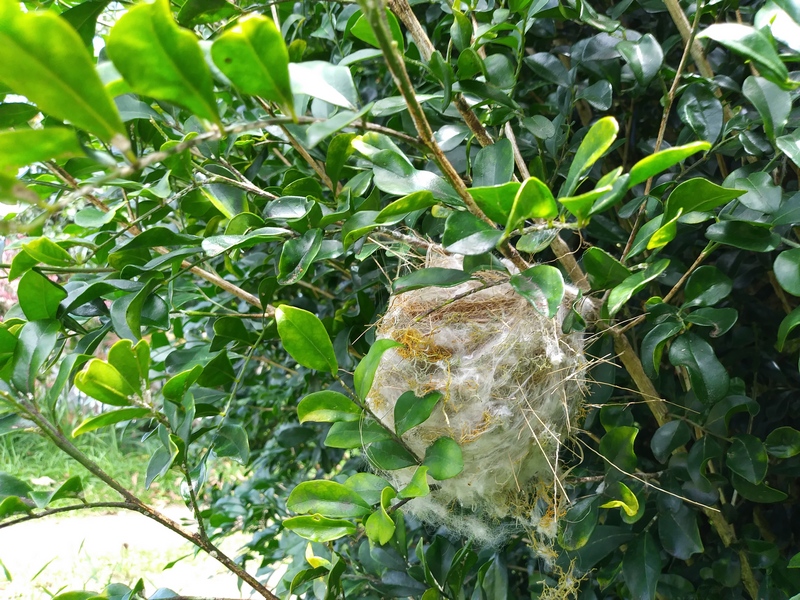
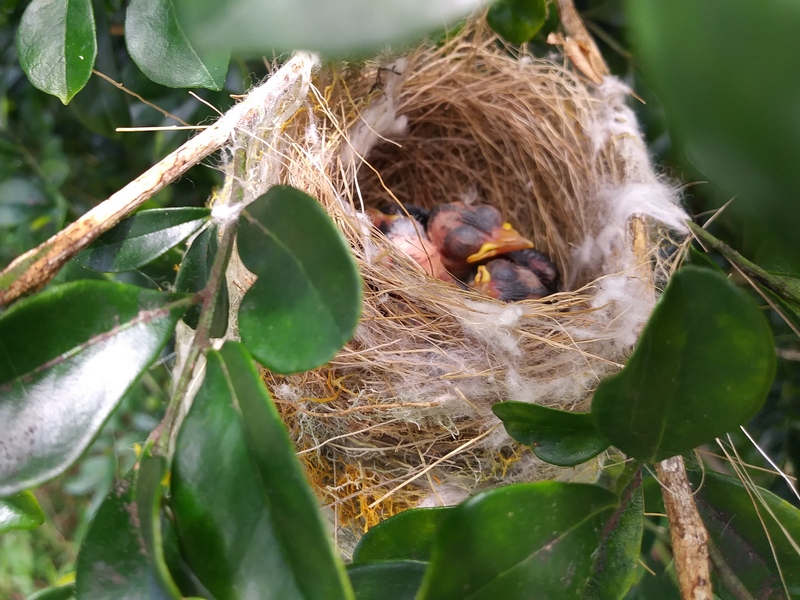
Bird nest in the hedge
with a nest built from angora and cotton fibers
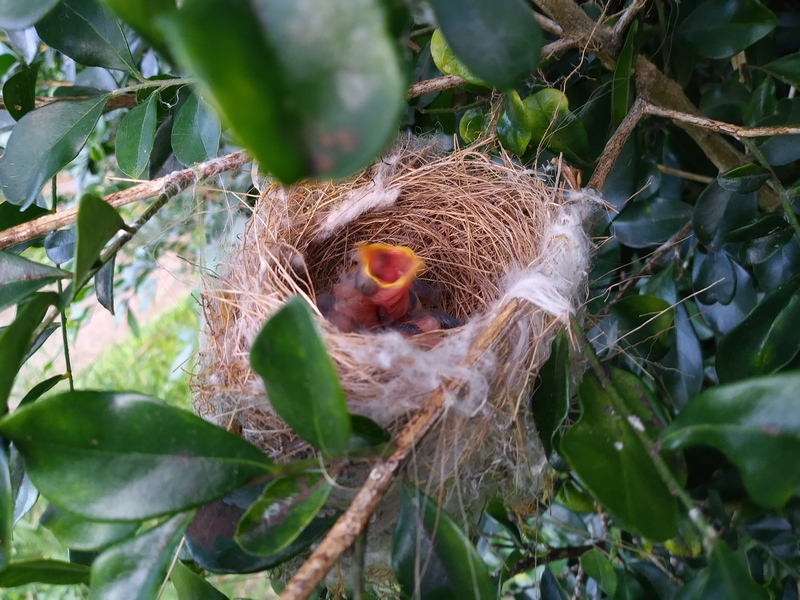
Baby birds in the nest
hungry little ones
I was spraying the mock orange hedge with some neem oil mix to get rid of sooty mildew (works a treat on sooty mildew) and found these little ones hanging right on the edge of the hedge. Dunno why I hadn't noticed them before, although we don't do much in that area of the yard.
As you can see, this is one of the birds who has been 'helping' me with the cotton and angora bunny fluff harvesting. Using bunny fluff and cotton fluff to build her nest, those should be some comfy and toasty warm little birds. I haven't a clue what sort they are just yet, perhaps a Japanese White Eye? At the moment, they aren't particularly pretty, but I'm sure they will be once they get around to growing some feathers. There's three of them in the nest and any time I get near there they pop their mouths up, wide open and waving. They don't make much noise while doing it, though, not like baby chickens.
Bath Tile Project
turning out lovely!
Bath Restoration
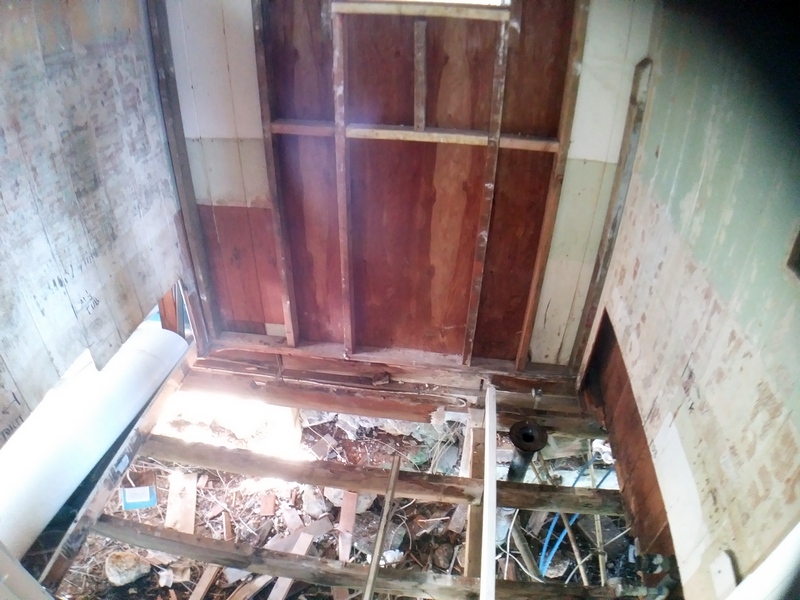
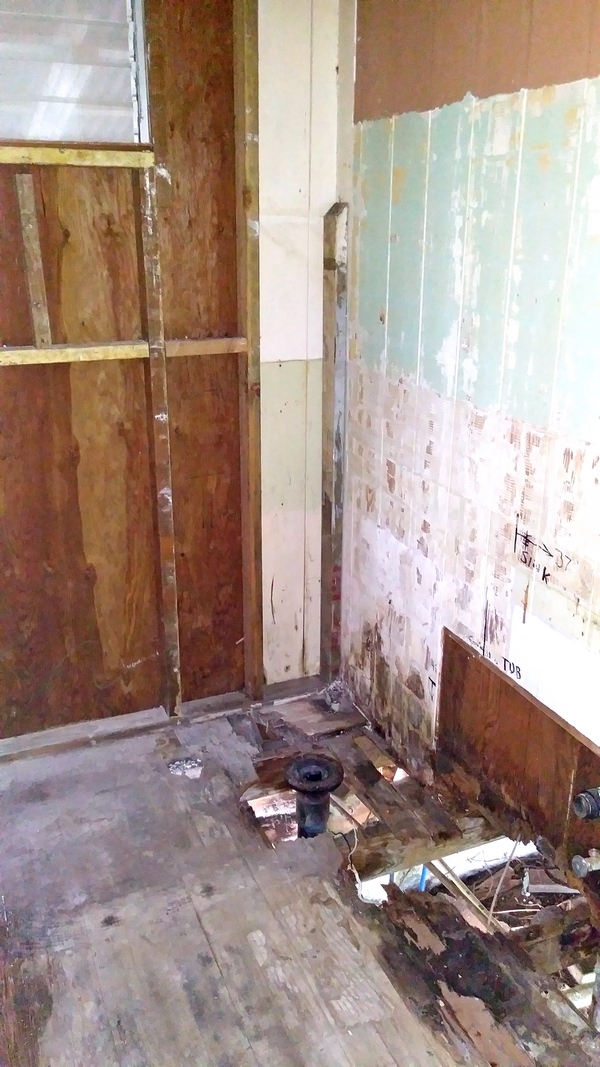
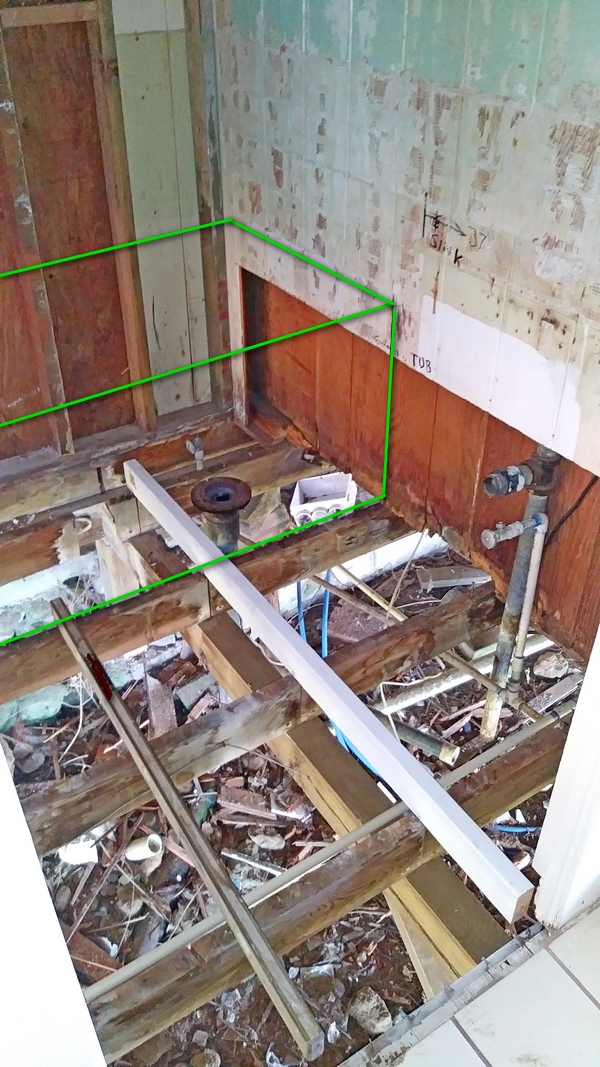
obviously a 'before' picture
Bath Restoration Project
with "current" and "before" pictures
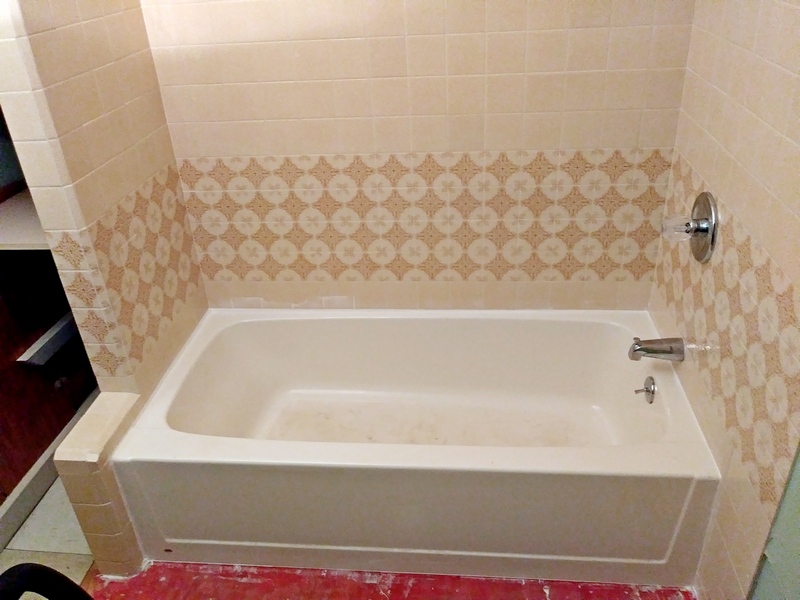
The renovation of the bathroom at the new little rental house is continuing. Sometimes it's really nice to compare the 'before' and/or 'during' pictures with a current picture just to appreciate how much work has gone into the project. The green lines on the one 'before' picture shows the new location of the tub.
Originally, the bath had a tile floor with a huge lump in the middle of it. There was no closet, the toilet was facing the side of the bath and there wasn't much room between the two. It wasn't a particularly well thought out layout, IMHO, but it's what was there for about sixty eight years so I suppose it worked well enough. But when we started the renovation of the little rental house, the wall behind the tub was rotted out, the floor under the sink was rotted out, structurally the whole thing was a mess. Putting tile over the plywood patch on the floor really hadn't fixed the floor very well and that was what was causing the big lump in the floor.
Since the whole thing needed repair, it seemed a good time to look into changing up the floor plan a little. The tub and the toilet swapped places and things are vastly improved. By putting the tub under the window, that allows for a small closet space at the end of the tub. Which is a really good thing! What kind of useable bath has no closet? It also allows the toilet to face the sink and have more knee room in front of it, another really good thing.
New floor joists, new floor decking, relocated fixtures and now the finish work which seems to take more time and effort than the structural parts. The red stuff is supposed to be really good waterproofing. The tile work came out brilliantly and this is even his first tile project but You Tube videos are wonderfully educational. The next part of the project is putting down linoleum tiles, the old fashioned kind that are glued down.
This is an old house, we like to keep things true to it's age and style when possible. Frequently, it seems folks get ahold of a nice old house and try to rip out everything that gives it character and make it just like all the cookie cutter 'modern' houses. We like the old style houses, they seem much more comfortable.
This little house had some squatters in it several years ago, they were 'improving' it by taking out the original cabinets and doors. Original light fixtures and everything else they didn't like as well. At least they didn't get around to 'improving' the windows before they got chased out.
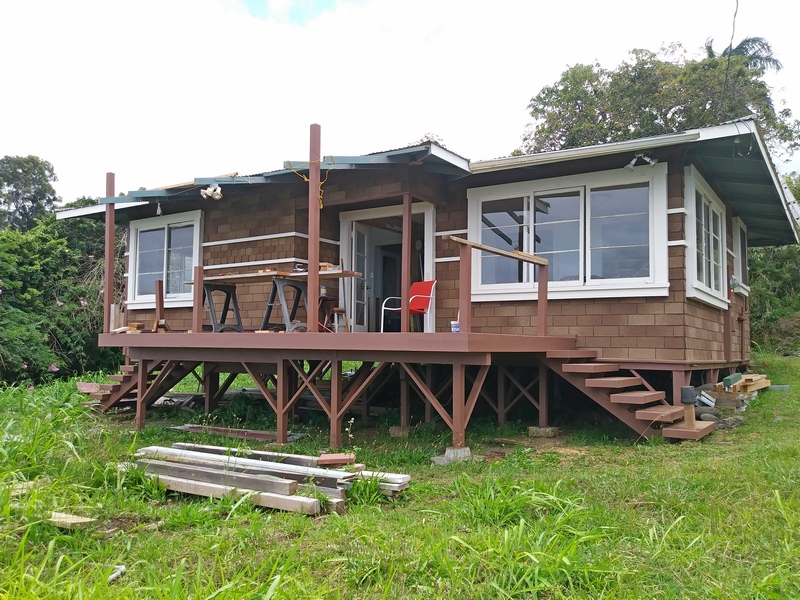
Lanai Restoration
new steps up
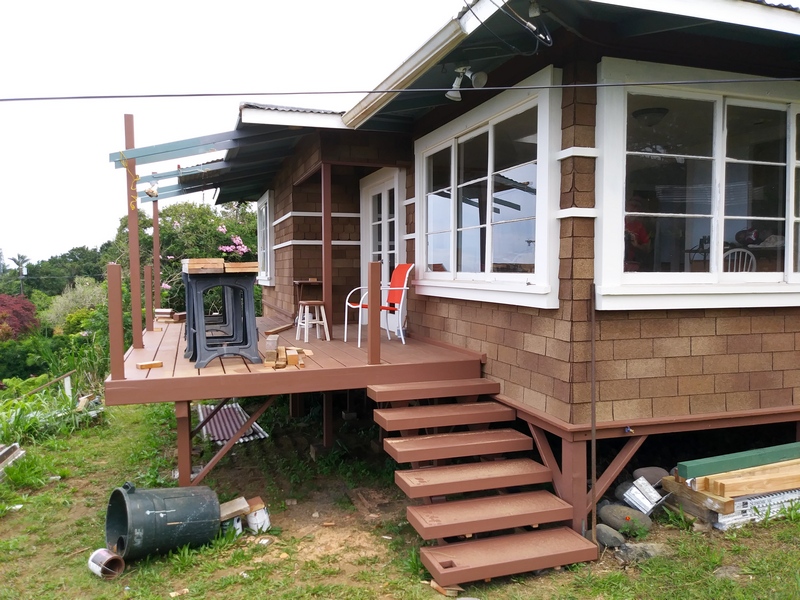
Lanai Steps
steps are a really good thing
Rebuilding the Lanai
mostly been working on the steps lately
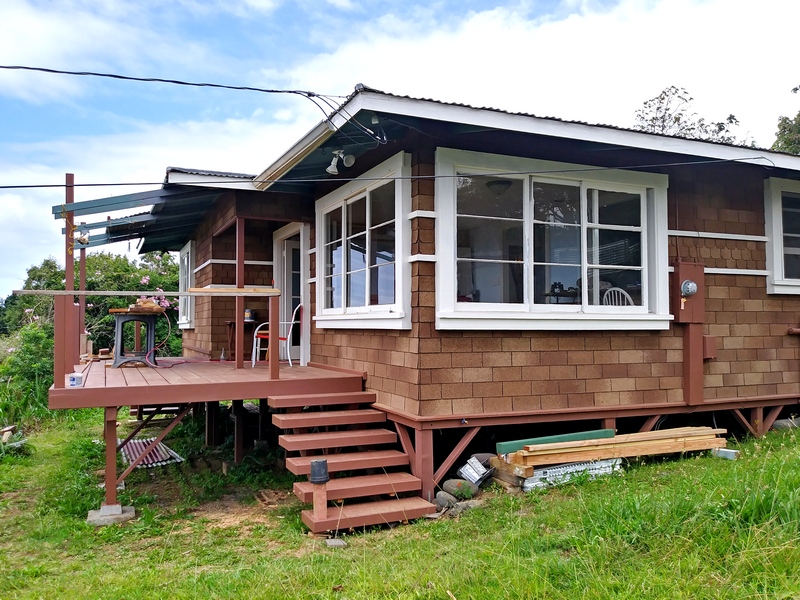
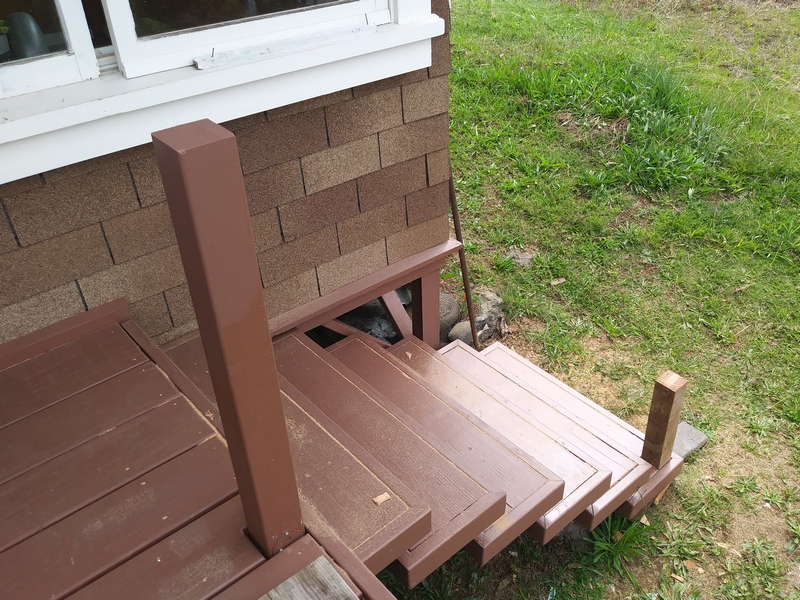
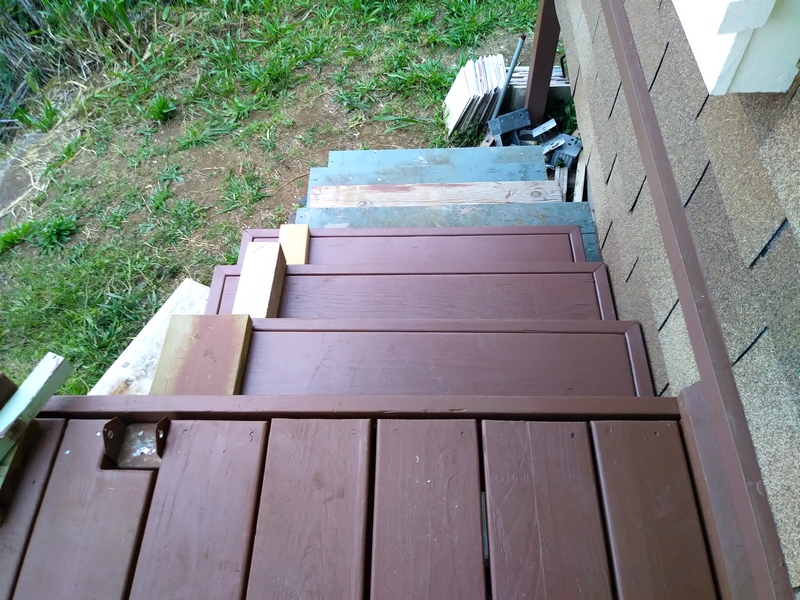
It's really nice to be able to walk up on either side of the rebuilt and restored lanai these days. For awhile, we had to walk all the way around to the back door to get to the lanai. Then we had temporary steps which weren't nailed on. Easier than walking to the back door, but until they are nailed down, steps still remain a bit dangerous. Now we finally have all the steps nailed down on both the stairways. Still need the railings, of course, but one step at a time. (Sorry, couldn't resist.)
New Bunny Hutch
looks good on paper!
New Bunny Hutch
aka 'taking a break from house restorations'
It's been awhile that we've been working on the restoration of the little rental house. I think it will be a full year this upcoming July/August so I suppose it's only been three quarters of a year for the project. We don't work fast at all.
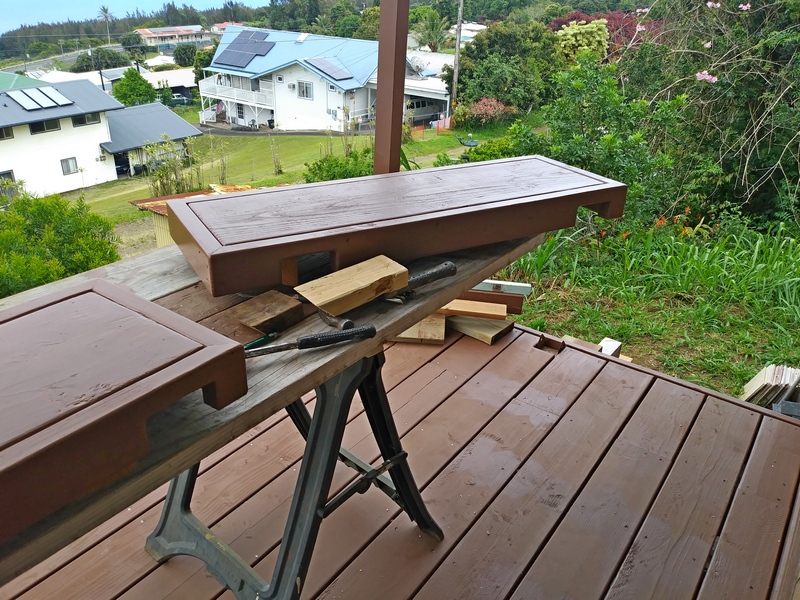
Every once in awhile, it's nice to take time for a few other projects. In this case, it's a new bunny hutch. We have some girls who are going to want a nice secure place for babies, so it is about time to build a hutch especially for nesting.
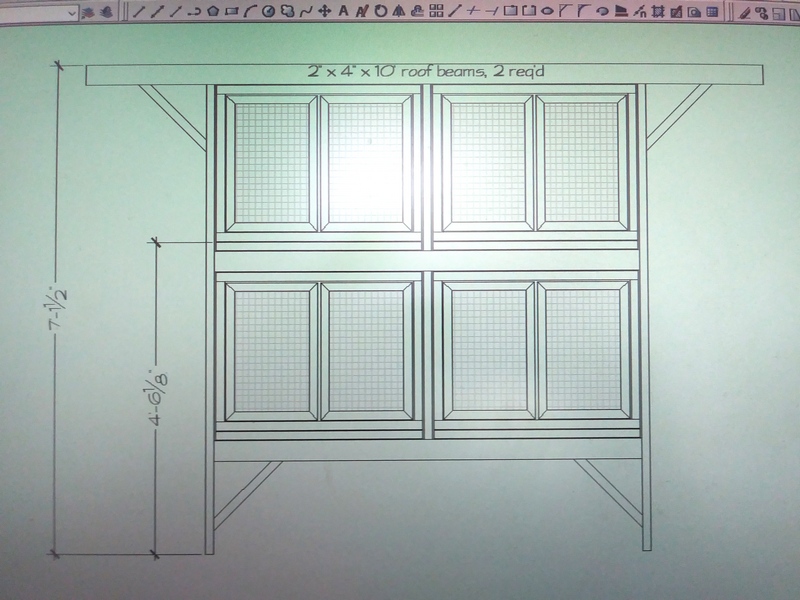
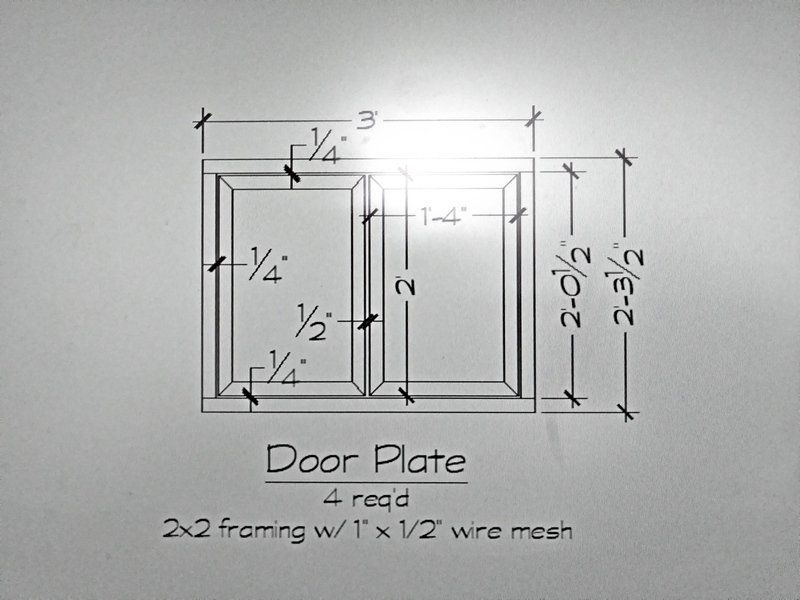
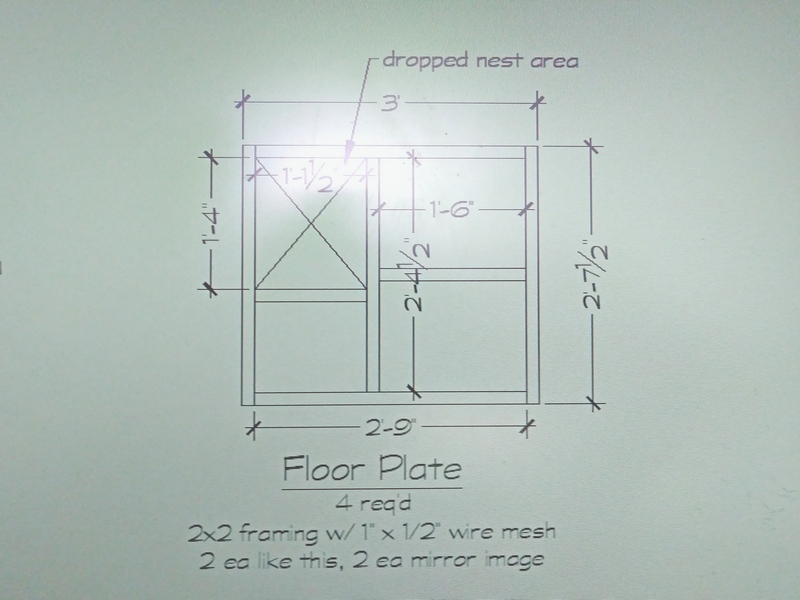
A nesting hutch needs to be ratproof, ant proof, ventilated but not drafty and a nice quiet area so the doe will be comfortable. This hutch space can be configured for either four nest sites or two larger ones. Since we rarely seem to have all the prospective litters show up, starting with four spaces and then changing it to two larger ones will probably work out pretty well.
The hutch is built in the 'modular' style, so the floor plates will be interchangeable with the existing hutches. The doors are not all the same height, though, so they don't actually interchange with the other hutches but they will interchange with each other on this hutch. There will be a removeable wall in the middle which will probably have an empty frame to fill in the 1.5" gap when the wall isn't there. We will see, that's one of the last parts to be built.
Overall, the hutch is about seven feet tall, about six feet wide with about ten feet of roofing above. The hutch spaces are about two and a half feet deep, so the whole hutch will probably need to be staked to the ground to keep the wind from blowing it over on really windy days. Hmm, maybe I should build four of these and tie the roof tips together so they don't blow over? Well, maybe next bunny yard.
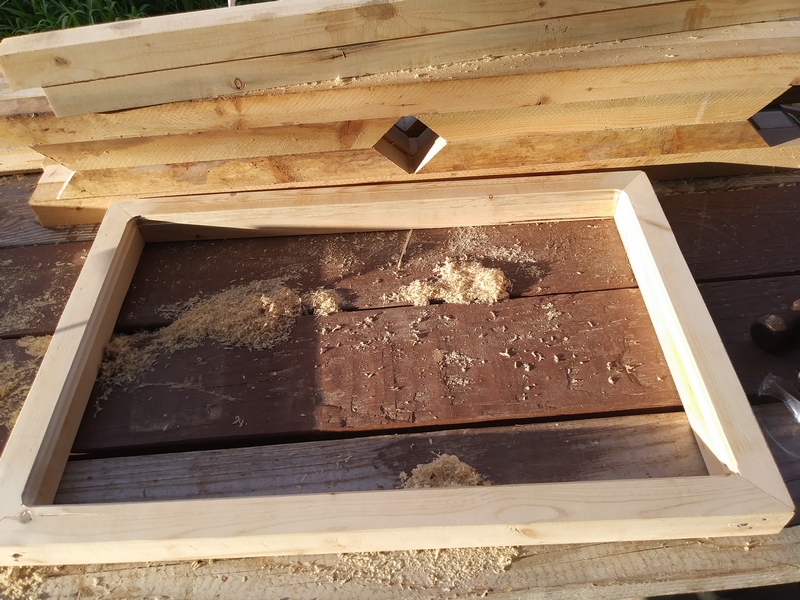
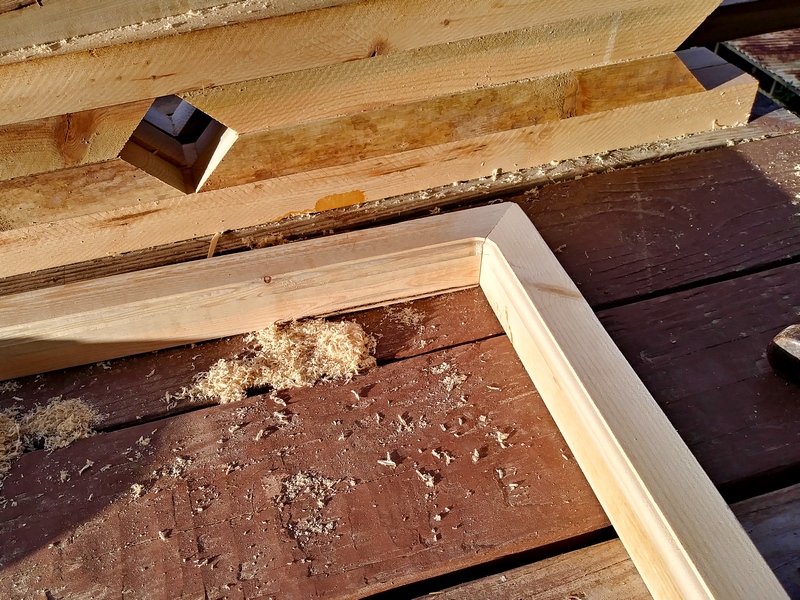
At the moment, I'm building the door plates. Each door 'plate' has two hinged doors and the whole 'plate' is as wide as a floor plate so they go in matched pairs, a door plate with a floor plate. Those are set on racks which have fixed sides. On this one, I may have the back be built of the same wood frame with wire type construction. I've been using refrigerator racks for that portion, but sometimes rats can fit through the wire spacing on refrigerator racks, so this hutch will have the wire & wood frame which has smaller wire spacing to make it more rat proof.
At some point, I'll put all this over on the 'Hutches' page, but at the moment it's only here on the 'New Farm News' page.
As you can see, I'm doing a bit of 'overkill' with the doors. It's good practice with the router to make fancy edges on the doors. It's more than a mere bunny hutch needs, but it's always good to get in new woodworking skills on projects where it doesn't really matter.
Click on the picture above for the previous blog entry
or check the list of older blog posts at the bottom of this page
Click on the bunny for the Home Page
