🔨 Shingles! 🔨
(not just for roofs anymore)
November 30th, 2019
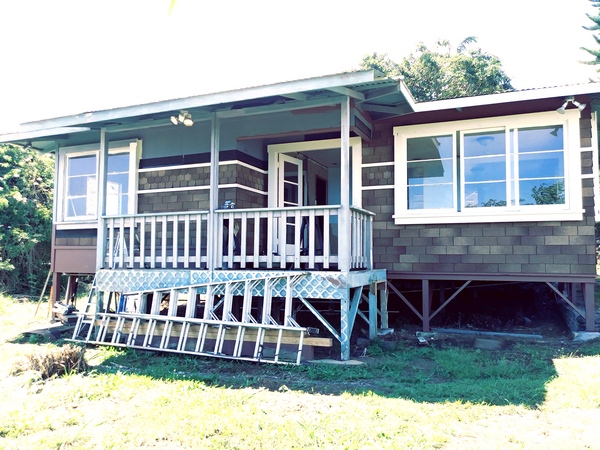
The Before Picture or 'The Little House' project
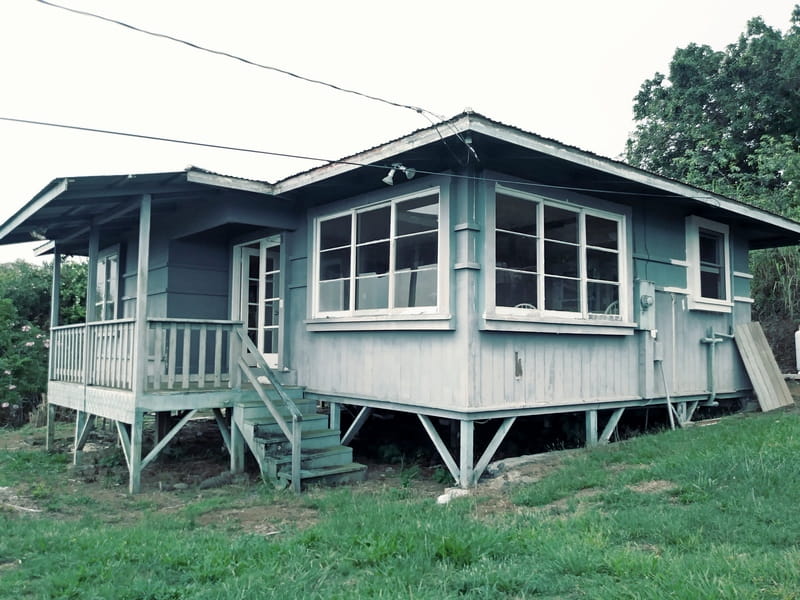
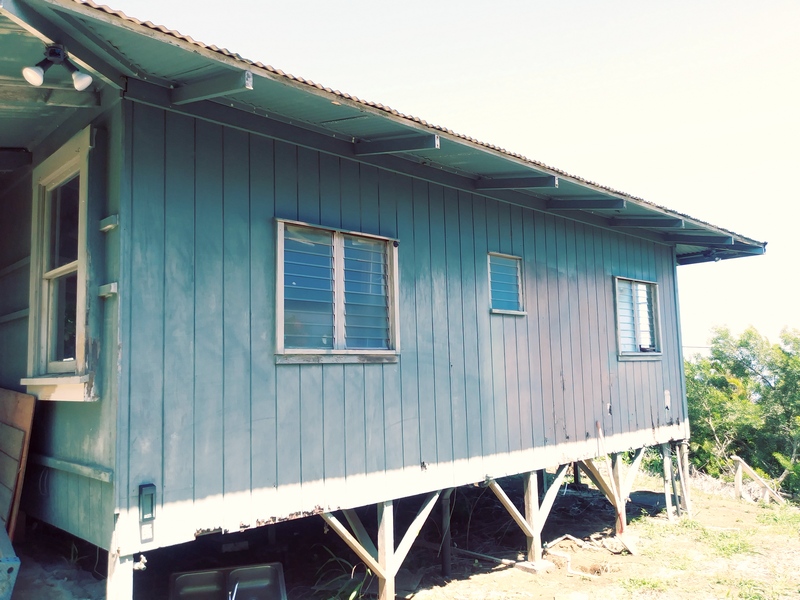
This is, one hopes it is obvious, one of the 'before' pictures. As you can see, this little house has a few issues. Actually, it had - and for that matter still has, so many issues we don't even bother to make a list. It would be hugely depressing had we even considered doing that. Plus, we're actually pretty lazy and having all the work listed out would probably have us run for the hills screaming. Hmm, although with this little house, we wouldn't have to run far to find a hill.
Technically, this picture isn't really from before we did anything to the house, the kitchen window had been repaired and the trim painted around it by the time this picture was taken. It's a double hung sash window and the sash weights had fallen off the cords, so it needed new sash cords. Which are now made of nylon cord instead of cotton cord. Was nylon an option for sash cords in 1953? The window needed repainting as well, which is the part you can actually see in the picture since sash cords hide well. But you can also see various damaged areas on the side of the house which need repair so it's still a good 'before' picture.
Things to note are the areas of holes in the siding, the front steps rotting off, the floor sagging, the front post rotted, etc., etc. Some of the damage you can't see because the damaged item isn't even there anymore. Such as the post under what used to be the front corner of the front porch eaves - back when the porch was much smaller and was an actual porch instead of a lanai. That little eyebrow-rooflet-eave-thing (I don't know it's actual name) over the front door is sagging a few inches. Or the steps on the other side of the front lanai that aren't there anymore, but you wouldn't have been able to see they weren't there anymore from this angle of the picture anyway. There is/was a whole pile of assorted damages, but, they're fixable, so we are fixing and upping.
At 760 square feet, it's a pretty small house. Which, when it needs this much repair, is a good thing! It was originally a two bedroom one bath house, it had some folks 'renovating' it (they were evil squatters with either a chain saw or SawsAll) who apparently didn't like walls. They hacked out the walls between the kitchen and the living room and the living room and the front bedroom. They did a total hack and bash job on it with ragged ends of the T & G boards left at the ceiling and floor, it was a mess. "Remove Wall" is written on a few more walls, but I think they figured out that the walls were holding the roof up when the living room/kitchen ceiling fell a few inches (surprised it didn't fall on their heads)so at least those last walls weren't removed.
Because of those crazy wall removing people, when we got the little house it was a one bedroom with an 'open floorplan' that was way too open. It will be a two bedroom again when we're done. One of the first projects was to push the ceiling back up, but this is supposed to be about the exterior shingles so we will get into ceilings later.
One way to figure how much work is involved in fixing this Little House is that it sat on the real estate market for almost a year and it was one of the lowest priced if not the lowest priced property in the area. It was advertised as a three bedroom, one and a half bath but after the wall hackers it was just a one bedroom. Folks looking for a three bedroom house would show up and look at it, but even with the walls replaced, it still wasn't a three bedroom. Several folks even brought contractors with them (we live nearby so we were watching this parade of hopefuls as they came by) and there would be a lot of arm waving and head shaking. We finally scraped enough together to buy the little house so now we can resurrect it and then we're not quite sure what we will do. Either live in it or rent it, at this moment, I'm guessing it will become a rental since if we were to rent the house we're living in, we'd have to fix that one up first. We were in the middle of fixing it up but got distracted by this Little House. It's way nicer fixing and upping when you don't live in the middle of the construction site.
It was originally built in 1953 and since it was built in Hawaii, it's what's called 'single wall construction'. That means the exterior walls; well actually, almost all the walls, are vertical 1" x 6" tongue and groove boards. That's it, just one layer of these vertical boards. The 'racing stripes' around the exterior of the house are not a design feature, they're structural and hold the vertical boards tight to each other.
Another interesting feature of single wall construction Hawaii houses is that there isn't anywhere to run the plumbing so frequently it's hung outside the walls, kinda like house jewelry. Sometimes it's painted the same color as the trim to accent it. Why it wasn't run through the floor and around under the house, I don't know. The house is up on stilts, which is called a 'post & pier' foundation, so there's lots of room under there. Well, it's what they did in the fifties, it doesn't bother us enough to change it but we aren't going to paint it in contrasting trim colors.
There are a lot of damaged areas on the exterior walls and from various repairs over the years, areas which have had a different type of siding. Trying to get it nice enough to paint would have been a huge job and would also require repainting every seven to ten years or so. The house we're living in was built in the early 50's and it has three tab asphalt roofing shingles installed as siding. From the condition of the shingles (still hanging in there, but kinda stiff and dry-ish), I'm guessing the shingles were installed when the house was still fairly new.
Here's the thought process about how to fix the exterior of the little house:
Hawaii has weather.
Weather is hard on houses.
Asphalt shingles keep the weather off the houses.
This little house has damaged sides.
Asphalt shingles cover up damage.
Obvious answer: Asphalt shingles instead of paint. Ha!
Having found the fix to the problem of the beat up exterior, the next thing to do is to implement it. We found a good deal on three tab asphalt shingles, although the color selection was pretty limited. I'd hoped for green, but brown will do. It's also a better deal if a lot of shingles are bought at the same time so we got a whole pallet full of them. The hardware store delivers, too! (Thank goodness! The jobsite is all uphill.) I'd not realized how heavy a single bundle of asphalt shingles are, I'm guessing sixty pounds? Heavier than a bag of bunny feed and that's fifty pounds.
Everything starts out downhill.
Good thing they brought a forklift and our nice neighbor lets us bring things up her driveway until we get a driveway on our side of the property line. At one time she owned both properties so the driveway to the carport attached to the back of the little house was accessed by her driveway on her property next door. The pallet of shingles was brought uphill and deposited between the fence posts (there's just the fence posts on the property line, but no actual fencing) on our side so it was perfect. I'm really glad we didn't have to haul them up from the road below since they are really heavy.
House on a Hill
Here's another 'before' picture to show a bit of that front yard topography and why we really don't want to haul shingles from the roadway up to the little house. There's an old falling down carport at the front left corner of the yard just out of view of the picture. Originally we had planned on storing the shingles there and hauling them up one bundle at a time. There is a set of concrete steps going up to the little house but they're in need of repair and no longer level. Having the shingles delivered up hill saved us just tons of work.
So this is the beginning canvas, as it were. As if the little house is some sort of artwork? Well, work anyway, not a lot of art to it. So, anyway, these are the 'beginning' pictures.
For the start of the shingling part of the little house renovation project, it seemed easiest to start over at the kitchen corner. That was the closest point to where the pile of shingles ended up and it didn't need a really tall ladder.

Injured front foot on the little gray house
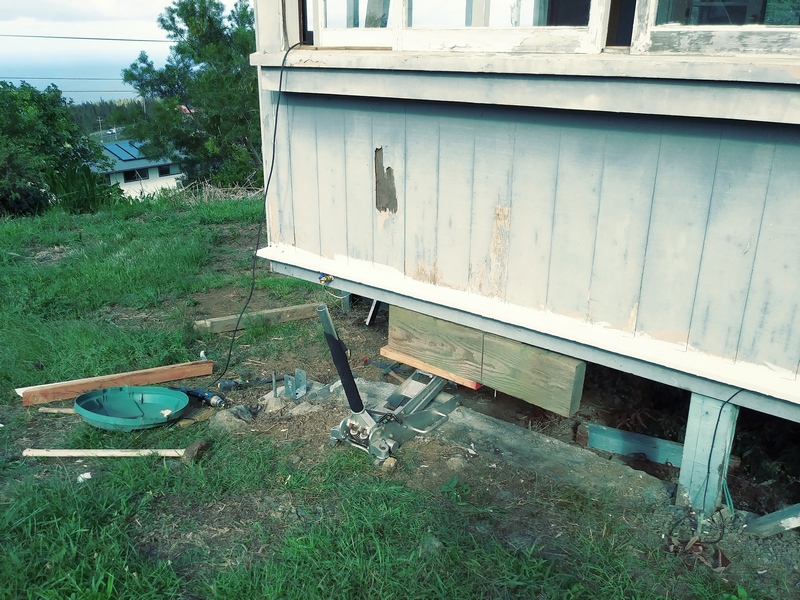
and it IS a floor jack after all
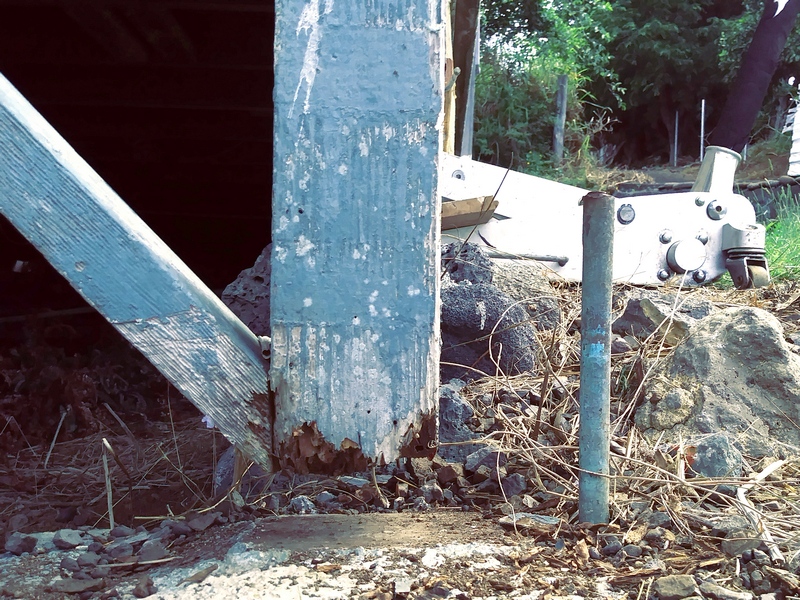
When the floor is leveled, the front foundation post doesn't even reach the ground
Starting the Shingling Project
(had to level the wall a bit before putting shingles on it)
This whole project has been sort of layers of projects. Can't do one thing without doing two or six other things first. In the case of shingling the exterior walls, the living room floor and wall were sagging at the front corner and had to be leveled before putting the shingles on it.
The front post repair went surprisingly quickly. I'd done some repair on one of the big living room windows and when it was replaced, I tried shutting it and there was a three inch gap where they didn't shut. The window was square, but the window frame wasn't. A level on the floor indicated it was about three inches (at least) too low in the front corner. So, the floor had to be leveled. We had already pushed the ceiling between the living room and the kitchen back up with the car jack so it was still kicking around the jobsite. It's a floor jack, right? May as well jack up the floor with it. It worked a treat and we already had the Simpson post base, a length of 4"x 4" post and assorted 2"x 4"s for the braces (the braces are those 45 degree angled boards on the sides of the 4"x 4" post) so we were able to replace the post within an hour or two of finding out the floor wasn't level. Although, then we had to run around and check other floors and placed for level. Leveling the front living room corner brought the front living room wall to vertical again, too. Amazing what one little bit of 4"x 4" post can do.
There was some other wall repairs as we went along, although because the shingles were going to be the finish layer, we didn't have to get things really exact before installing them. Had we been painting the exterior, the base work would have been huge if not impossible due to the amount of damage and changes in the exterior siding over the years. Well, I suppose we could have painted over all the different types of siding and such, it just wouldn't have looked very good. At least, in my estimation. As with probably most projects, there's at least about fourteen different ways to get things done.
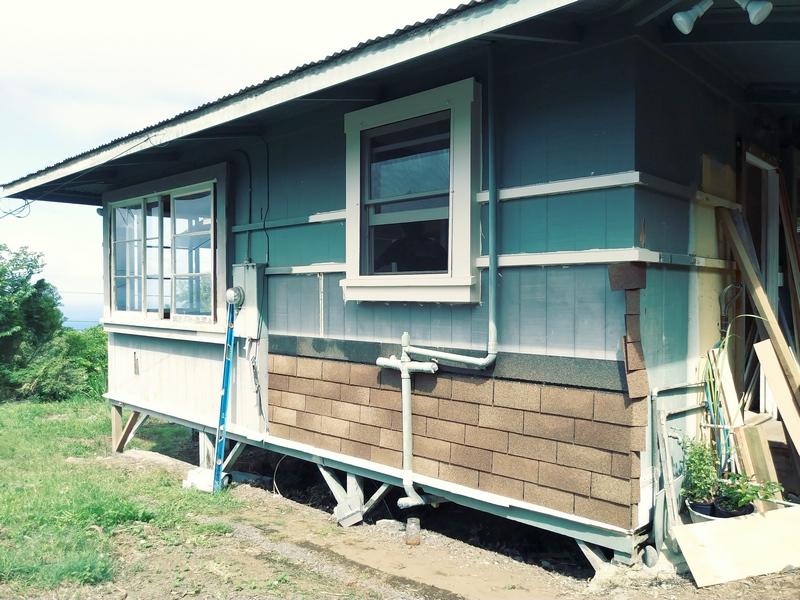
Learning how to shingle at the start of the project
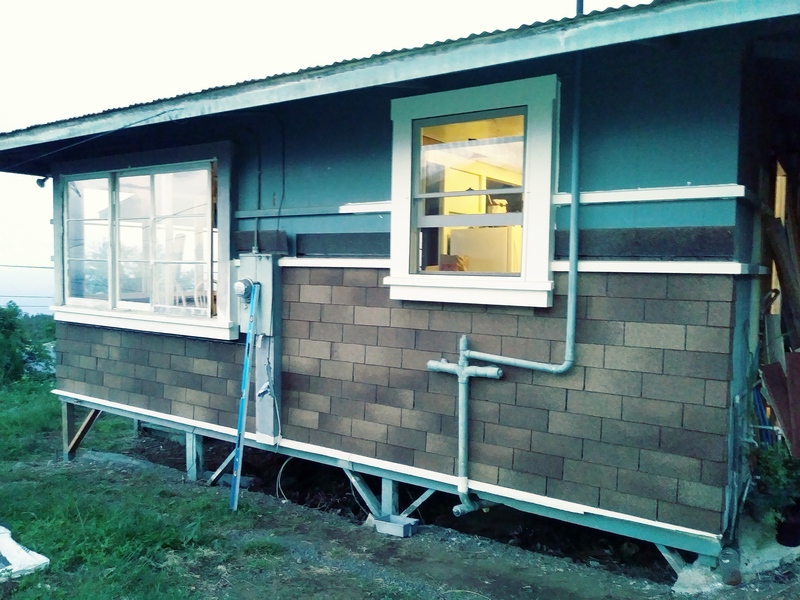
It's easier to paint the racing stripes before adding shingles
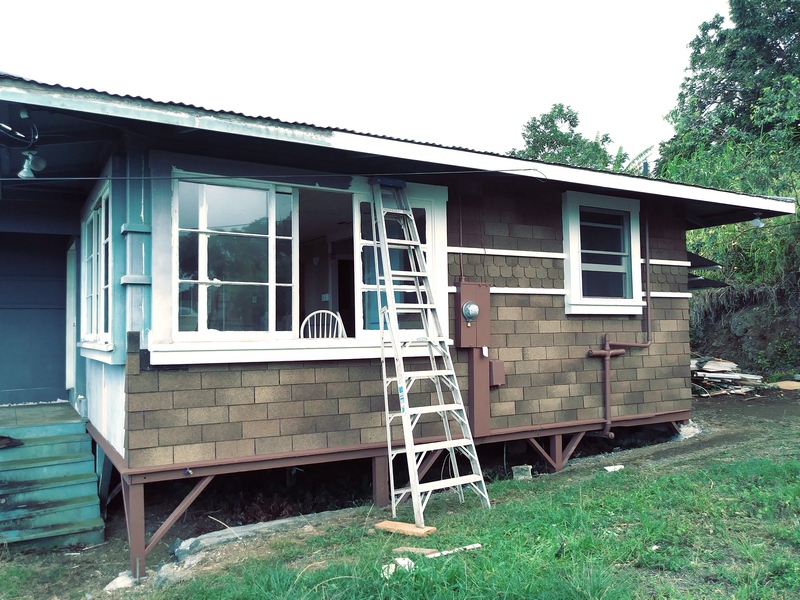
Decided the white trim at the bottom showed dirt too easily so it became brown.
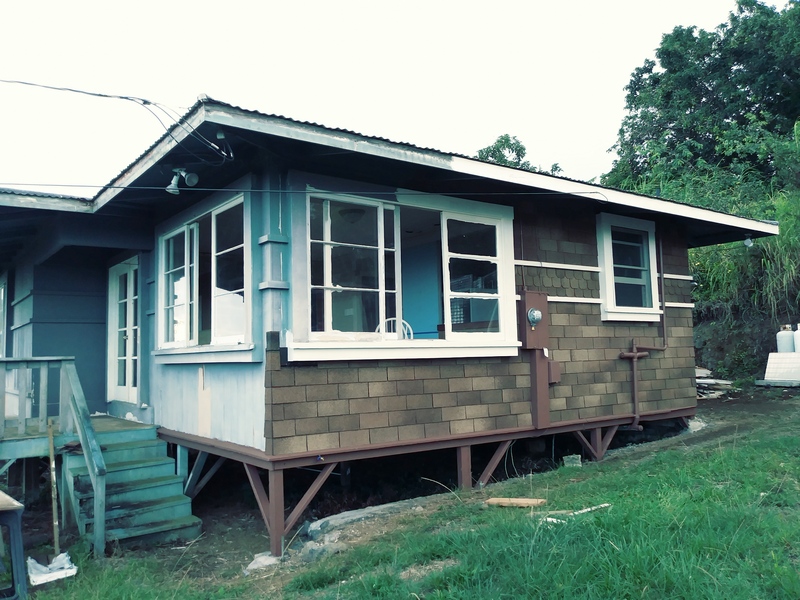
Slogging along and trying to figure out how to do corners
Finally actually getting shingles put on
It's been a couple of decades since I'd done any shingling and the shingles have even changed. They used to have a bit of plastic strip that had to be pulled off the back of each shingle when installing it, but that's not necessary anymore. Shingling still involves a lot of short little nails, though. Since we're nailing to the sides of the house, we have to use extra short nails so they don't go completely through the walls. That's because it's a 'single wall' type constuction and the total wall thickness is approximately 1" thick. That also means we can't use a nail gun since there aren't any that can use that short of roofing nails. I've been using a pair of needle nose pliers to hold the nails since otherwise too many fingers get smashed. It works, but it's a beyond tedious method. Also, since we're working on the sides of the house, there's a lot of odd shaped areas to fill and it takes a lot longer to fit the shingles into the various spaces.
The 'racing stripes' on the side of the house as well as the lower and upper trim were painted before shingling so there wouldn't be a chance of the paint getting on the shingles like there would be if we painted them after shingling. The 'racing stripes' are actually structural elements. They hold the vertical T & G 1" thick boards that make up the wall. In these old Hawaii houses, a lot of the trim is structural.
The shingles on the first side went pretty quickly, although things slowed down once I got up to the front corner. Tiny little pieces to fit in take awhile and progress in complicated areas just seems glacially slow. Plus there was a lot more of 'up the ladder' & 'down the ladder' since the house is getting higher off the ground.
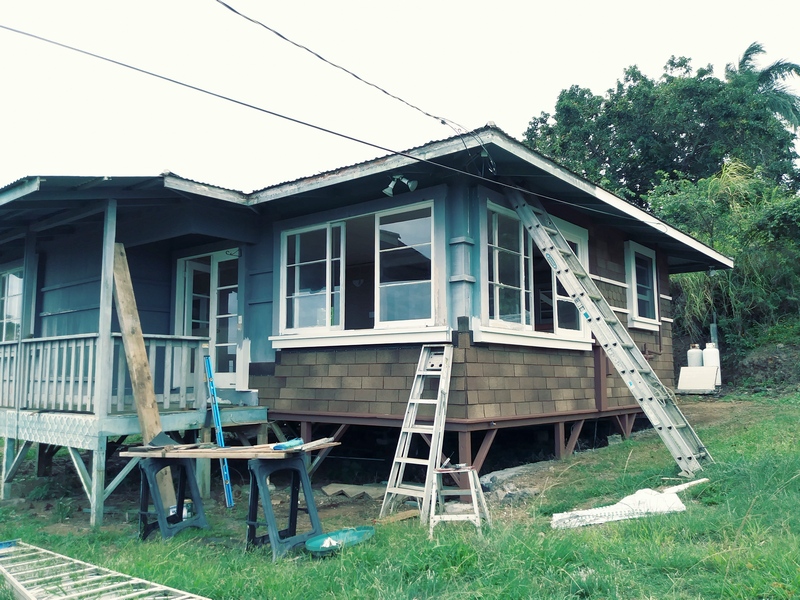
Finally starting on the next side
still have the upper areas to do
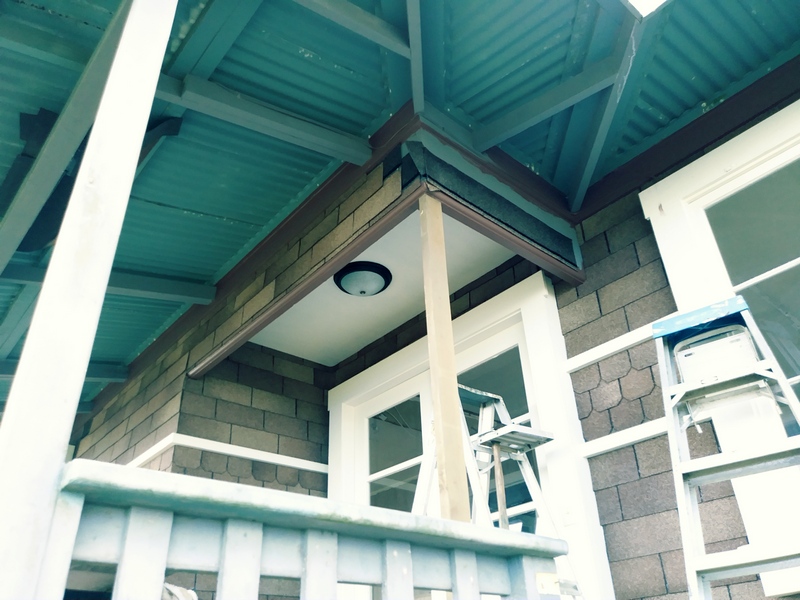
It takes longer to go around complicated shapes
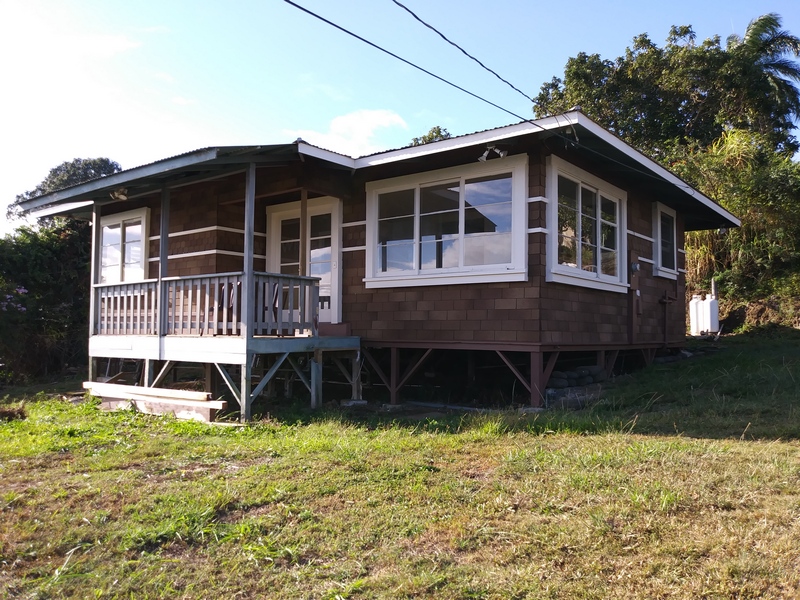
Two sides done! Yay! so half way through the shingling
Finally actually getting shingles put on
The front of the house started out going pretty quickly since it was mostly just filling in under the front window. Nice big square area. When full shingles can be put on, it goes pretty quickly. Soon as they have to be cut to fit around things, then the project slows way down. The front door area took a long time because of the small spaces to fill in.
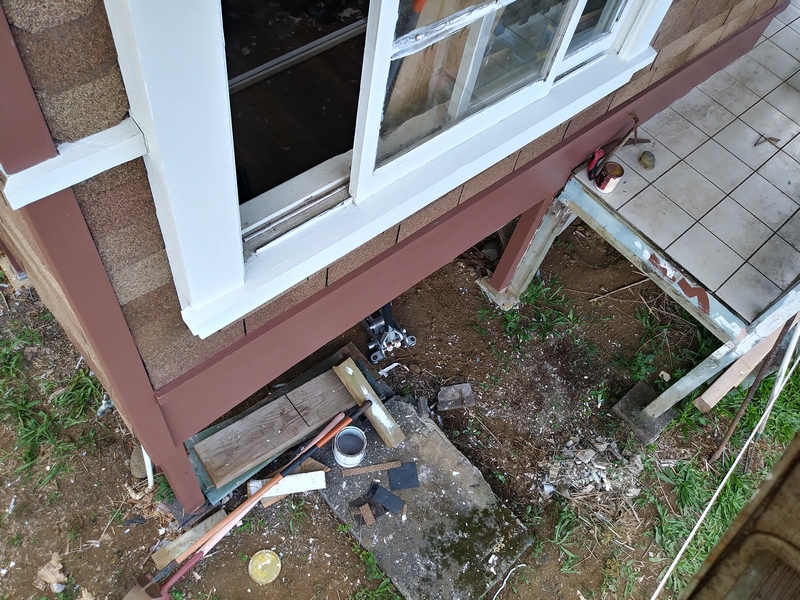
looking down from the top of the ladder!
wall repair and add in trim and racing stripes
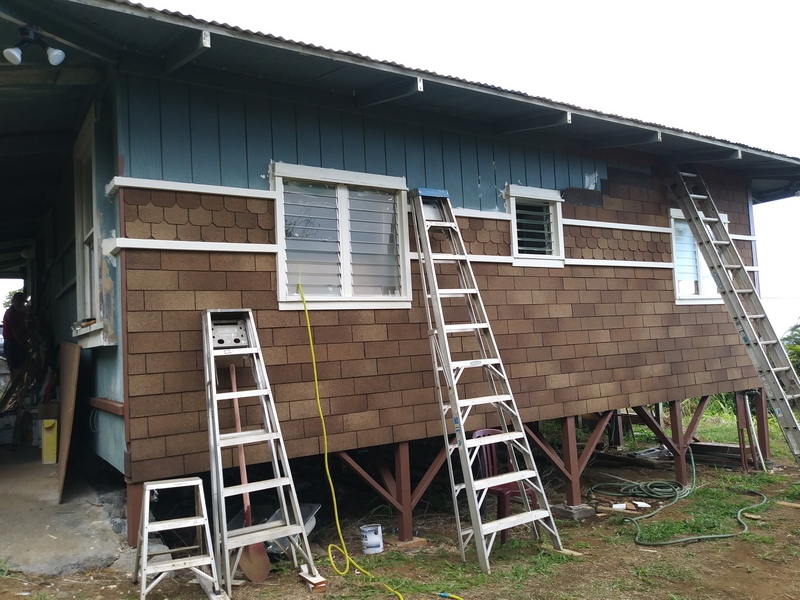
multiple ladders is a good thing
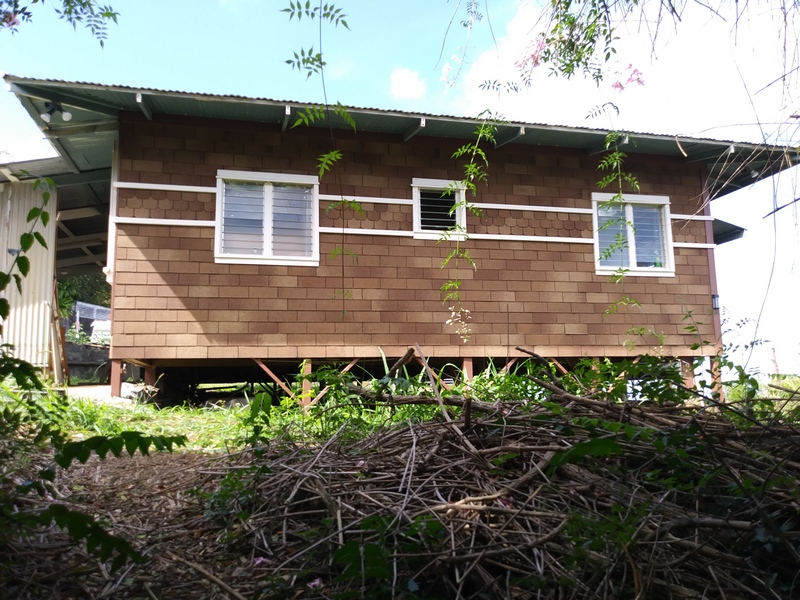
Still needs the roof edge fascia and the 'skirting' on the foundation posts, but the shingles are done at least
Finished Side Three
The front corner took longer once past the lanai since there was a lot of going up and down the ladders. It's a long way down from the top corner!
This 'Hilo side' wall of the house had entirely been replaced at one point so it is a double wall construction with T1-11 siding on the exterior and drywall on the interior. Which means longer nails could be used and saved having to use the needle nosed pliers to grip short nails. Still, having to go up and down the ladders more than made up for any time savings by being able to grab nails with fingers.
The double wall construction also meant that there were no 'racing stripes'. Seemed kinda odd to not have them on one side of the house so we put in some racing stripes on this side to match the other sides. On this side, they're merely a stylish decoration and not structural. We added window trim, too, since it really needed it. I still don't like the placement of the windows. If work was going quicker, it would have been nice to reframe the windows into something that matched the other windows on the other walls in the bedrooms. It's not as obvious from this outside view, but inside the bedrooms, the windows don't match at all. Oh well, worry about that when it's time to make curtains.
I don't have a lot of pictures of the next corner before shingles were put on it. There's probably a few somewhere, but I can find them later. That corner went pretty quickly, by the fourth side, shingles were going on faster.
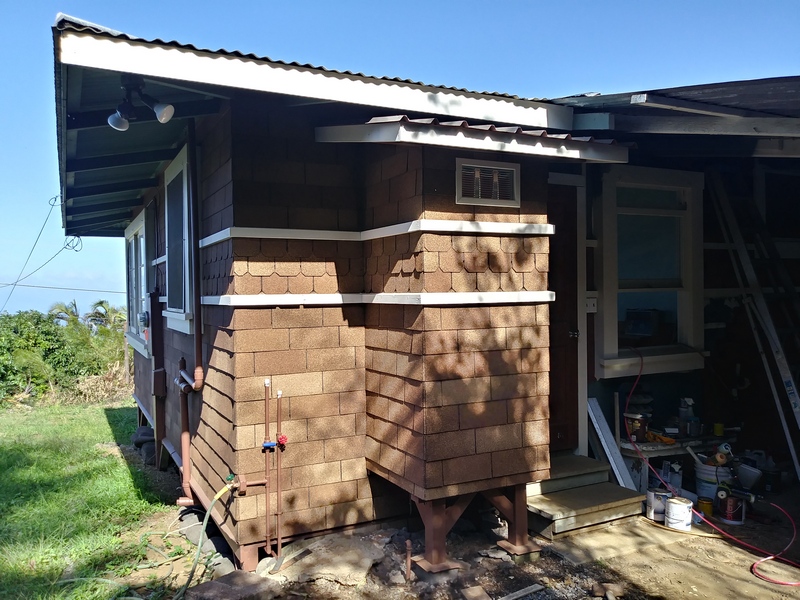
Finally Finished!
Well, with the shingles anyway, still needs a new lanai.
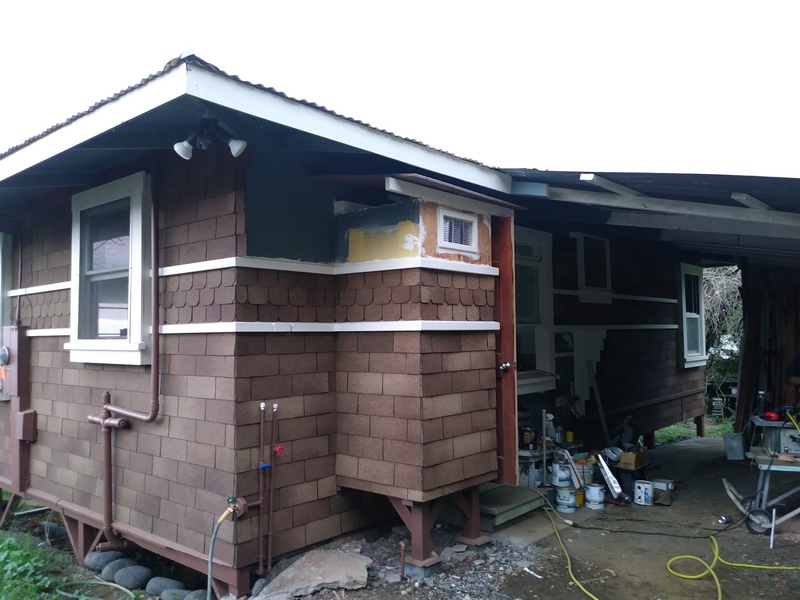
Just thought I'd add in another picture of the finished shingles. The amount of work to get to this point is appalling, may as well enjoy it longer and with larger pictures. When this picture was taken, the refrigerator niche was already done, but I've added more pictures after this one for the construction of the refrigerator niche. That added about three weeks to the project, but we don't work all that fast and it's only one worker on this part of the project.
Guess the next project will be the new lanai as well as new stairs. May as well fix the roof edge while working in the area, that kinda looks pretty wonky. But, here's the pictures of the construction of the refrigerator niche.
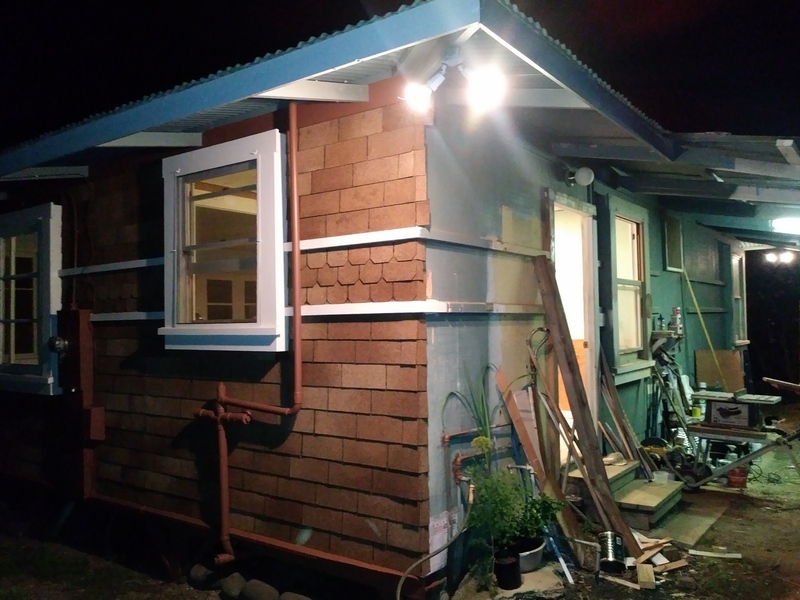
the fourth side and the last corner to be done
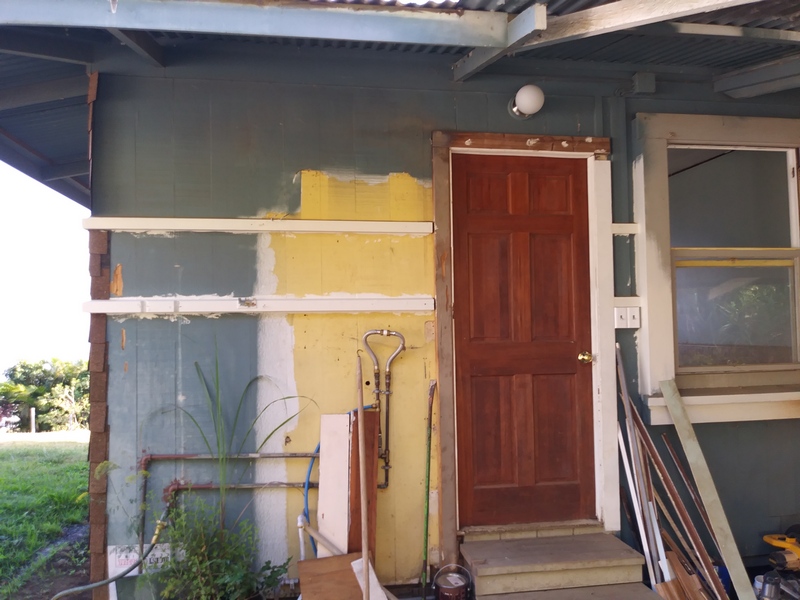
this is the 'before' picture of the refrigerator niche
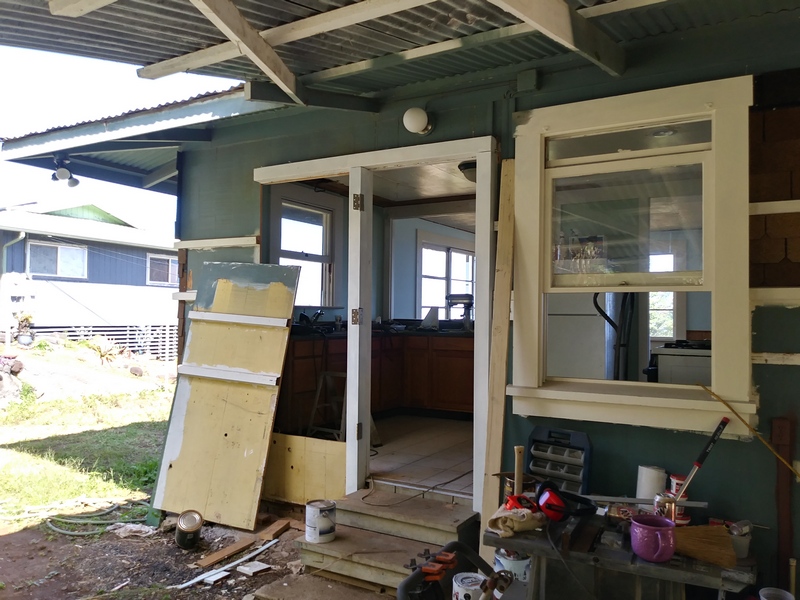
new door framing, door hinged to swing out and hole cut for fridge niche
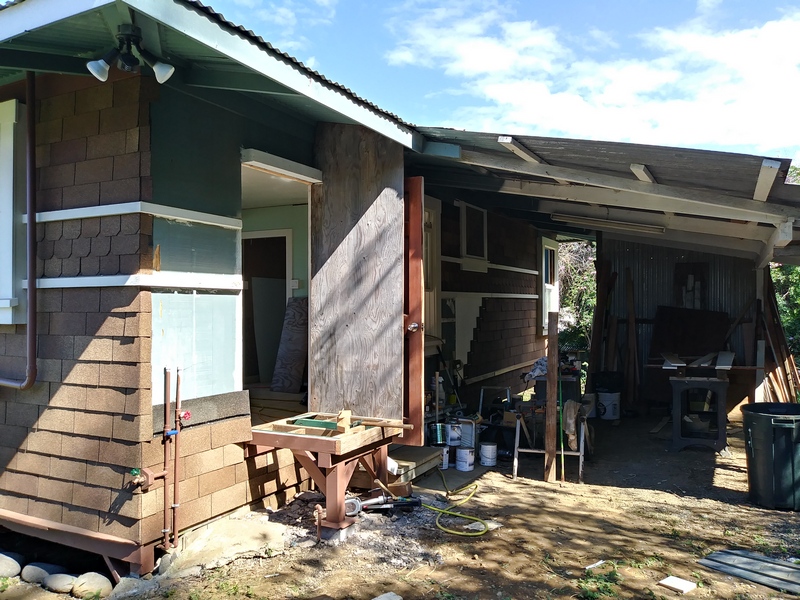
Starting the foundation for the fridge niche
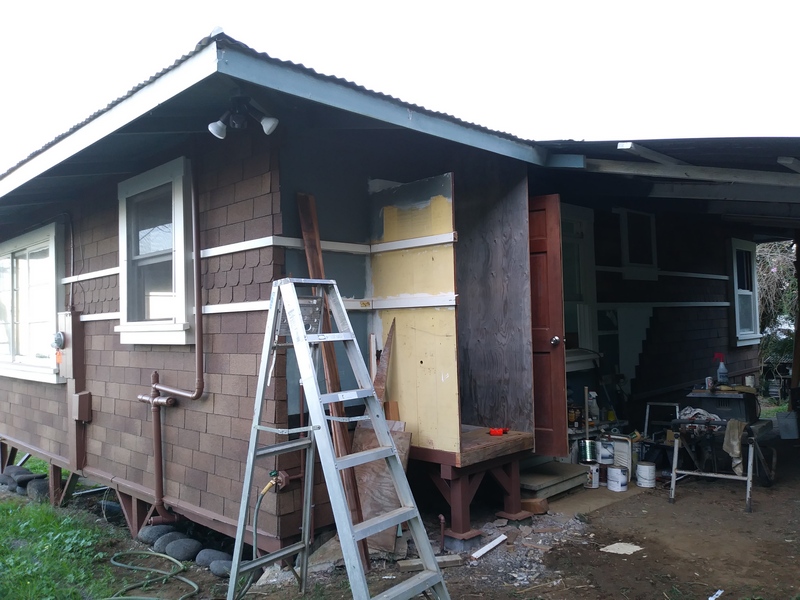
the wall cut out made a nice side wall for the fridge niche and it even had 'racing stripes' pre-installed
needs matching 'racing stripes' even on the fridge niche
It added two weeks to the project but makes a huge difference in the kitchen
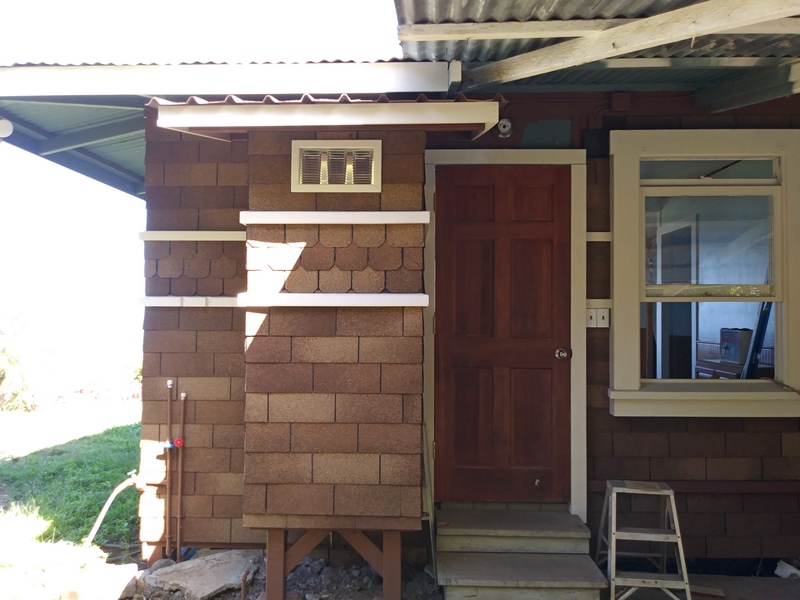
Finally getting to the end of the shingling part of the project
It added complexity but we put in a 'fridge niche' anyway
It seemed that a lot of shingling involved other projects. The kitchen door jamb had to be replaced so the shingles couldn't be done until that was done. We also rehinged the door to swing outwards since it took up too much kitchen space when swinging inwards. Since the kitchen is so small, the fridge takes up a huge amount of space and kinda looms all over the place. So, a hole was cut in the wall next to the kitchen door. Then a foundation was built, walls put around it, a roof added and that makes a niche for the refrigerator to live in. Keeps it from looming over the rest of the kitchen. It's also got ventilation holes in the floor and a vent at the top of the wall so the frige will have lots of ventilation and run more efficiently, too. Seems like a win-win, although it did take two extra weeks to do. We don't work fast and other things distract us so it slows the project down.
Reframing the back door to swing the other way took a few days. Plus the header that also goes over the top of the fridge niche. Then the size of the fridge niche itself is pretty critical since there's a door knob that shouldn't knock into it. Yet needs enough room for the refridgerator and any other similar sized one to fit in it. There had been a water heater cabinet at the back door. It was apparently built when the house was sunny yellow. Had the siding been in good enough condition to paint, it might have been sunny yellow again. It's that kinda house. Pink would have been fun, too, so it's probably a good thing that shingles are being installed.
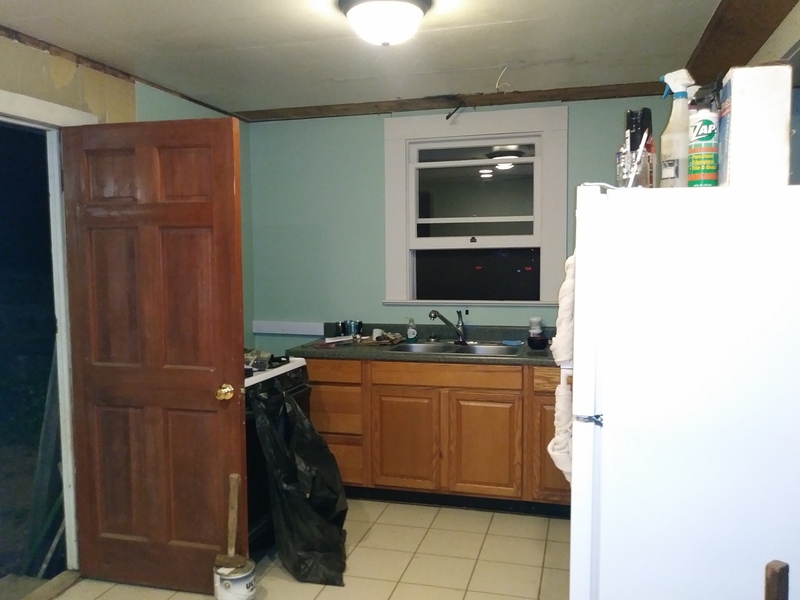
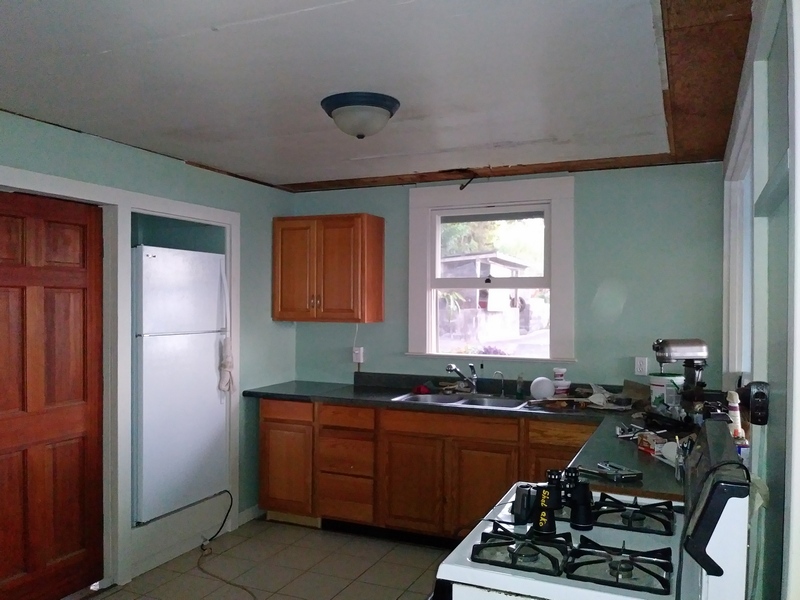
Old Kitchen Layout:
The fridge is against the new little wall that was built to hold up the ceiling, but it still looms over everything and makes the kitchen feel smaller
New Kitchen Layout:
Refrigerator in the niche. Finally! (and the kitchen door swings outwards)
Fridge in the Niche!
Finally got the fridge stuffed into the niche. Since we're running the jobsite on an extension cord, it's not plugged into the outlet in the back of the niche. The door handles have been swapped to the other side now, too. So, now one can open the refrigerator, take things out and put them on the counter. Then wash them in the sink, then move them to the other counter and prepare them for cooking, cook them on the stove. And at this point, clear up the prep area, I suppose, since it then occasionally becomes the serving area to the eating bar on the ledge between the kitchen and the living room.
I think at one point, the refrigerator was on the far kitchen wall, which would have been inconvienent as well as taking up the only possible space for a small dining table. Kitchen layout is even more important in tiny kitchens than in big ones. Seems a bit odd to consider shingling the exterior as part of the kitchen design, but this house is so small every part kinda shapes the others.
The kitchen is finally getting done enough that we could probably start making a 'to do' list for it. Needs the trim under the kitchen window, a splash bar on the granite part of the countertop (most of the cabinets came from a yard sale, so there was one side that was a bit short and we had to fill in), paint the under counter edge of the granite topped cabinet dark colored to match the others. Do something with the ceiling, put a light over the sink and ceiling trim. Also a cabinet with vent fan over the stove. That should pretty much finish off the kitchen. Oh, trim around the doorway between the living room and kitchen and install the eating bar. The list got longer. Well, guess that's why we aren't keen on making lists at the beginning of any sort of major project.
