New Nest Hutch 2020
Well, it's time for another bunny hutch. That seems to happen occasionally. We've been using a put together sorta 'cludge' hutch as a temporary nesting site for does. We had been short on hutch space and someone had given us an old wood framed hutch so it was renovated to be able to use the existing modular floor plates, but it still wasn't a good fit and the floor plate sticks out to create a ledge in front where the chickens like to roost. Which can be messy. Sigh!
So, now it's time to actually build a proper hutch. Depending on the herd and the reasons for the new hutch, there's always different things to figure out before building a new hutch. Here's the list of the current considerations for this next hutch. Some of these are pretty standard considerations, but they're still valid for this hutch.
The primary purpose of this hutch will be a nest site for does who are expecting a litter. As a pregnant doe, they have some special considerations such as a quiet and somewhat hidden space. Mum buns don't hang around their nest, they stay away except for several times during the day when they pop in to feed the babies. The rest of the time they are away from the nest so predators won't find it. I'll usually have the nest box opening pointed away from the center of the hutch space so the doe will feel that the nest is further away.
Baby bunnies are extremely delicate. I don't even consider them as 'being there' until they are about a week old since there's just so many things that they can succumb to. Rats are one of the primary difficulties here, so a completely rat proof hutch is best. Drafts and getting chilled is another big concern. Even if they don't get out of the nest box, having a nest box that is too large can be a problem. If a kit gets into a corner away from the other babies it will have a hard time staying warm. An ideal nest box is not only the proper size but has a curved bottom so they end up in one area. Baby bunnies do much better in a pile.
Here's some of the concerns we hope to address with the new nesting hutch:
- 🐇 Secure from predators:
The predators we will be concerned with are mostly rats, although cats and perhaps maybe a stray dog. Mostly, though, for baby bunnies, rats - and occasionally ants of all things - are the primary predators. So far we've not had any problems with mongoose.
- 🐇 Ease of Maintenance:
I'm in a quandry on this one since a double layer hutch takes up less space but takes occasional cleaning of the roofing area between the upper layer and lower layer. A single layer hutch takes up more room and we don't have a lot of yard space for bunny hutches.
- 🐇 Modular
- It's best to be able to use hutch parts from one hutch to the next, so I'd like to continue with the 'modular' approach.
- 🐇 Semi-Portable
Not that I really want to move the hutches around very often, but it seems like we're moving the bunny yard every four or five years. I'd like to be able to move the hutches instead of having to rebuild. Which is why the 'modular' approach. A lot of the hutch components can be shifted to a new hutch if the whole bunny yard is moved.
- 🐇 Safe for Newborns
Newborn bunnies are extremely delicate. Newborns need warm soft areas which if they get out of they can get back into. Mum buns can't pick up babies and move them around like cats and dogs can. Baby bunnies can't really move around much on their own for the first week to ten days. Which means if they get out of the nest or even over into a cold area of the nest, they can catch a chill and not survive.
At the moment, April 29th, 2020, the new nesting hutch is still in the design stages. I'll try to take pictures of it as it goes along and keep some detailed records in case someone else wants to build one.
Depending on the skill and tool level of the hutch builder, some modifications may be necessary to be an easier build. We have a fairly broad assortment of carpentry and construction tools. Some of the construction techniques take advantage of these tools and may be a difficult build without a few of these tools. The majority of the construction fussiness is done with a chop saw, small nail gun and a drill press.
The chop saw makes accurate angle cuts, a lesser option may be a miter box and a fine handsaw but that would take a lot longer. The nail gun shoots brads or small nails quickly into the corners while keeping them straight. However, it could be nailed with a hammer although it would take longer and a higher skill level than a nail gun. The drill press is used for making the vertical and accurate nail holes for putting the nails used for 'door locks'. That could be done with a regular drill, although with the modular system to lock the door plates to the floor plates with another drop in nail, accuracy matters.
Well, back to the planning stages. Another tool we have around here which may not be available to everyone else is AutoCAD and construction experience. But, experience only happens by doing, so get to doing and you'll become an experience bunny hutch builder, too. Woot!
Finished Hutch
June 14th, 2020
Finished Nest Hutch
with two happy buns
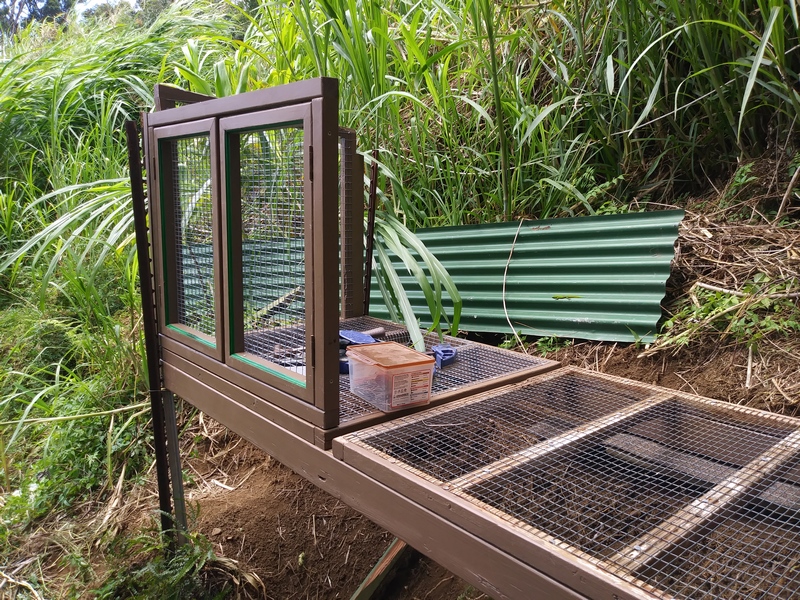
We are on a hillside, guess a rabbitry name of 'Hillside Farm' may be an indication? It's hard to find flat spaces for bunny hutches. This nest hutch has the back of it resting on the top of a bit of hillside and the front of it on two fenceposts. I was trying to make it an easier construction, but I think the 'H' frame style used on the other hutches would have been easier although I didn't know it at the time.
In order to get some sort of platform to put the floor plates on, a square frame was built of 2x4s and the wall plates - built similar to a floor plate but different shape - are fastened to the sides of it. This hutch is screwed together so it can be taken apart if necessary. The other big hutches are held together with toggles so they come apart easily. This one will come apart, but it will require at least a screwdriver.
The roof overhang is a bit long, but hopefully it will keep the rain off the bunnies as well as the people feeding the bunnies.
At the top of the hill is the sheep fence. Then the back of the hutch rests on the top of the hill. On the far side of the hutch is the nesting site which is a renovated chicken coop, although in the picture it almost looks like it's part of this hutch. There's also a couple of door plates sort of in the garden. I'd planned on making a double decker hutch with four bunny spaces instead of just two, so there's now two extra door plates. Hmm, I should see if they fit on the other 'kludge' hutch and see if that one can be fixed up with an easier to use doors.
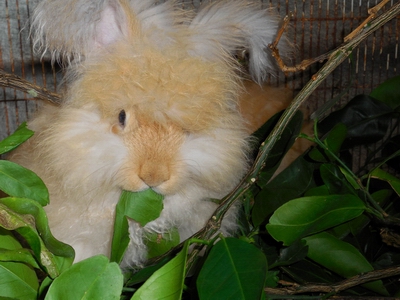
It's now mid-July and there's already been two litters born in the new nesting hutch. Petunia and Phineas had a litter of seven babies. They grew up pretty quickly and have now moved to a larger space. Now Oliva and Hadrian have a litter of seven, they're in the picture up above and are three days old now. Buttercup is expecting a litter the day after tomorrow, so the new hutch has been really busy with new baby bunnies.
The floor has a dropped nesting area. If the babies get out of the nest, they can easily fall back into it. The bottom of the dropped area is more or less flat, but has a slightly scooped bottom so the babies all gravitate to the center. The box over the dropped nest area has no bottom to it and has slots on the sides so baby bunnies can roll back in. It's one drawback is it can be too well ventilated in winter, but fortunately, this is Hawaii so it never really gets all that cold around here. If we had nasty cold weather, it would probably be a solid and insulated box.
When checking the babies, it's easy enough to tip the nest box over on it's side. Sometimes the mum bun will jump to the top, although most times they're busy eating since I'll usually feed them before looking at their babies. Bunnies like bribes.
Over the years, our hutches have evolved. Here's a history of our previous interpretations of proper bunny housing.
The Evolution of Hillside Farm Hawaii Bunny Spaces:
Meet Your Fiber Providers
If you like, you can send us an email and ask about bunnies, yarn, Hawaii things, what we should have on our webpage or just about anything else.
Hillside Farm Hawaii
All content copyright Hillside Farm Hawaii


