New Nest Hutch
Finished Hutch
December 20th, 2024
(still needs paint, tho)
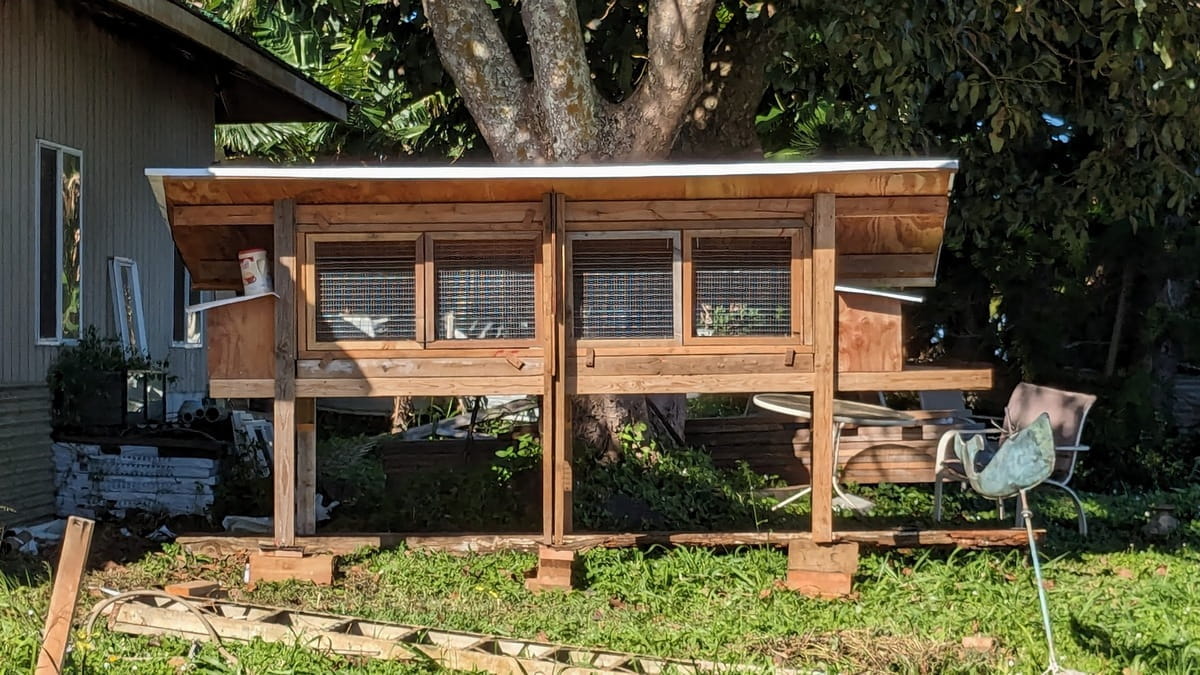
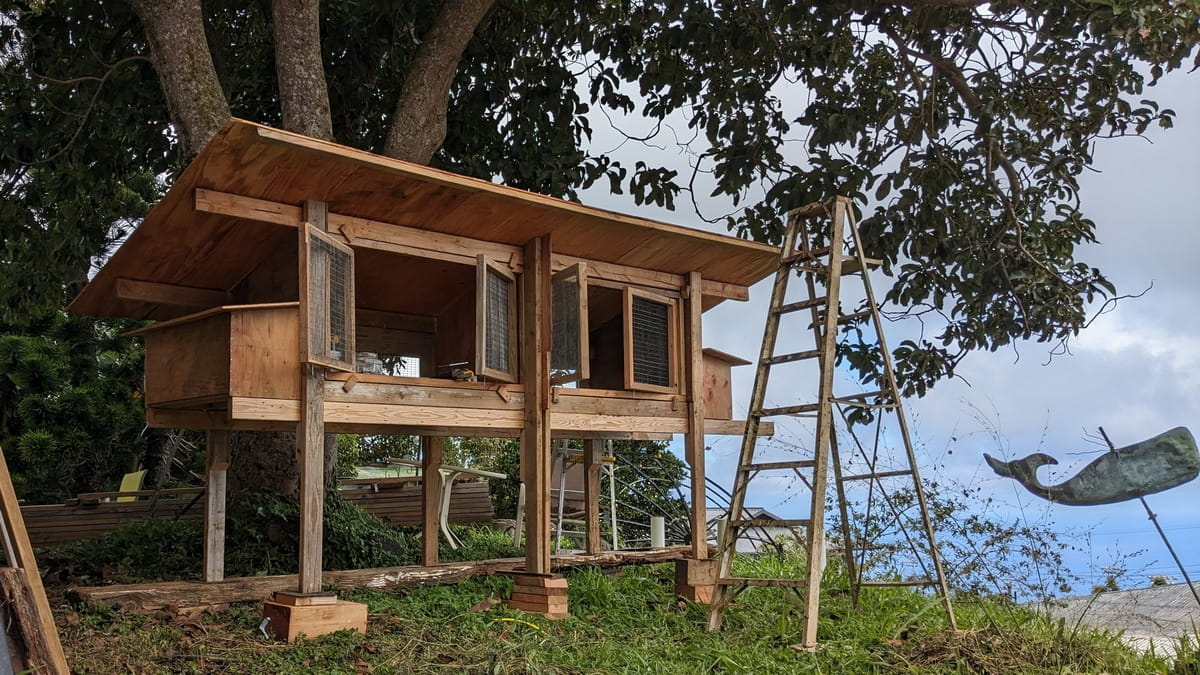
This is a picture of the almost finished hutch. It's completely built, but not painted and it's only got waterproof "paper" on top of it and not the official tin roofing yet. However, the bunnies' biological time clock ran out and Clover and Amy needed to move in right now!! before it got painted and completely finished. There may or may not be baby bunnies tomorrow, so they needed a nesting hutch three days ago and hopefully they will still have their litters even though they got moved to a new space the day before the babies are due.
It's been four years since the last bunny hutch was build around here so it was time for a new one. Since we're building a house and it's currently in framing, there's loads of scrap lumber so this hutch is all built from construction scrap other than buying the 1/2" x 1" galvanized wire.
This is an improvement over the last nesting hutch mostly in being bigger. The dropped nest area of the previous hutch was good, but having it in the middle of the bunny space took up too much room so once the kits got very large, there wasn't enough area for them all. In this hutch, the nesting area is added to the side so the floor area for the bunnies isn't taken up by the nest.
Preliminary Ideas
gotta start somewhere
I'd been thinking about this hutch for awhile although didn't get serious about it until November 19th when Clover was visiting with Azzie and Amy was visiting with Ayden. Wasn't sure if the old hutch should be renovated or a new one built. If a new one is built, where to put it? Should it be one layer or two? How many "holes" (in the bunny world, a space for an individual bunny is called a "hole"). It took awhile to figure out what to do. Eventually, what with the extra scrap lumber available from the construction site (it's appalling how much scrap lumber is created when building a house), the small size of the old nest hutch and needing to move all the bunnies uphill at some point, building a new hutch seemed to be the way to go.
With the plan of "build a new hutch", the next step was to figure out what it should look like. Here's some of the basic design criteria:
- 🐇 Depth Determined by Wire:
The flooring and sides are made with 1/2" x 1" galvanized wire since that's a good clean flooring for angoras as well as being ratproof. It's 30" wide since that's about as far as can easily be reached into the hutch.
- 🐇 Beginning Dimension:
The floor is the width of the wire plus 1-1/2", which puts the wire to the middle of the 2x4s at the front and back of the wire. That's the basic beginning dimension, the rest of the hutch is built around the floor plate size.
- 🐇 Replaceable Floor
The floor wire is always the first to rot out, having the floor plate easily replaceable makes repairs a lot easier. In this hutch, the floor plates are 31-1/2" x 48". When it's time to repair them, either new wire can be put on the existing frame, if it's still in good shape or a new floor plate can be made.
- 🐇 Dropped Nest Area
Mum buns can't pick up babies and move them around like cats and dogs can. Baby bunnies can't really move around much on their own for the first week to ten days. Which means if they get out of the nest during that time they can't easily get back in, especially if it's the type of nest with a raised lip to keep them in. If they're out of the nest, they get chilled and generally don't survive. It's best to have a dropped nest area so if the babies do get out somehow, they can easily fall back into the nest.
- 🐇 Multiple Litters
It's good insurance to have multiple litters. If for whatever reason one mum bun can't take care of her babies, then they can be fostered to the other mum. Bunnies can't count and don't seem to be able to tell their own babies from another or perhaps they just don't care. If one doe doesn't make milk on time, then the other doe can feed them. Or if one doe has a litter of one or two and the other a litter of ten, then they can be evened out between the them so one doe isn't feeding too many.
This hutch needs to accommodate at least two litters at a time and have a large floor space so there's room for mum bun and babies. The basic body of the hutch is eight feet long. Each bunny area is roughly 48" and 30" wide. The nest area on each end is 16" x 30" with the access hole at end so the babies can be at the back of the "tunnel". These nest areas have a top lid which can be lifted up to look in.
The legs of the hutch
start at the bottom and work up
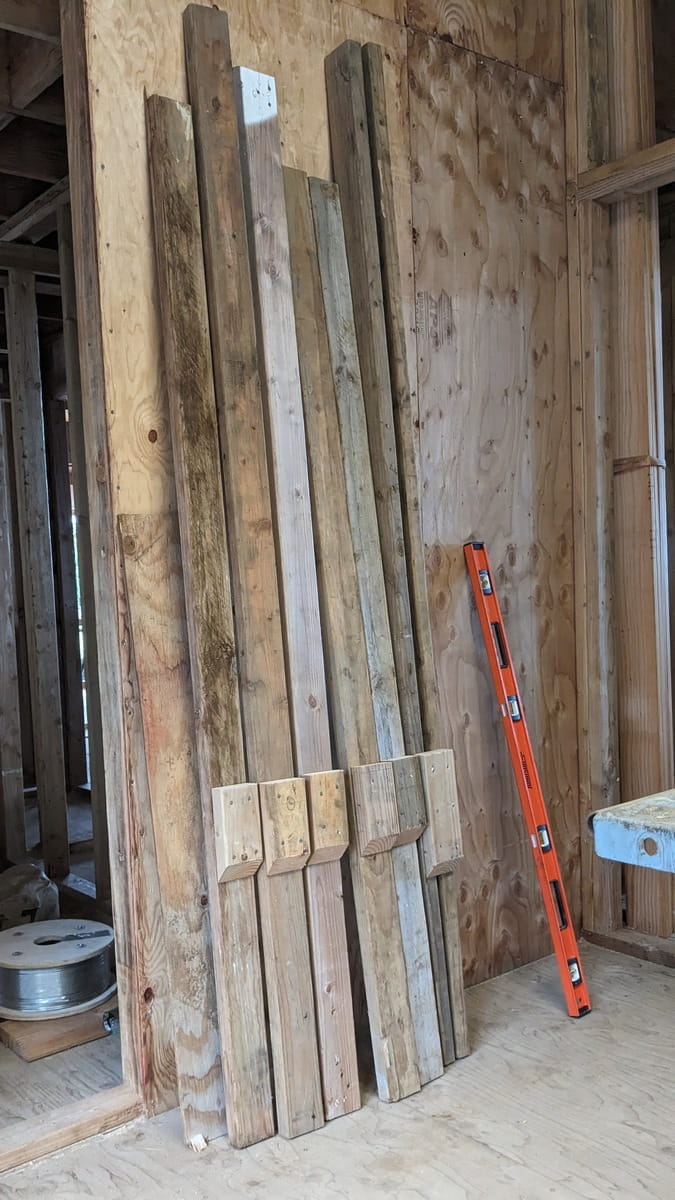
These are the hutch legs. When building things, it's generally best to start at the bottom and work up, so we start with the legs. They're 2x4 with some blocks nailed to the sides to support the 2x4 crossbars which will hold up the flooring.
The center leg in the front of the hutch is made of a pair of 2x4 so a bit of 1/2" plywood can slide between them. This separates the hutch into two sides, if just one doe is going to kindle, then the board can be removed and the hutch left as one big space.
In the picture, the tops aren't cut to length yet, just the bottom supports for the main horizontal hutch frame are put on the posts. Once it's assembled, there will be several screws holding the horizontal supports to the vertical legs, but the screws will just be holding the horizontal beams in place, the weight is carried by the blocks.
The ends of the hutch
with a "rabbit hole"
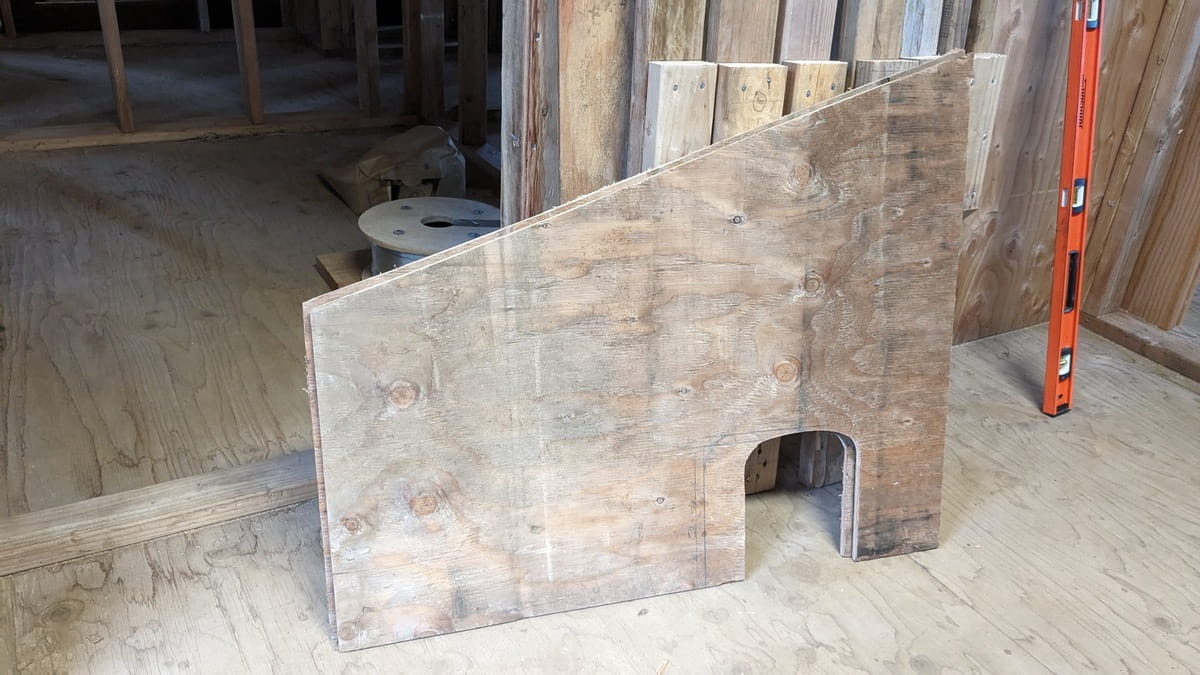
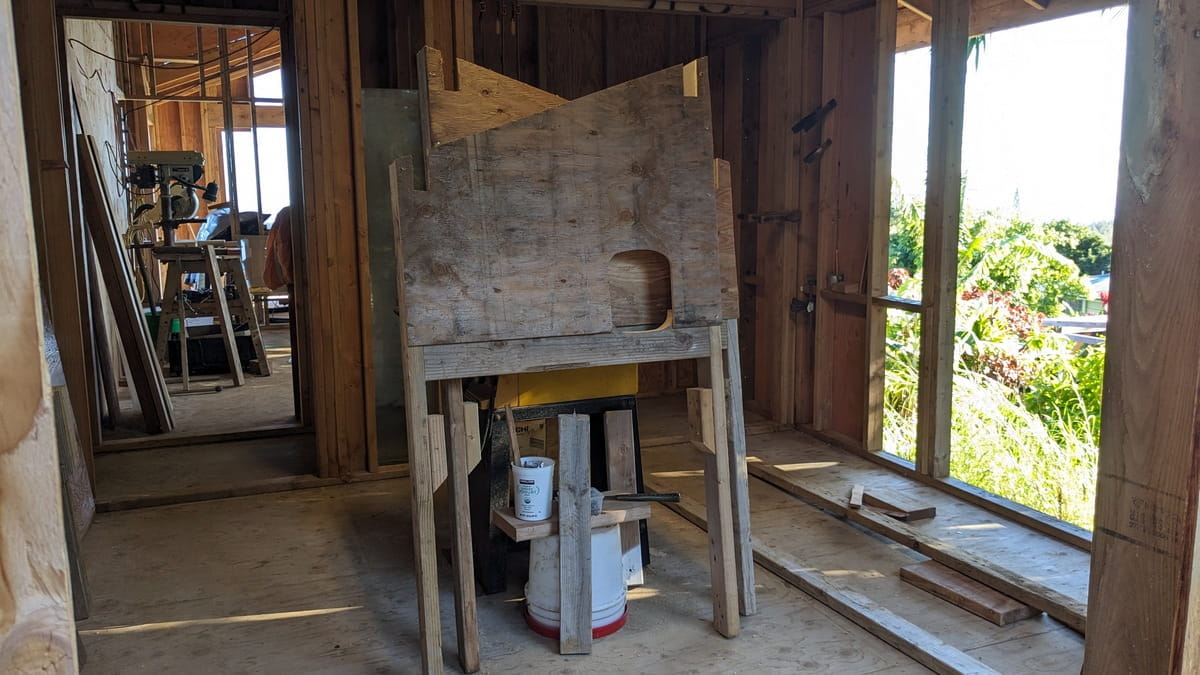
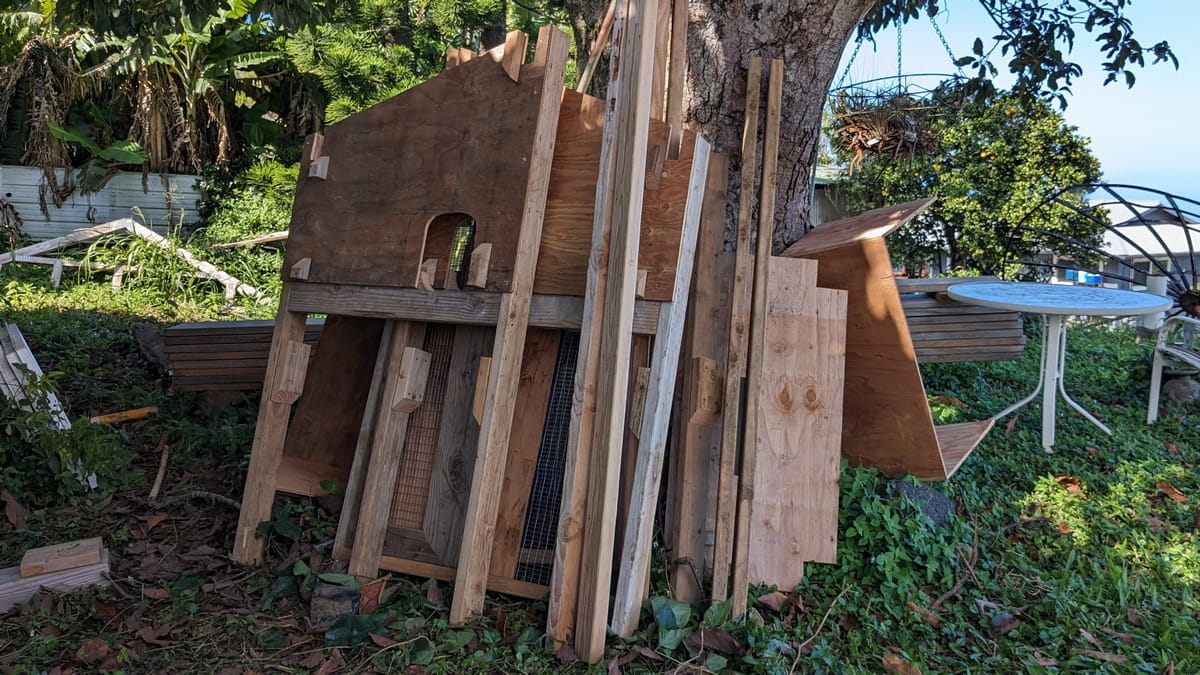
These are the ends of the hutch, they will be between the bunny space and the nest area. The basic width of this board is the 30" wire, 3/4" of both of the 2x4 supports on each side sticking out past the edges of the wire plus 3" which covers the sides of the legs in front and back. That all adds up to 34-1/2". The height would have been a bit higher in the back, but when I cut the scrap in half, that's how high it is. The hutch needs two of these since it's a double sided nesting hutch.
If I was doing this again, I'd make this piece 3-1/2" taller so it could go down alongside the floor plate instead of trying to figure out how to get it to sit on top. But, the scrap of plywood was only so big so the design got a bit more complicated to make up for it.
End Supports
with a matching "rabbit hole"
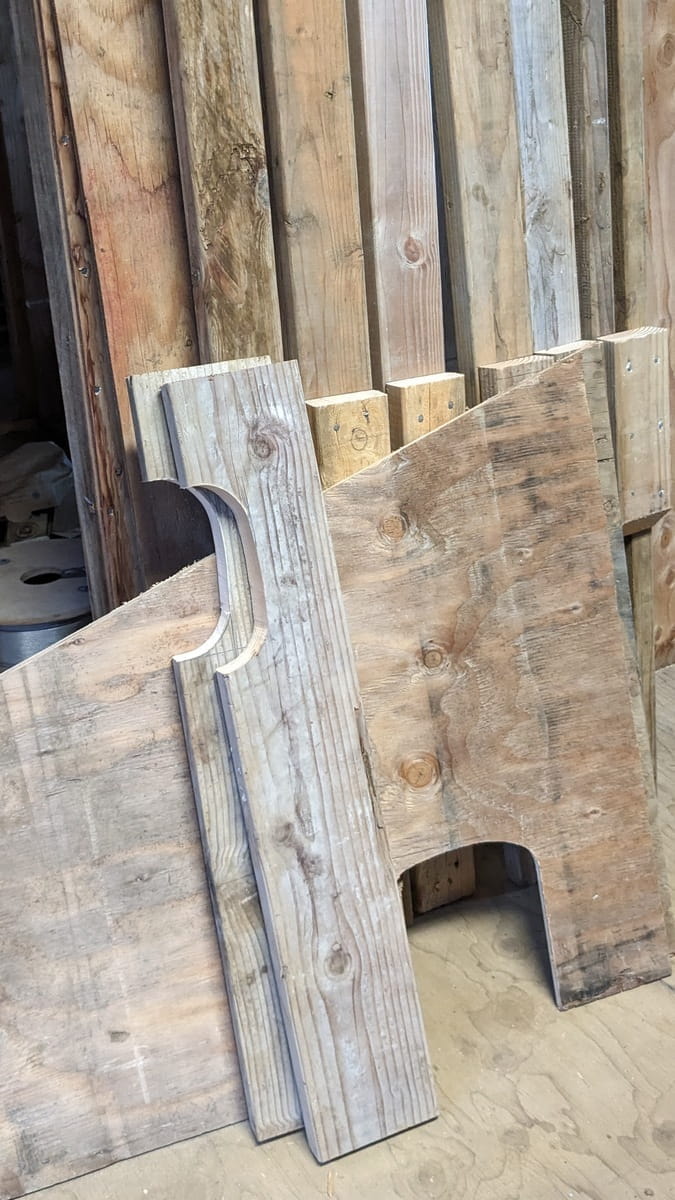
This is a support piece so to make up for the end walls not being as tall as I wanted. There's probably several different ways this could have been done, but this one matched the wood available. Ideally, the end pieces would have been made taller, but this method also works.
Floor Plates
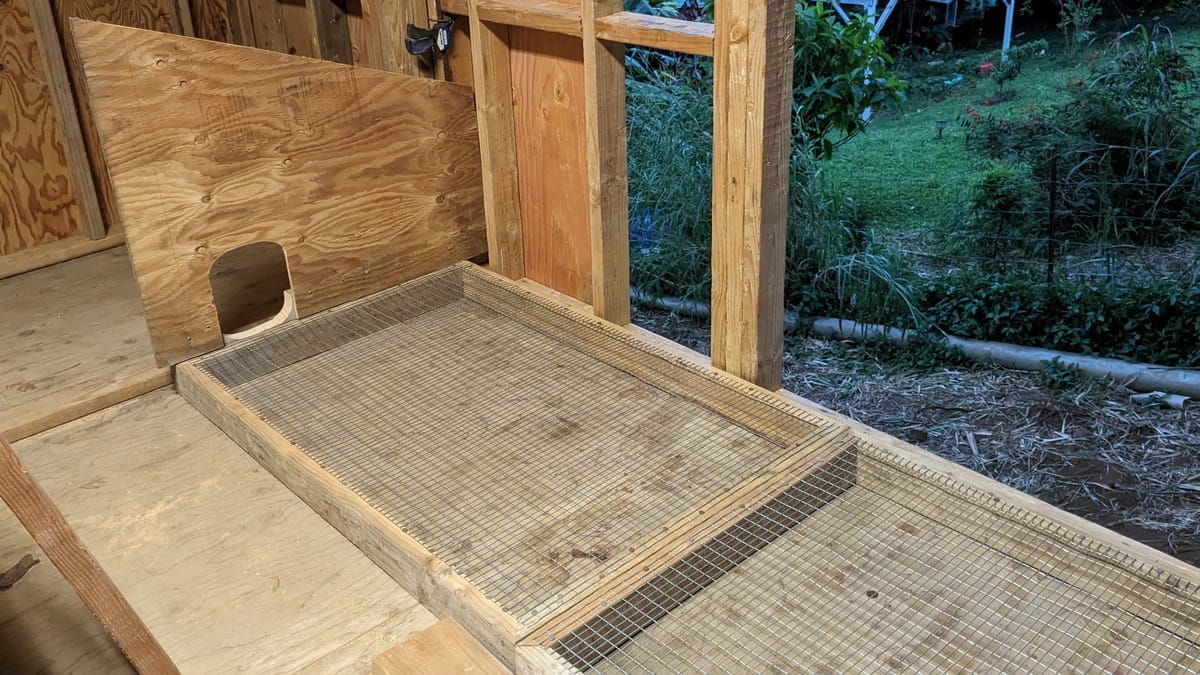
The floor plates had actually been made prior to the end walls since the width of the floor plates determined the width of the end walls. But, since it's all determined by the width of the wire, it doesn't really matter which was made first. Each floor plate is roughly two and a half by four feet and an additional support could have been put across the middle. If the wire starts to bow down in the center, then I'll add in the 2x across the middle. The wire may or may not sag so this will do for starters. An adult English angora weighs about six to eight pounds so the floor doesn't carry that much weight.
Oh, the vertical 2x4s in the back of the floor plate aren't part of the hutch. I'm building the hutch in the house we're building so there's a lot of bare wood everywhere. This is the back bedroom and the big hole in the wall will be a window eventually. But, at the moment, it's a handy spot to build a bunny hutch.
Looking back at hutch building, the first of the big two story hutches was built when we were first moving into and restoring our current house - was it 2014? - so those bunny hutches were built in a bedroom, too.
Walls with legs
the most intricate part
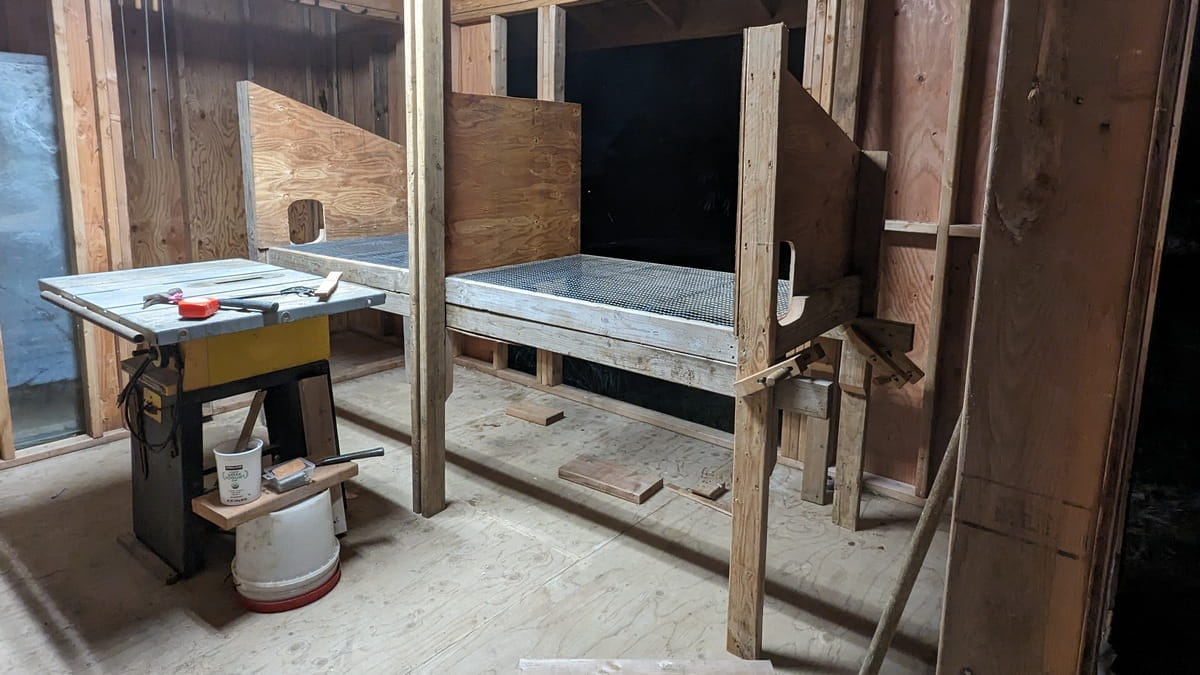
The end walls are the most intricate part. They hold up the horizontal floor and roof beams as well as separate the areas of the hutch into the basic bunny space and the nesting area. There will be a lot of small bits of blocking to hold the doors in place as well as the back, but those aren't on there yet.
The end walls extend 1-1/2" out past the front and back of the floor plate so the walls can be nailed to the sides of the legs. There's a notch at the top of the wall plate to hold the 2x4 roof beams. The end walls are nailed to the legs with enough room under them for the 2x4 floor beams. So you can see where there will be the horizontal beams coming out of the end plate. The back wall and the doors in the front will line up between the upper roof beams and the lower floor beams.
Beginning Rough Assembly
easier to measure when the parts are in place
This hutch is being built by stages. There's an overall plan of how it should be, but the actual dimensions are determined by what's been built instead of drawing it all out and accurately planning it first. As the parts are made, they're sorta roughly assembled so the next part can be figured out. They aren't fastened together at this point, just set in place.
At this point, the slots for the roof beams are the next thing to figure out. Once those are in place, then the center post can be cut to length and then the separation board can be figured out.
Nest Box
lower floor than main floor
One of the critical things with this nesting hutch is to have the floor of the nest area lower than the main floor. If baby bunnies get out of the nest area too soon, there is a large chance they will chill and die before getting back into the nest if it isn't easy for them to fall back in.
Traditional nest boxes are metal (brrr! cold!) or wooden boxes which have a fairly high lip to keep the babies in. However, when the nest boxes are filled with nesting material - grasses, hay, bunny wool that the mom bun adds, etc. - sometimes that will get pushed up against the sides and create a ramp - but only on the inside of the nest box. Which means, if they get out of a traditional nest box, there's almost no way for them to get back in. They chill, the results are not good.
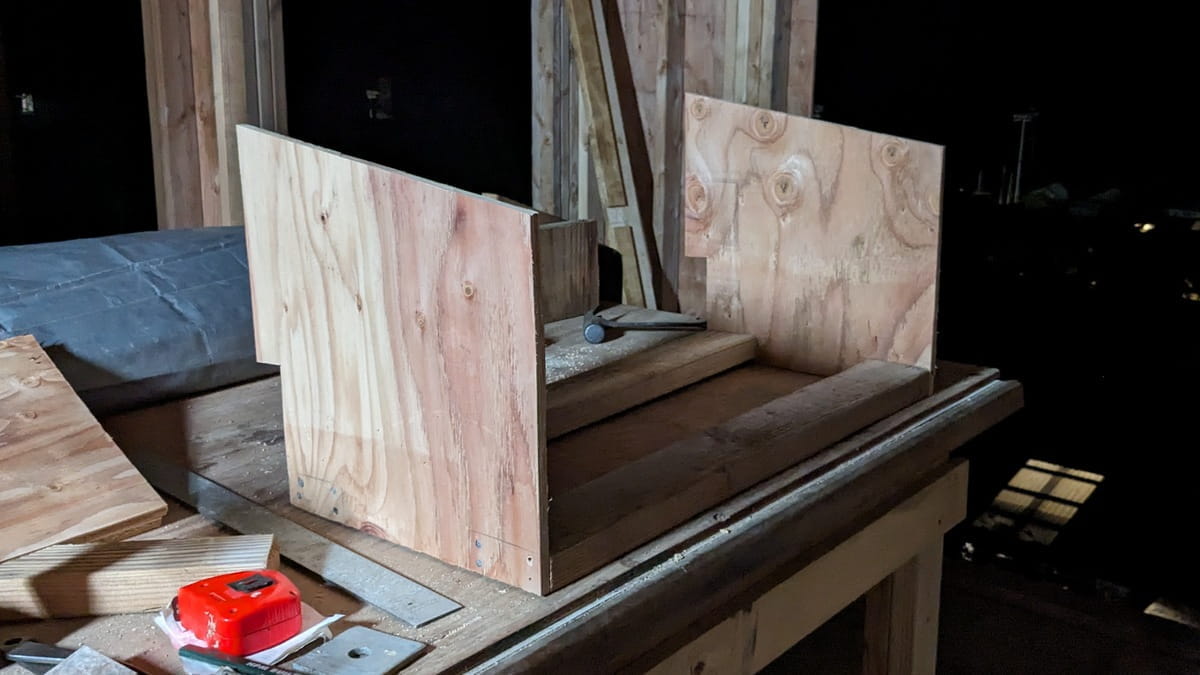
The floor of the nest box is 2x4s laid flat so it's an inch and a half lower than the main floor of the hutch. It would have been good to have a bit more difference between the two, perhaps, but the nest box is long so more than likely, the actual nest will be at the back of it so the babies will have to get to the front of the nest area and then up the inch and a half to get out onto the floor of the main area.
There is some wire floor in the nest area since when the babies are several weeks old, they pee rather a lot. At that point in time, if they were in a traditional nest box, they can become quite damp from this so having the wire allows things to fall through and the babies to stay dry. But, they need to be kept warm, so the whole floor isn't wire.
This nest box will set on the main horizontal floor beams and between the front and back posts. It will be plywood on three sides with the fourth side the back wall of the hutch. A plywood lid will fit on top so it's mostly a plywood box.
A Door!
some assembly required
The doors are the same width as the floor plate so for this door they're four feet wide. They're as tall as the height between the upper horizontal roof beam and the lower horizontal floor beam minus the width of the floor plates. So, depending on the specific hutch you're building, that number will most likely be different than this one.
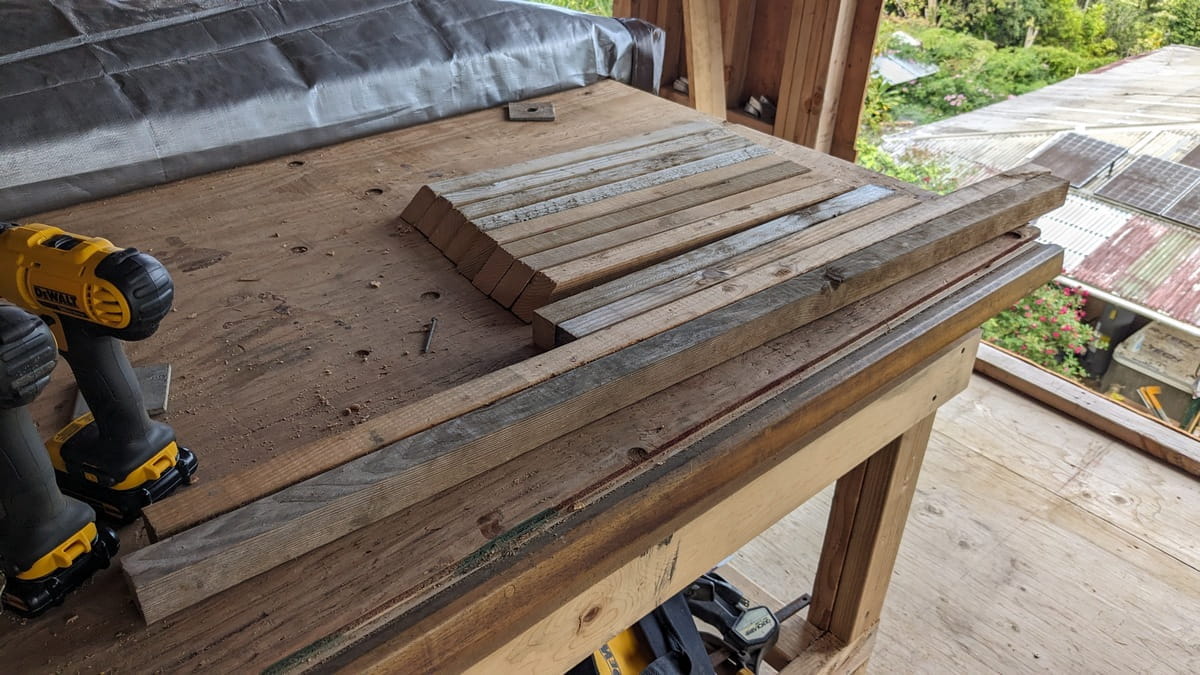
The door frame starts with basically a big picture frame with the ends of the boards just butted up to each other. The top and bottom one go the entire width, the upright ends fit between them. Then two more square frames are made, those have forty five degree corners. That isn't absolutely necessary, but we have a chop saw so it's easy enough.
Oh, when putting these together, pre-drill the nail holes or the wood will split. When screwing the larger frame together, it won't be necessary, but for these frames which have fasteners near the ends, the pre-drilling is necessary.
Test fitting a pair of doors
checking the hinges, too
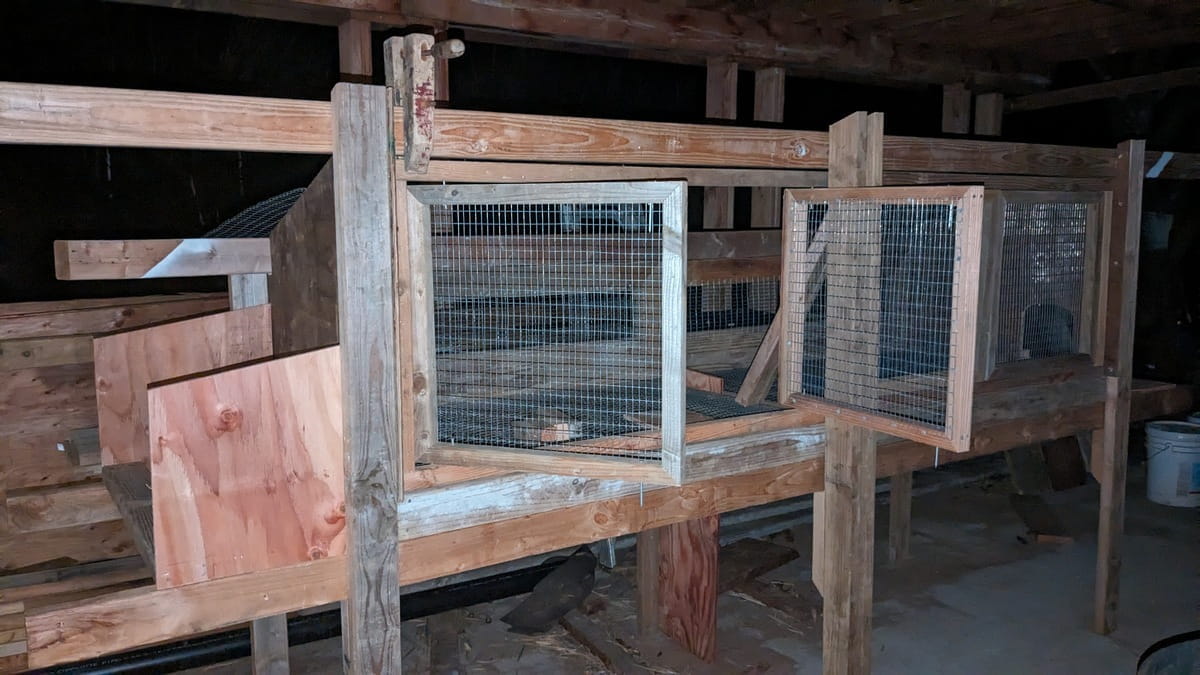
The doors fit between the horizontal floor beam and the upper horizontal roof beam. There will eventually be little blocks on the end plates to keep the doors from falling in and little turn knob bits of wood to hold it on from the front. Basically, a "turn knob" is a scrap of wood held snugly with a screw or nail and it can be turned to hold the door on, or turned out of the way to let the door be taken off for cleaning or repair.
This is the first time I'm trying the "nail-as-a-hinge" technique. Hawaii is a tropical climate, hinges rust around here really quickly. A nail is not only a lot less expensive , but a galvanized nail is much less likely to rust.
Nail as a Hinge
(at the end of the red arrow)
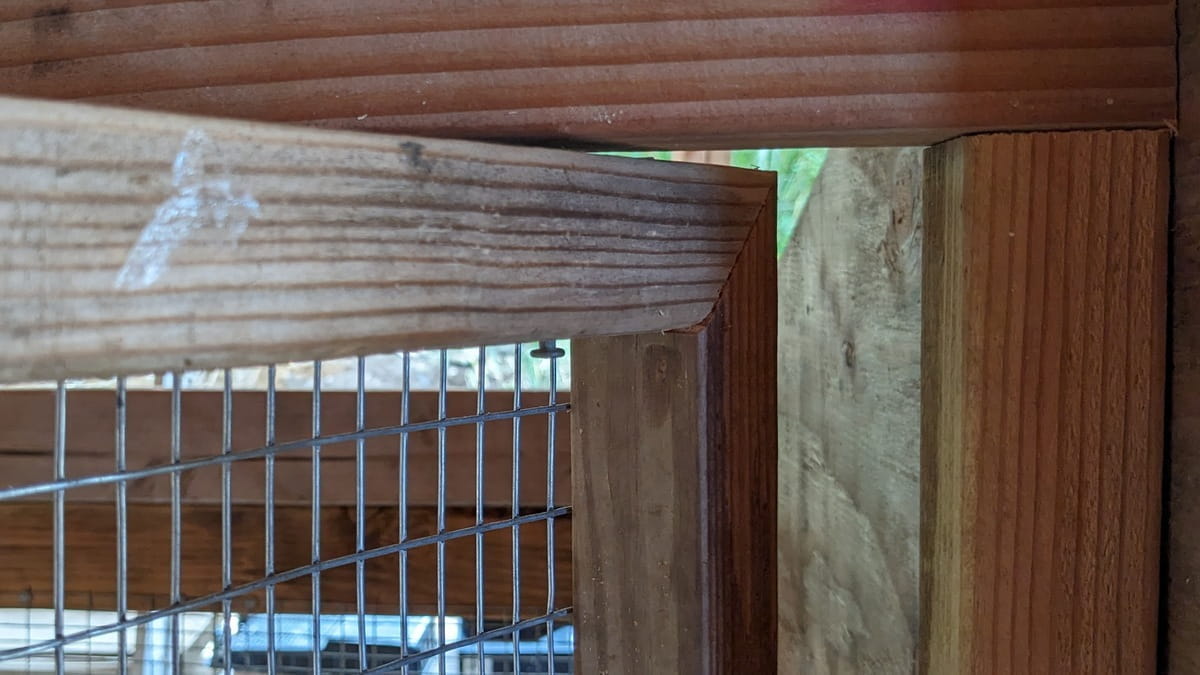
Each set of doors is the same width as the floor plate so they're made in matching pairs. The doors have space between each other as well as the frame around them. I've made some before that had no space and it makes it harder to open and close the doors. Now, using nails as hinges, there needs to be enough space for the door to pivot on the nail and still clear the door frame.
The nail hole on the door itself is wider than the nail so it can pivot freely. The nail hole in the frame was pre-drilled so the fram wouldn't split, but it is much smaller than the nail so the nail is tight in the frame.
Nail as a Door Latch
seems to be a theme, here, doesn't it?
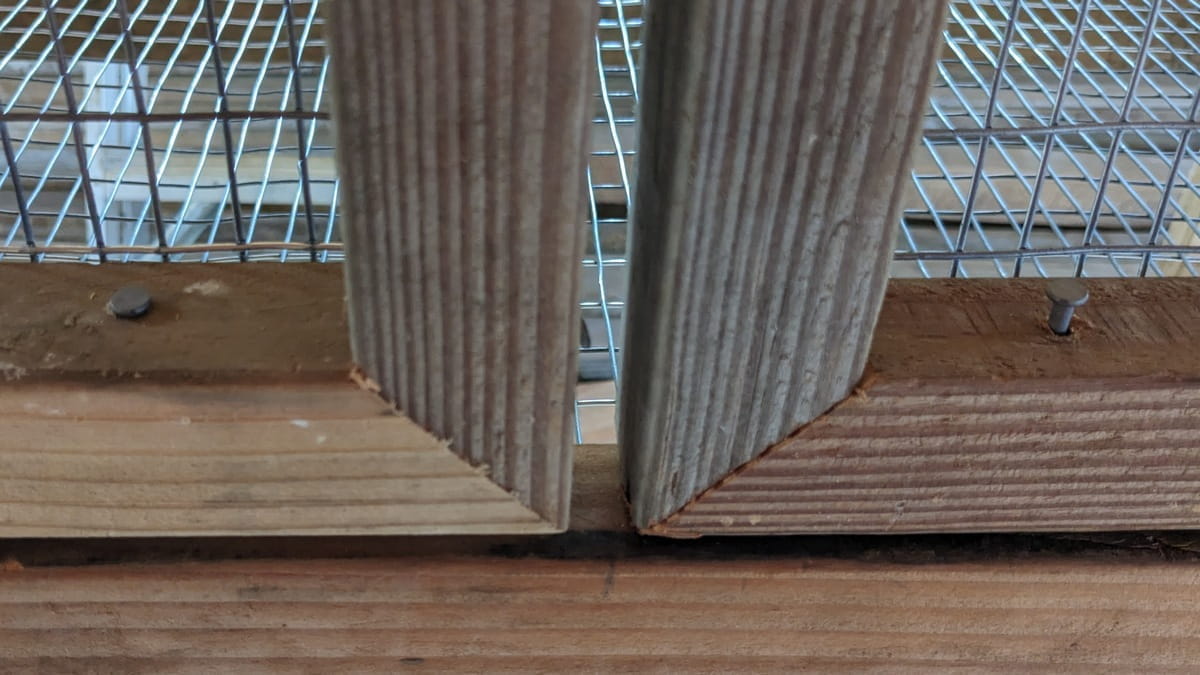
If we were being traditional and buying door hinges and door latches for each door, this building of bunny hutches could get expensive. However, the same handy galvanized nail that was used for hinges can also be called upon to become a door latch as well. In this case, there is a hole larger than the nail drilled in the lower door frame. An even slightly larger hole is drilled halfway through the door frame below. However, then a driller narrower than the nail is drilled all the way through the hole in the lower door frame. This allows any rain to drain through while not letting the nail drop all the way to the door frame. Easier to grab that way, don'cha know?
For a door lock, a bit of wire is looped around one nail with a loop at the other end of the wire to drop over the nail on the other door. Should the nail not drop into the hole or the door somehow become open, the wire looped between the nails will keep it from opening entirely.
In the picture above, the nail on the right is the larger proper size, the nail on the left is a smaller one just holding the door shut until I find another bigger nail. If the nails were small and hard to grab, then a wire loop could be added, I suppose. Just using a bigger nail is the current plan, though.
All the Bunny Hutch Parts
(some assembly required)
This is basically all the parts for the hutch. It looks like it will be set up on the Avocado Plateau, which was one of three spots it could go. This will be good for the tree, but not so good for the bunnies if they escape and eat the avocado leaves. Avo leaves are toxic to bunnies, but really beneficial to humans. Strangely enough, they say that a tea made from the avo leaves that can kill bunnies can lower blood pressure in humans.
But, in any case, the new hutch is being set up on the Avocado Plateau. Mostly the spot was chosen since it's out of the way of construction trucks and equipment and it's in view of the dining room from the new house. It's always nice to keep an eye on the buns.
Starting the Hutch Assembly
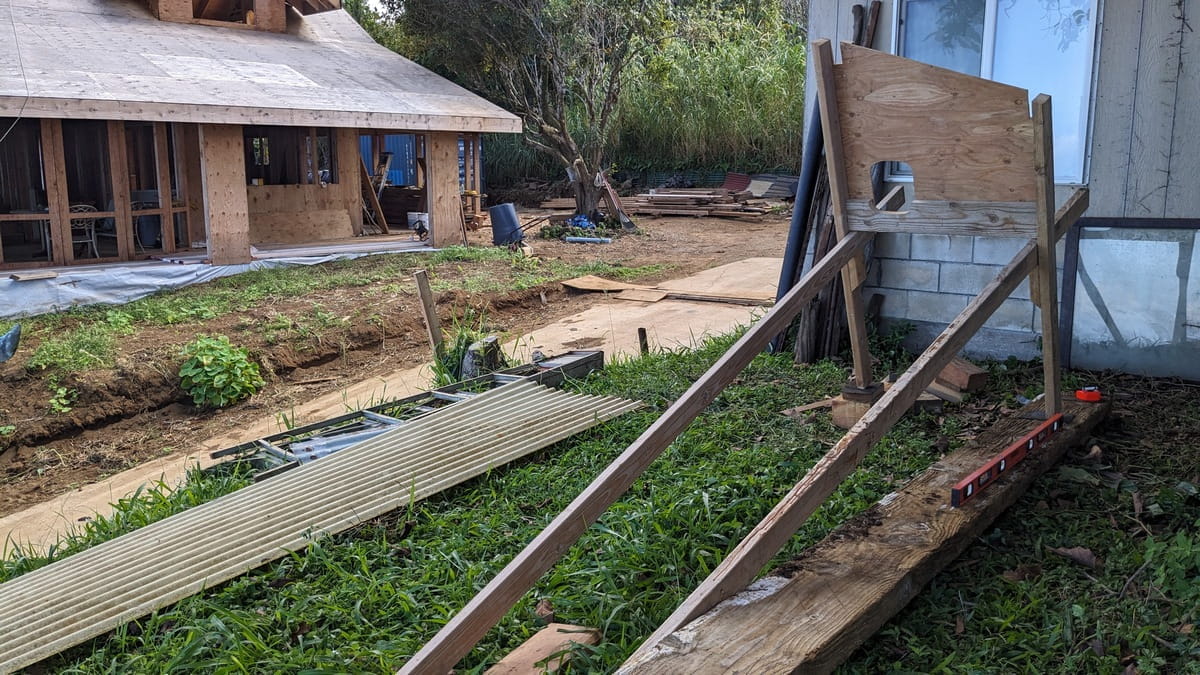
To start the assembly, a flat spot is found and/or made. We had an old 4x12 beam laying about so it's used to make a level space for the back legs. We're stacking up scrap lumber for the front legs. That will need to be replaced in a few months or so, but once we get trimmings from the roof installation on the new house, then the trimmings will be used to roof the bunny hutch.
Putting the front and back legs of one of the end pieces on the level spot, the lower floor beams are slotted in above the blocks on the legs. Had I been paying attention, I would have noticed that the wrong end piece was put on the wrong end of the hutch. The end piece was swapped out for the other one after the picture was taken, but then I got busy putting it together and didn't take better pictures.
Continuing the Hutch Assembly
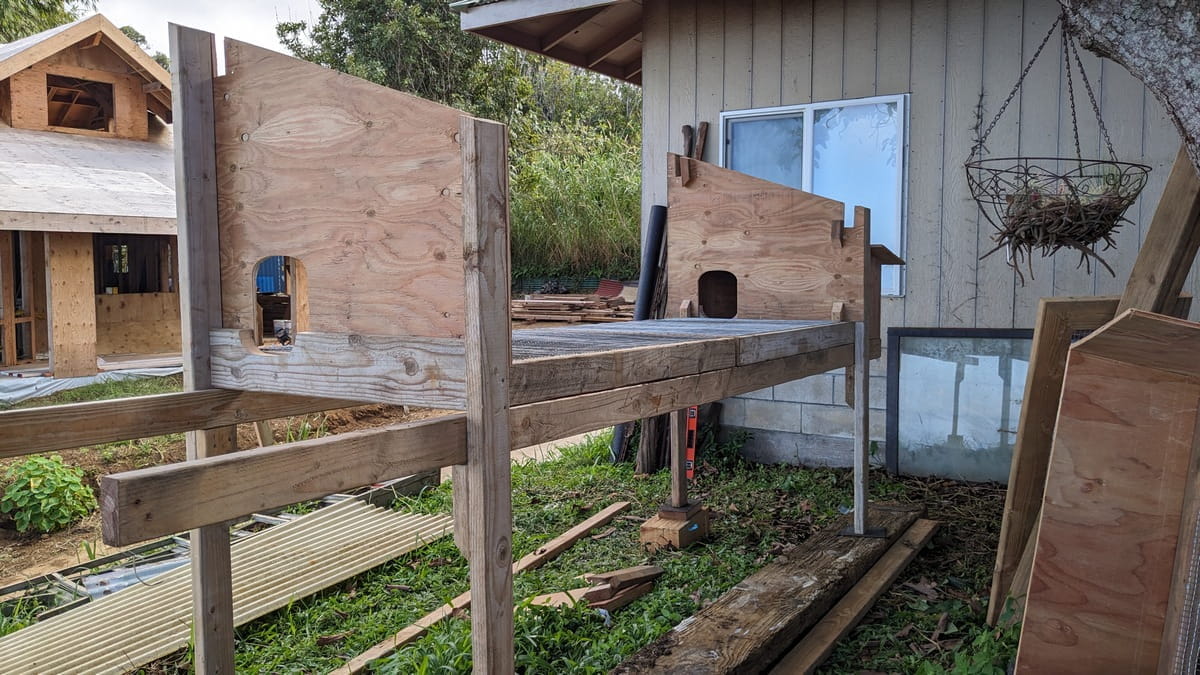
After switching out the correct end piece and adding the other one to the other side, then the two floor plates are set onto the horizontal floor beams.
Continuing the Hutch Assembly
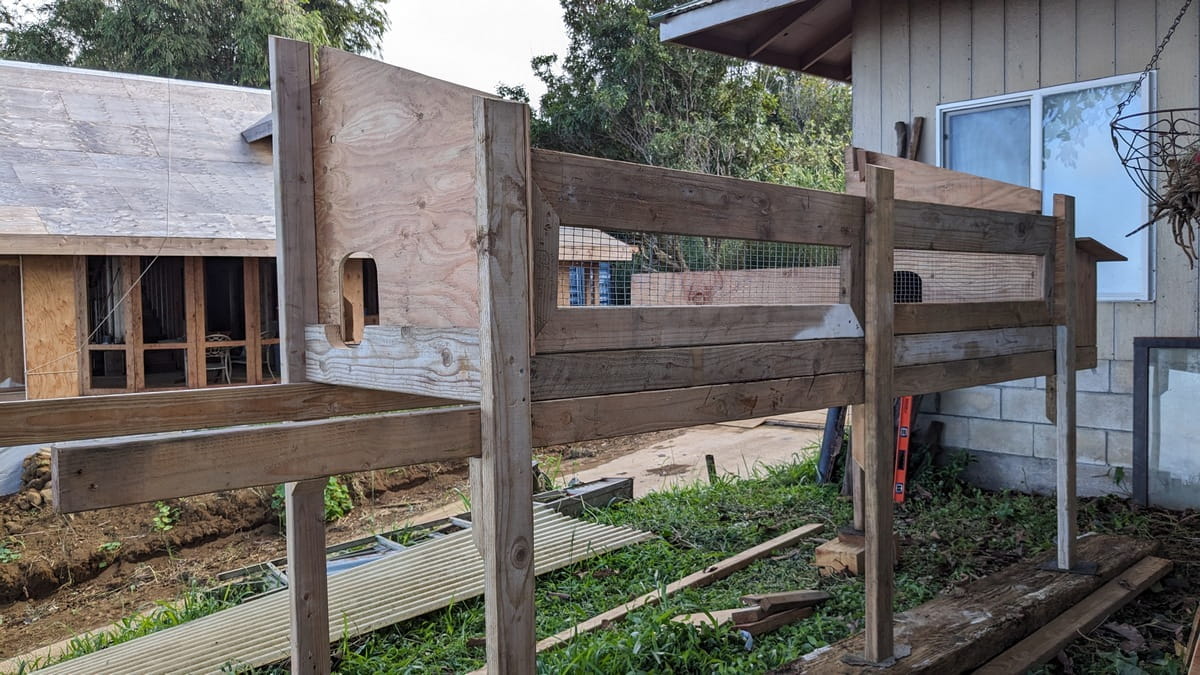
The back center post is put in place, the back wall plates are set on in place, too. One nest box is in place, the other needs to be installed as well as the roof beams and roof decking.
Almost all Assembled
still needs waterproofing on the roof
As the parts are put in place, it becomes apparent where a small block needs to be added or some other additional adjustment needs to be made. The legs are attached to the horizontal elements with screws. The roof decking is attached to the roof beam with screws. That will allow for it to be taken apart easier than if nails were used, although, it won't come apart easily.
This hutch is in a more exposed spot than the others so wind can be a consideration. Come to think of it, I need to get out there and stake it down in case the winds come up in the next few days. The front legs will probably be staked to the ground somehow and there may be a pole between the back of the hutch and the trunk of the avocado tree.
Nesting Bunnies
(hopefully, anyway)
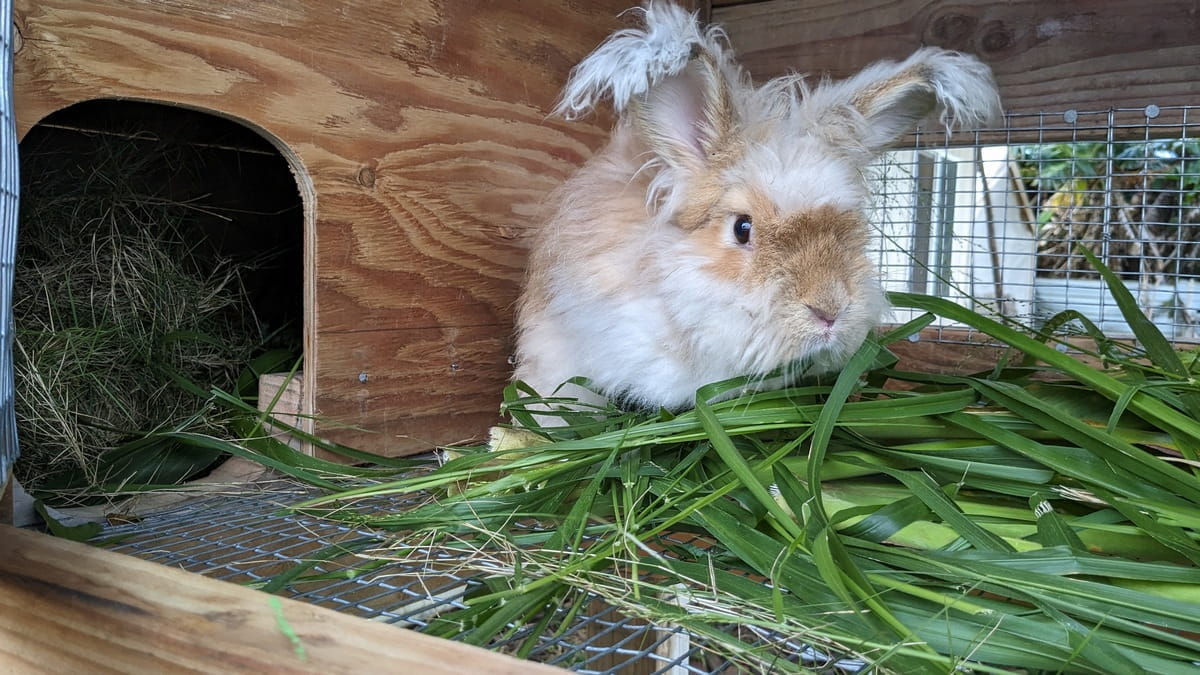
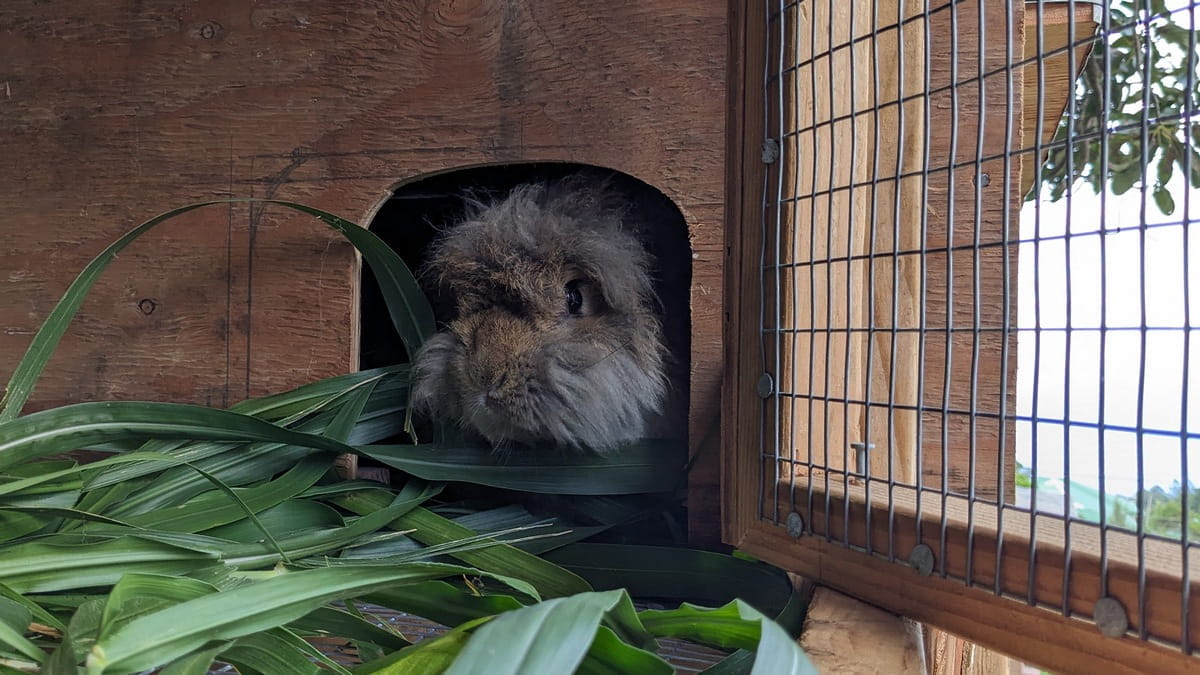
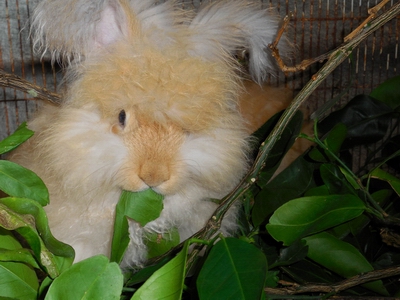
Clover and Amy are due to have their babies the day after they are moved to the new nesting hutch. Considering that they haven't had time to get used to the new hutch and it's a new hutch that doesn't smell like bunnies or let them see other bunnies, they may not have their litters. But, if they don't have them this time, they can go back to meet up with Azzie & Ayden and try again.
Hmm, bunnies are usually pretty territorial so the doe is always taken to the buck's space for breeding. Since the girls haven't been in the new hutch long enough to consider it officially "theirs", perhaps the boys could visit them in the new nest hutch and help get the new hutch to smell like bunnies.
Finished hutch as seen from the front door
(once we get a front door, of course)
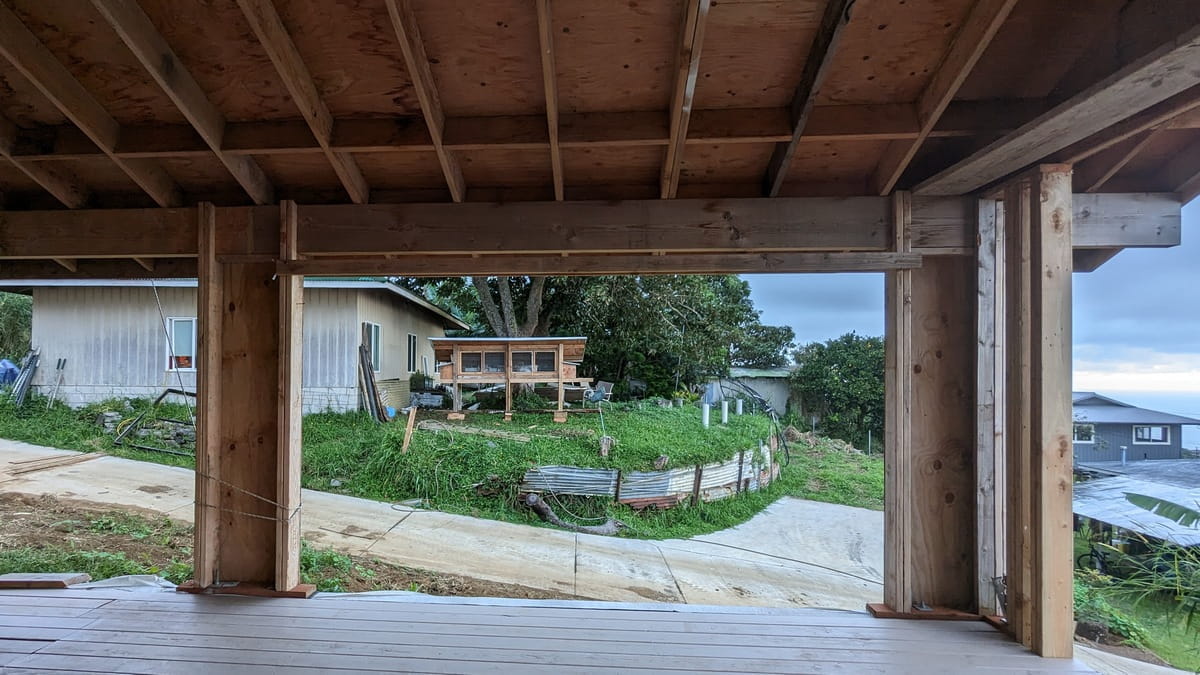
The bunny hutch can be seen from the front door as well as the dining room windows so we can keep an eye on them. Not sure if all the bunny hutches will end up there on the Avocado Plateau or not. The final landscaping is still a big unknown.
House project with bunny hutch
(time to get back to the main project)
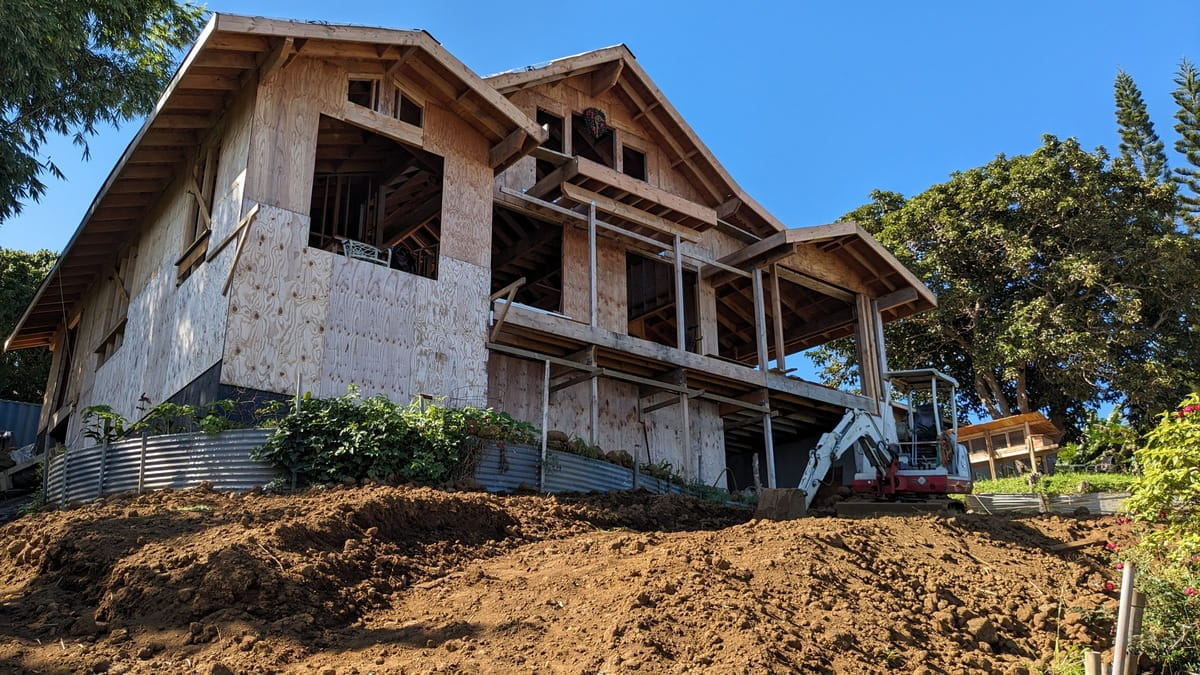
Well, the new nest hutch is pretty much finished. You can see it there on the right side of the house. There will be a bit more work on it here and there, but it's essentially done so now it's time to get back to the main project at hand: building a house.
Over the years, our hutches have evolved. Here's a history of our previous interpretations of proper bunny housing.
The Evolution of Hillside Farm Hawaii Bunny Spaces:
Meet Your Fiber Providers
If you like, you can send us an email and ask about bunnies, yarn, Hawaii things, what we should have on our webpage or just about anything else.
Hillside Farm Hawaii
All content copyright Hillside Farm Hawaii
